What's on this page
- What crawl space encapsulation costs
- Vapor barrier versus full encapsulation
- What drives the price per square foot
- Cleanout and old barrier removal
- Mold remediation as a separate line
- Sealing the vents and the walls
- Rim joist insulation
- Dehumidifiers and moisture control
- Drainage, sumps, and standing water
- Where an encapsulation budget goes
- Encapsulation cost by scope
- Partial versus full encapsulation
- When encapsulation is not the answer
- Permits, access, and working conditions
- What a good quote itemizes
- Choosing a contractor for crawl space work
- Long term maintenance after encapsulation
- A worked example a 1,200 square foot crawl space
- The bottom line
Short answer: Crawl space encapsulation commonly runs an illustrative $3 to $8 per square foot, which places a typical 1,200 square foot crawl space in a rough band of $4,000 to $10,000 before any repair work. That price covers a sealed liner up the walls, sealed vents and managed humidity; cleanout, mold remediation and drainage are separate line items where a quote can double, and a dehumidifier belongs in the scope.
Crawl space encapsulation cost is priced by area more than by anything else, which makes it one of the more predictable numbers in home repair right up until someone opens the hatch and finds standing water. A dry, accessible crawl space that needs a heavy liner, sealed seams, sealed vents, and a dehumidifier is a straightforward multi day job with a total you can estimate from square footage. A crawl space with a failed old barrier, insulation hanging out of the joists, visible growth on the subfloor, and water pooling after every rain is three jobs stacked together, and only one of them is encapsulation.
Illustratively, encapsulation commonly runs somewhere around $3 to $8 per square foot of crawl space, which places a typical 1,200 square foot crawl space in a rough band of $4,000 to $10,000 before any repair work. This cost file prices the job the way a contractor actually assembles it: the cleanout first, then the repairs, then the liner and sealing, then the moisture control equipment, with drainage priced separately when the space needs it. Our basement finishing cost file is the natural sibling for below grade work with a different objective, and our estimate reading guide explains how to tell those lines apart on a bid. Price your own crawl space in the job cost estimator as you read, and the ranges below turn into numbers you can plan around.
Key takeaways
- Illustratively, encapsulation commonly runs around $3 to $8 per square foot, putting a typical 1,200 square foot crawl space in a rough $4,000 to $10,000 band before repairs.
- A vapor barrier and an encapsulation are different products: one is loose plastic on the dirt, the other is a sealed liner up the walls plus sealed vents and managed humidity.
- Cleanout, mold remediation, and drainage are separate line items, not part of the encapsulation price, and they are where a quote can double.
- A sealed crawl space still needs a way to remove moisture, so a dehumidifier or a designed supply of conditioned air belongs in the scope rather than as an upsell.
- Encapsulation solves a moisture problem; it is an expensive answer if your real issue is grading, gutters, or a plumbing leak that a much cheaper fix would resolve.
What crawl space encapsulation costs
Priced honestly, encapsulation is a per square foot number with a wide band around it, because two crawl spaces of the same area can present completely different amounts of work. As an illustrative guide, encapsulation commonly runs somewhere around $3 to $8 per square foot, which puts a 1,200 square foot crawl space in a rough range of $4,000 to $10,000. Where you land inside that band depends on liner thickness, how much wall and pier area has to be covered and sealed, how difficult the access is, and what equipment the scope includes.
What sits outside that band is the repair work. A crawl space with standing water needs drainage and a sump before a liner makes sense, and that is its own project. A crawl space with mold growth on the subfloor needs remediation before anything gets sealed over it. A crawl space full of collapsed fiberglass insulation needs that material removed and disposed of first. Each of those items is priced separately by any honest contractor, and any of them can add as much as the encapsulation itself.
The practical takeaway is to price the job in phases rather than as one number. Cleanout, repairs, encapsulation, and equipment are four different scopes, and a quote that lumps them into a single figure is hard to compare against another. Ask each contractor to break them out, because the difference between two bids is usually in which phases they included rather than in what they charge per square foot for the same work. The estimator treats area and difficulty as their own fields so you can build the number in layers.
Vapor barrier versus full encapsulation
The single most common source of quote confusion is that two very different products share a general description. A vapor barrier is a sheet of plastic laid over the dirt floor to slow moisture rising out of the soil. It is typically a thinner material, laid loose, overlapped rather than sealed at the seams, and it stops at the base of the foundation walls. It is inexpensive, it is better than bare dirt, and in a fundamentally dry crawl space with good drainage it may be all the space needs.
Encapsulation is the complete version of that idea. A heavier liner covers the floor, runs up the foundation walls and around every pier, and is mechanically fastened and sealed rather than laid loose. Every seam is sealed, the vents are closed and sealed, and the space is treated as part of the building envelope rather than as outside air under the floor. Because a sealed space has no way to shed the moisture already inside it, encapsulation almost always includes a dehumidifier or a designed supply of conditioned air.
The price difference reflects both material and labor. Heavier liner costs more per square foot, and the wall and pier work multiplies the area being covered well beyond the floor plan. Sealing takes time, working on your back in a low space takes longer than the same task standing up, and the equipment is a real line. When you compare a low bid against a high one, first confirm you are comparing two encapsulations rather than a barrier against an encapsulation, because that single distinction explains most enormous gaps.
What drives the price per square foot
Within encapsulation there is still a wide per square foot range, and a handful of factors account for most of it. Liner thickness is the most visible: heavier liners cost more per square foot, resist punctures better, and are usually what contractors specify where anyone will crawl through the space for service. Thinner liners are cheaper and more vulnerable, and the right choice depends on traffic and on what is stored or serviced down there.
Wall and pier area is the factor homeowners forget. A liner that runs up the walls and wraps every pier covers substantially more square footage than the floor plan suggests, and a crawl space with many piers or a tall stem wall has more of that work than its footprint implies. Access is the next: a hatch you can walk through is a very different job from a small exterior door that every roll of material and every bag of debris has to pass through, and low headroom slows every task.
Existing conditions are the last, and the largest. A clean, dry, empty crawl space is quick. One with an old barrier to remove, debris to haul, damp fallen insulation to bag, or ductwork and plumbing to work around is slow. None of that changes what a square foot of liner costs, and all of it changes what a square foot of finished encapsulation costs, which is why per square foot pricing is a starting point rather than a quote.
Cleanout and old barrier removal
Almost every encapsulation starts with taking things out, and this phase is easy to underestimate because it is unglamorous, physical, and priced by hours rather than by material. Old plastic that has been down for years is torn, dirty, and heavy with soil, and it comes out in pieces through whatever access the space has. Debris left from original construction is common, and so is whatever previous owners stored down there and forgot.
Fallen insulation is the item that most often turns cleanout into a real line. Fiberglass batts stapled between floor joists in a damp crawl space absorb moisture, get heavy, and eventually sag and fall, and once they are wet they are not worth reinstalling. Bagging and removing them is slow work in a low space, and disposal is a cost of its own. Where the insulation is contaminated rather than merely damp, it becomes part of a remediation scope rather than a cleanout.
The practical framing is to have the cleanout quoted as its own line with an honest estimate of what is down there, based on someone actually going in and looking. A contractor who quotes encapsulation from the driveway is guessing about the phase most likely to surprise both of you. Where the volume is genuinely unknown, an hourly cleanout allowance with a stated cap is a more honest structure than a fixed price built on an assumption nobody verified.
Mold remediation as a separate line
If there is visible growth on the subfloor, the joists, or the insulation, that is a remediation question and it belongs in its own scope, quoted separately, and completed before anything is sealed. The reason is straightforward: encapsulation changes future conditions but does not remove past growth, and a liner installed over contaminated material hides the problem rather than solving it. Any contractor who proposes to seal over visible growth without addressing it is telling you something about how they work.
Remediation scope varies enormously with extent, which is why nobody can price it from a description. Light surface growth on framing in a small area is a different job from widespread growth across a subfloor, and the difference is measured in containment, labor hours, materials removed, and whether any structural member has decayed to the point of needing repair. Where wood has actually deteriorated, you have moved from a moisture project into a structural one, and that needs a different professional entirely.
The practical move is to treat remediation as a gate rather than an add on. Get the crawl space assessed, get remediation priced and completed, and only then encapsulate, so that the sealed space starts clean. Bundling everything into one number from one contractor is convenient but makes it very hard to tell what you paid for which phase, and it removes your ability to get the remediation priced competitively on its own.
Sealing the vents and the walls
The part of encapsulation that most changes how a crawl space behaves is sealing it off from outside air. Traditional construction vented crawl spaces on the theory that airflow would dry them out. In humid climates the opposite often happens: warm humid outside air enters a cool crawl space, hits surfaces below its dew point, and deposits moisture rather than removing it. Sealing the vents stops that cycle, and it is a small material cost with a large effect.
Sealing the walls is the larger piece of work. The liner is run up the foundation wall to a defined height, mechanically fastened, and sealed at the top edge and at every seam, so that moisture moving through the masonry has a barrier in front of it. Contractors typically leave a few inches of exposed wall below the sill as a termite inspection gap where that is required or customary, which is a detail worth asking about, since it varies by region and by pest control practice.
There is one important dependency: sealing a crawl space with combustion appliances in it is not a simple decision. A gas furnace or water heater that draws combustion air from the space and vents through a flue relies on that air being available, and sealing the space can affect it. Where combustion equipment sits in the crawl space, the plan has to address combustion air and venting, and that is a conversation for a licensed professional rather than something to sort out with tape. Our HVAC maintenance guide covers why airflow and combustion safety are treated so carefully.
Rim joist insulation
The band of framing where the floor system meets the foundation is one of the leakiest parts of many houses, and encapsulation is the natural moment to address it because the crew is already down there with access. Insulating the rim joist area reduces air leakage between the crawl space and the floor above, and in a sealed crawl space it becomes part of drawing the thermal boundary at the foundation wall rather than at the floor.
The material choice matters more here than in most places, because this is a location where moisture and air movement meet. Rigid foam board cut and sealed in place, or sprayed foam, are the approaches contractors most often use, precisely because they combine insulation with air sealing and do not absorb moisture the way fiberglass batts do. Fiberglass stuffed into a rim joist bay is the traditional approach and the one most likely to be found soaked and ineffective years later.
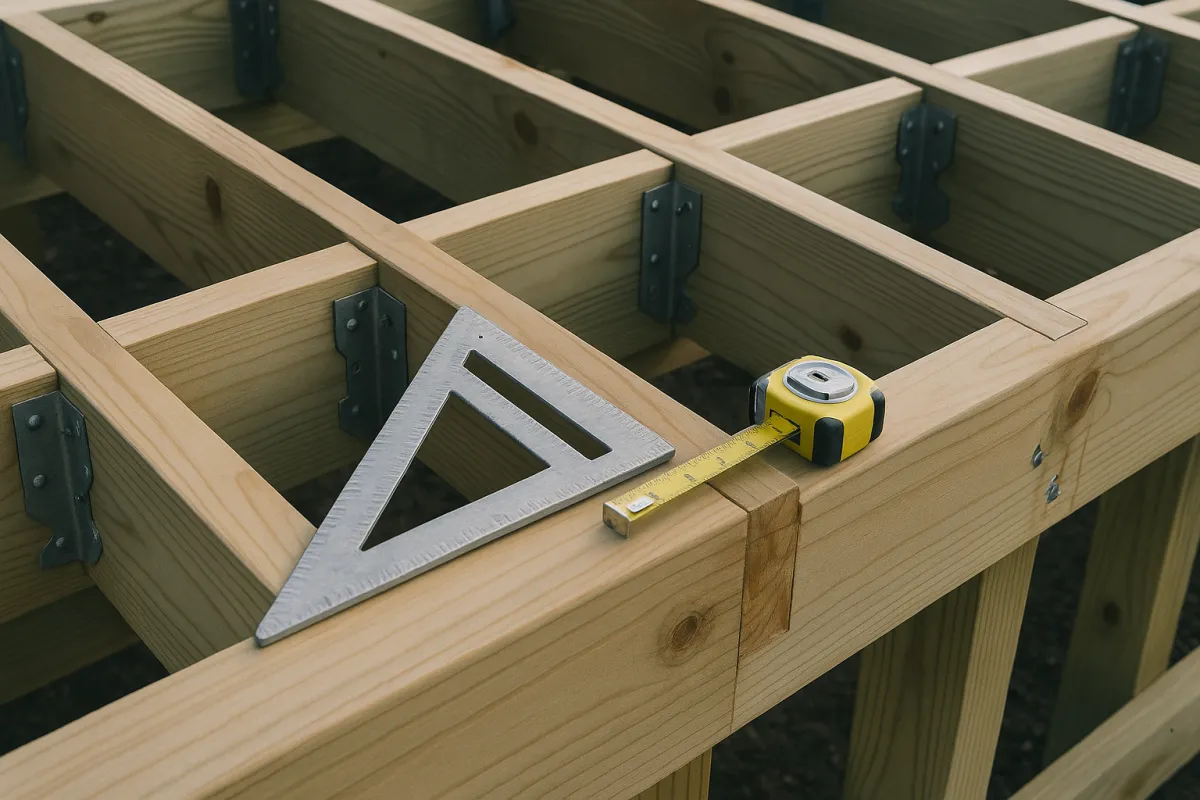
As an illustrative guide, rim joist work commonly adds somewhere around $500 to $1,200 on a typical crawl space, depending on the linear footage, the bay depth, and the material. It is optional in the narrow sense that encapsulation works without it, and it is worth pricing because it is cheap to do while the crew is already in the space and expensive to come back for. Ask for it as its own line so you can decide with the number in front of you.
Dehumidifiers and moisture control
Sealing a crawl space raises an obvious question: where does the moisture already in there go? The answer is that it does not go anywhere on its own, which is why moisture control equipment belongs in the scope rather than being treated as an upsell. The common approach is a dedicated crawl space dehumidifier, a purpose built unit sized for the space, installed with a condensate drain to a suitable location or a condensate pump where gravity drainage is not available.
As an illustrative guide, supplying and installing one commonly adds somewhere in the range of $1,300 to $2,500, depending on capacity, whether a condensate pump is needed, and whether an electrical circuit has to be run. Sizing is the part to ask about: an undersized unit runs constantly and never reaches the target, while an oversized one costs more than the space needs. A contractor should be able to state the unit’s capacity and the humidity target it is meant to hold, and to say who changes the filter and how often.
The alternative approach is supplying a small amount of conditioned air from the home’s heating and cooling system into the crawl space, so that the space is kept dry by the same equipment that conditions the house. Where it is permitted and correctly designed, it is a legitimate strategy that avoids a second appliance. What is not legitimate is sealing the space and providing no moisture control at all, so if a quote omits both, ask why before you assume it is a saving.
Drainage, sumps, and standing water
If water enters the crawl space rather than merely evaporating out of the soil, no liner solves it, and this is the most important boundary to understand before you buy anything. Standing water after rain means water is arriving from somewhere, and the sequence is to find the source, stop what can be stopped, manage what remains, and only then encapsulate. Sealing a liner over an active water problem traps water under plastic, which is worse than the original condition.
The cheap sources are worth checking first because they are so often the actual cause. Gutters that overflow, downspouts that discharge next to the foundation, and grading that slopes toward the house rather than away all put water where it becomes a crawl space problem. Fixing those costs a fraction of an interior drainage system, and our seasonal maintenance checklist covers the routine version of that work. Only when the exterior is right does an interior system make sense.
Where an interior system is genuinely needed, it usually means a perimeter drain in a gravel trench routed to a sump pit with a pump that discharges away from the house, and that is a substantial addition rather than a small line. It carries its own considerations: pump quality, a check valve, a discharge line that will not freeze, and ideally a battery backup, since a pump is only useful when it runs. Price it as its own project, and expect it to move a total well above a plain encapsulation.
Where an encapsulation budget goes
Assemble the pieces and the shape of a standard encapsulation budget comes into focus, splitting across materials, labor, equipment, and the prep and disposal that surround them. The proportions below are illustrative for a straightforward encapsulation in a dry crawl space with reasonable access, excluding remediation and drainage, which are separate scopes.
Where the money goes in a standard encapsulation
Illustrative shares for a dry crawl space with reasonable access. Remediation and drainage are excluded because they are separate scopes.
Shares shift with the job: a heavy cleanout enlarges the prep band, difficult access enlarges the labor band, and a crawl space that needs remediation or a sump adds scopes that sit outside this bar entirely.
Two readings matter here. First, labor is the largest band, which is why access and headroom move the price so much: the same materials installed in a space you can crouch in cost less than the same materials installed lying down. Second, the equipment band is real and should not be negotiated away, because it is what keeps the sealed space dry. Budget from the whole bar, and remember that remediation and drainage are additional bars rather than slices of this one.
Encapsulation cost by scope
Zoom out and one fact organizes the budget: the total scales with how much of the moisture problem the job is actually solving. A barrier upgrade, a standard encapsulation, an encapsulation with proper humidity control, and a full project that adds drainage are four different scopes on the same crawl space. Using an illustrative total for a 1,200 square foot crawl space in each case, the chart below shows how the total scales.
Illustrative totals by scope for a 1,200 square foot crawl space
Midpoint estimates for four common scopes. Access, existing conditions, and local labor rates set where you actually land.
Illustrative midpoint totals for four scopes on the same crawl space. Mold remediation is not included in any of these bars and is priced separately by extent.
Read those bars as the shape of the decision rather than as your quote. The step from a barrier upgrade to a full encapsulation is a genuine change in product, and the step to added drainage is a change in what problem is being solved. Anchor on the scope that matches your crawl space’s actual condition, then adjust for area and access. The estimator treats scope and area as separate fields so you can see the swing directly.
Partial versus full encapsulation
Not every crawl space needs the full treatment, and partial approaches are legitimate when they match the problem. A floor only encapsulation seals the ground plane with a heavy liner and seals seams but does not run up the walls or seal the vents, which addresses soil moisture while leaving the space vented. It costs less, it does not require a dehumidifier in the same way, and in a dry climate with a fundamentally sound crawl space it can be a reasonable stopping point.
The trade off is that a partial job does not control the environment. A vented crawl space with a lined floor still takes in outside air, so in a humid climate it can still reach dew point on cool surfaces and still support growth on framing. The partial approach solves the soil vapor half of the problem and leaves the humid air half alone, and whether that is acceptable depends entirely on your climate and your starting condition.
The honest way to choose is by measurement rather than by preference. A hygrometer left in the crawl space through a season tells you what the humidity actually does there, and that reading is a better basis for scope than any general rule. If humidity swings high in warm weather, the vented approach is not controlling the space and the full treatment has a real job to do. If it stays moderate year round, a good floor liner and attention to drainage may be all the money you need to spend.
When encapsulation is not the answer
There are situations where a contractor will quote encapsulation and the honest answer is that your money belongs somewhere else first. The clearest is a plumbing leak: a supply line seep or a drain leak under the floor puts water into the crawl space continuously, and no liner addresses it. Finding and fixing the leak is the job, and it is usually far cheaper than encapsulation.
The second is exterior water management. If the grade slopes toward the house, if downspouts dump at the foundation, or if gutters overflow every storm, then water is being delivered to your foundation on purpose. Regrading, extending downspouts, and fixing gutters cost a fraction of an interior system, and they address the cause. A contractor who inspects the exterior before quoting the interior is one worth listening to. Our gutter installation cost file prices that side of the work.
The third is simply a dry crawl space. Where there is a sound existing barrier, no visible growth, no musty odor reaching the house, dry framing, and stable humidity readings, encapsulation is a solution looking for a problem. That does not mean nothing should be done, since a torn barrier is worth replacing and a missing one is worth adding, but full encapsulation is a large expenditure that should be justified by a condition you can point to rather than by a sales visit.
Permits, access, and working conditions
Requirements vary, and crawl space work sits in an area where they differ meaningfully by jurisdiction. Some work, particularly anything touching electrical for a dehumidifier or sump pump, or any structural repair, commonly requires a permit, while liner installation on its own frequently does not. Because this genuinely varies, the reliable answer comes from your building department or from a licensed contractor working in your area rather than from any general statement, and our permit guide explains how to ask the question.
Working conditions deserve a mention because they explain the labor rates. A crawl space is a confined, low, often damp space with poor air quality and limited egress, and crews working in one need protective equipment and often respirators, particularly where growth or old insulation is being removed. That is not padding on an invoice, it is the reason the same square footage of plastic costs more to install here than it would in an open basement.
If you are considering any owner participation, understand what you are volunteering for. Cleanout is the phase homeowners most often take on themselves, and it is genuinely the most physically punishing part, with real exposure to dust, fiberglass, and whatever has been growing down there. Anyone entering a crawl space should have a light, a way for someone above to know they are down there, and appropriate protection. Where growth is suspected, leave it to a professional rather than disturbing it.
What a good quote itemizes
The difference between a comparable quote and an uncomparable one is itemization, and crawl space bids vary widely on this point. A trustworthy encapsulation quote states the crawl space area it is priced on, the liner thickness and how far it runs up the walls, whether piers are wrapped, whether the vents are sealed, whether seams are taped or otherwise sealed and with what, and whether rim joist work is included.
It should also state the equipment: the dehumidifier’s capacity, how condensate is handled, whether an electrical circuit is included, and the humidity target the design assumes. It should separate cleanout with its assumptions, separate any remediation, separate any drainage work, and say what happens if conditions turn out worse than the inspection suggested. And it should name the warranty: on the material, on the workmanship, and on the equipment, since those are three different terms.
The reason itemization matters is that vague bids cannot be compared and vague bids can grow. Our quote comparison manual covers the general method, and it applies with particular force here because so much of the work becomes invisible the moment it is finished. Once a liner is installed you cannot easily verify what is under it, which is why what the quote promised, and what a photo record shows, matter more than usual.

Choosing a contractor for crawl space work
Crawl space work attracts a mix of specialists and generalists, and the sales practices vary more than in most trades because the product is invisible and the diagnosis is being made by the person selling the cure. That is not a reason to avoid specialists, who often bring genuine expertise and better materials, but it is a reason to apply the same vetting discipline you would to any large job.
Look for a contractor who inspects before quoting, who takes photographs of what they found and shows them to you, who distinguishes clearly between what is a problem and what is a preference, and who is willing to say that part of your crawl space is fine. Ask for the moisture readings they took rather than accepting a general statement that the space is damp. Ask what they would do about the exterior drainage before they touch the interior.
Then verify the basics: license where your area requires one, insurance including workers compensation given that crews will be in a confined space on your property, references from jobs in your area that are old enough to have been tested by a season, and a written warranty you have read. Our contractor vetting guide covers the process, and our scam avoidance guide covers the pressure tactics that show up around invisible, fear driven work of exactly this kind.
Long term maintenance after encapsulation
An encapsulated crawl space is not a sealed box you never think about again, and understanding the maintenance is part of understanding the cost. The dehumidifier has a filter that needs cleaning or replacing on a schedule, a condensate drain that can clog, and a service life like any appliance. A unit that stops working in a sealed crawl space is a problem that develops quietly, which is why some owners add a humidity monitor that reports to the house.
The liner itself is durable but not indestructible. Anyone working in the crawl space, a plumber running a line, an electrician pulling cable, a pest control technician, can tear it, and a torn liner near a seam is worth repairing rather than ignoring. Tell any trade working down there that the space is encapsulated and ask them to report damage, and inspect after major work.
Then keep watching the exterior, because the conditions that created the original problem do not disappear when the interior is sealed. Gutters still clog, downspout extensions still get moved, and grading still settles. An encapsulated crawl space with neglected exterior drainage is being asked to do a job it was not designed to do alone. A twice yearly look, folded into the routine our seasonal maintenance checklist describes, is most of what the system needs from you.
A worked example a 1,200 square foot crawl space
Take one ordinary project and cost it in layers so the structure of the number becomes concrete. Every figure is illustrative; the method is the lesson. Assume a 1,200 square foot crawl space with a torn old barrier, damp fallen insulation between the joists, reasonable hatch access, no visible growth, and no standing water.
Start with the cleanout. Removing the old plastic, bagging and hauling the fallen insulation, and clearing debris illustratively runs about $500 to $1,200, driven mostly by volume and by how far material has to travel to reach the hatch. This is the phase most likely to move if conditions are worse than expected.
Add the liner and sealing. A heavier liner covering the floor, running up the walls, wrapped around the piers, with all seams sealed and the vents closed, illustratively adds about $2,200 to $4,000 for this area. Add rim joist insulation at roughly $500 to $1,200, and the running total is about $3,200 to $6,400.
Add the moisture control. A dedicated dehumidifier with condensate handling and any needed circuit illustratively adds about $1,300 to $2,500, bringing the project to roughly $4,500 to $8,900 installed. On 1,200 square feet that is about $3.75 to $7.40 per square foot, which sits inside the $3 to $8 band this cost file uses, built from the bottom up rather than assumed from an average.
The lesson is in the layers, and in what is missing from them. This example includes no remediation and no drainage, and either would add a scope rather than a percentage. Run your own area, access, and scope through the estimator, and the same worked example prices itself around your crawl space.
The bottom line
Crawl space encapsulation cost is an area based number with a wide band around it, and the band exists because the phases surrounding the liner vary so much more than the liner itself. Illustratively, encapsulation commonly runs about $3 to $8 per square foot, putting a typical 1,200 square foot crawl space in a rough $4,000 to $10,000 range before repairs, with labor as the largest single band and the equipment as the line that makes the sealed space actually work. Cleanout, mold remediation, and drainage are separate scopes, and any of them can add as much again.
Then buy the work like a professional. Start by confirming what problem you are solving, because a plumbing leak, a downspout at the foundation, or a grade that slopes toward the house are cheaper fixes that no liner replaces. Get the space inspected and photographed before anyone quotes it, insist that cleanout, remediation, encapsulation, equipment, and drainage appear as separate lines, and confirm liner thickness, wall height, vent sealing, dehumidifier capacity, and the three warranties. Verify license, insurance, and references, and treat urgency and fear as sales technique rather than as diagnosis. Measure your humidity through a season if you have the time, because a reading beats an opinion. The owners who come out of this work satisfied are the ones who fixed the water source first, scoped the encapsulation to the actual condition, and kept enough of the quote in writing to know what was installed under plastic they will never see again.
This cost file describes how crawl space encapsulation projects are priced and scoped in general terms, not what your particular crawl space requires, and nothing here replaces an on site assessment and a written estimate from a licensed, insured contractor. Every dollar figure, per square foot range, share, and timeline above is illustration only: your real price moves with area, liner specification, wall and pier coverage, access and headroom, existing conditions, equipment selection, and local labor rates. Moisture, mold, and structural questions are technical assessments that should be made by a qualified professional who has entered and evaluated your space, and any suspicion of mold growth, wood decay, pest damage, or a combustion appliance located in the crawl space warrants specialist advice before work is scoped. Permit and code requirements for liner installation, insulation, electrical circuits, sump pumps, and vent sealing are set locally and vary widely, so confirm what applies where you live before work begins.
Frequently asked questions
How much does crawl space encapsulation cost?
Crawl space encapsulation is priced mostly by area and by how much repair work has to happen before the liner goes down, so the honest answer is a per square foot range rather than a single number. As an illustrative guide, encapsulation commonly runs somewhere around $3 to $8 per square foot of crawl space, which puts a typical 1,200 square foot crawl space in a rough band of $4,000 to $10,000. Jobs at the low end are dry crawl spaces with easy access where the work is essentially liner, sealing, and a dehumidifier. Jobs at the high end have standing water, failed insulation to remove, mold remediation, or drainage and a sump pump to install first, and each of those is its own line rather than part of the encapsulation price.
Is crawl space encapsulation worth it?
It is worth it when you have a moisture problem it actually solves, and it is an expensive answer to a problem you do not have. The case is strongest where the crawl space is visibly damp, where humidity is high enough to support mold or wood decay, where insulation between the joists is falling down because it has absorbed moisture, or where musty air is reaching the living space through the floor. In those situations encapsulation addresses the cause rather than the symptom, and the benefits show up as lower humidity, better air quality, and protection of the structure and ductwork. In a genuinely dry crawl space with a sound existing vapor barrier, the return is much thinner, and money may be better spent on grading, gutters, and downspout extensions that keep water away from the foundation in the first place.
What is the difference between a vapor barrier and encapsulation?
A vapor barrier is a sheet of plastic laid over the dirt floor of a crawl space to slow moisture rising out of the soil, and it is usually thin, loosely laid, and not sealed at the seams or up the walls. Encapsulation is the complete version of the same idea: a heavier liner covering the floor, run up and mechanically fastened and sealed to the foundation walls, sealed at every seam and around piers, combined with sealing the vents and usually adding a dehumidifier so the enclosed space stays dry. The price difference reflects the labor and the materials, since a loose barrier is a few hours of work and encapsulation is a multi day job for a crew. A barrier slows moisture; encapsulation is meant to control the environment.
How much does a crawl space dehumidifier cost?
A dedicated crawl space dehumidifier is a meaningful line inside an encapsulation quote rather than a small accessory, because these are purpose built units rated for the space and installed with a condensate drain or a pump. As an illustrative guide, supplying and installing one commonly adds somewhere in the range of $1,300 to $2,500 to a project, with the exact figure depending on the unit's capacity, whether it needs a condensate pump because there is no gravity drain, and whether an electrical circuit has to be added. Sizing matters: an undersized unit runs constantly and never reaches target humidity, while an oversized one costs more than the space needs. Ask the contractor to state the unit's capacity and the humidity target it is sized to hold, and confirm who services the filter.
Does crawl space encapsulation stop mold?
Encapsulation removes the conditions that let mold grow, but it is not itself a remediation and it does not clean up growth that already exists. Mold needs moisture, and a sealed, lined, dehumidified crawl space held at a controlled humidity is a much less hospitable place for it than an open, vented, damp one. What encapsulation cannot do is remove existing growth from joists, subfloor, or insulation, and sealing a liner over contaminated material simply hides it. A responsible contractor inspects first, prices any needed cleanup and removal of contaminated insulation as separate lines, and encapsulates afterward. If a quote covers encapsulation but says nothing about visible growth you already know about, that is a question to ask before you sign.
Do you need a dehumidifier after encapsulation?
In most cases yes, and a quote that omits one deserves an explanation rather than a discount. Sealing a crawl space stops most moisture from entering through the soil and the vents, but it does not remove the moisture already present in the air, in the soil beneath the liner, or introduced by ordinary sources such as a plumbing seep or humid outside air during access. Without a way to remove that moisture, a sealed space can hold humidity rather than shed it. Some contractors instead supply conditioned air from the home's heating and cooling system into the crawl space, which is a legitimate alternative approach where it is allowed and correctly designed. What is not legitimate is sealing the space and providing no moisture control at all.
How long does crawl space encapsulation take?
A straightforward encapsulation of a typical residential crawl space is commonly a two to four day job for a small crew, with the schedule driven mostly by area, access, and how much has to be removed before the liner goes in. Cleanout is often the slowest part: hauling out old plastic, debris, and moisture damaged insulation through a small hatch is slow, physical work. Jobs that stretch longer are the ones with a complication, such as drainage and a sump pump to install, mold remediation that has to be completed and verified first, or standing water that has to be resolved before anything else can proceed. Ask for a schedule that separates cleanout, repairs, and the encapsulation itself, since those phases can be quoted and even performed at different times.
Will encapsulation lower my energy bills?
It can help, but treating it as an energy retrofit overstates the case and sets up disappointment. The mechanism is real: a sealed, drier crawl space means less humid air infiltrating the floor above, ductwork running through a controlled space rather than a damp vented one, and insulation that stays dry and therefore keeps performing. Where a home has ducts in the crawl space and a real moisture problem, owners often report a more comfortable floor and a system that cycles differently. What nobody can honestly promise is a specific percentage saving, because it depends on your climate, your ductwork, your existing insulation, and how bad the starting condition was. Buy encapsulation to solve a moisture problem and treat any comfort or efficiency improvement as a welcome secondary benefit.