
What's on this page
- Before you start
- Step 1: Determine if your project needs a permit
- Step 2: Find your local building department and their requirements
- Step 3: Prepare your plans and documents
- Step 4: Submit the application and pay the fees
- Step 5: Get through plan review
- Step 6: Schedule inspections during the work
- Step 7: Pass final inspection and close out the permit
- A worked example: permitting a backyard deck
- Common mistakes when getting a building permit
- Troubleshooting: permit problems and edge cases
- The building-permit checklist
- The bottom line
Short answer: Get a building permit in seven steps: confirm with your building department whether the project needs one, since most structural, electrical, plumbing, mechanical and gas work does and most cosmetic work does not, prepare complete plans, submit the application and pay the fee, wait for plan review, schedule inspections during the work, never cover a wall before its rough-in inspection, and close the permit out after final inspection.
A building permit is your local government’s way of confirming that the work you are about to do on your home is safe, legal, and built to code, and for most homeowners it is also the least understood step in a renovation. The process feels like a bureaucratic maze from the outside: forms you have never seen, an office you have never visited, fees nobody quotes you up front, and inspectors who show up at stages you did not know existed. So a surprising number of projects skip the permit entirely, which turns a routine approval into the single most expensive mistake in home improvement, the kind that surfaces years later as a torn-open wall, a stalled home sale, or a fine.
This playbook walks you through getting a building permit from the first question, does my project even need one, all the way to closing the permit out after final inspection. It is written for the homeowner doing a deck, a remodel, or a systems upgrade, not for a professional plans examiner. Permit rules genuinely vary by locality, so treat every threshold and figure here as the general shape of the process and confirm the specifics with your own building department. When you are planning the money side of the job too, pair this with our walkthrough on how to plan a home renovation budget, and get an illustrative cost range for the underlying work from the job cost estimator before you file anything.
Key takeaways
- Most structural, electrical, plumbing, mechanical, and gas work needs a permit; most purely cosmetic work does not. When unsure, assume you need one until the department says otherwise.
- The single costly mistake is skipping a required permit. Unpermitted work invites stop-work orders, fines, torn-open finishes, and a stalled home sale later.
- Complete, correct plans are what move a permit fast. Incomplete applications are the most common reason a review stalls into weeks of back and forth.
- Permit fees and timelines vary widely by locality. Fees often track your project value plus flat plan-review and inspection charges, so confirm your local fee schedule.
- Inspections happen during the work, not just at the end. Never cover a wall before its rough-in inspection, or you will be opening it back up.
Before you start
Getting a permit is far smoother when you arrive prepared, because the building department can only act on complete information. Before you contact anyone or fill in a single form, gather the pieces below. Each one answers a question the department will ask, and having them ready is the difference between a same-visit approval and weeks of follow-up.
- A clear description of your project scope. Write down exactly what you intend to do, in plain terms: build a 12 by 16 foot attached deck, remodel a bathroom including moving the toilet, add two circuits and a subpanel. The department decides whether a permit is needed and which type based on this scope, so vagueness here creates delay everywhere downstream.
- Your property information. Have your address, parcel or lot number, and any known details about your property such as the zoning designation, whether you are in a special district, and whether a homeowners association governs your street. Some of this lives on your property tax record or deed.
- Plans or drawings appropriate to the job. Simple projects may need only a sketch and a site plan; larger or structural projects may require scaled drawings and, in some cases, an engineer’s or architect’s stamp. Step 3 covers this in detail, but know going in that plans are usually the long pole.
- Contractor details, if you are hiring one. If a licensed pro is doing the work, you will typically need their license and, where required, insurance information, because in many jurisdictions the contractor pulls the permit for their own trade.
Time and difficulty: expect anywhere from a same-day counter permit for simple work to several weeks for a project that needs full plan review and revisions. The effort is mostly organizational rather than technical. The seven steps below run in the order you will actually work through them, from deciding whether you need a permit to closing it out after the final inspection, so read them as a sequence rather than a menu.
Which projects usually need a permit
Illustrative likelihood only. The higher the score, the more commonly this work requires a permit. Your locality sets the real thresholds.
The scores are illustrative and rank how commonly each category needs a permit, not a guarantee for your job. Anything touching structure or a building system sits near the top; purely cosmetic work sits at the bottom. Your local building department draws the exact line.
Step 1: Determine if your project needs a permit
Before anything else, settle the question that decides whether the other six steps even apply: does this project require a permit at all. The general principle is simple even though the specifics vary. Work that affects the structure, safety, or major systems of the home almost always needs a permit, while purely cosmetic and like-for-like maintenance work usually does not. What matters is what the project touches, not how big or expensive it feels.
Projects that commonly require a permit include additions and new structures, decks and garages above a size threshold, removing or altering a load-bearing wall, converting a space such as a garage or basement into living area, re-roofing in many areas, changing the size of a window or door opening, and essentially all electrical, plumbing, mechanical, and gas work. As an illustrative example, replacing a light fixture on an existing box is often exempt, but adding a new circuit or moving a panel is not. Projects that are commonly exempt include painting, wallpapering, installing flooring over an existing subfloor, replacing trim, and swapping cabinets or a countertop in the same footprint. A basement conversion is the clearest example of the permit-required camp, which is why permits, egress, and inspections get their own lines in our basement finishing cost file.
The tricky part is the middle ground, where a project that looks cosmetic quietly crosses into permit territory. A bathroom refresh that only replaces a vanity and paint may be exempt, but the same room becomes permit-required the moment you move the toilet’s drain or add a circuit for heated floors. Watch out for this threshold, because the exemption you assumed can vanish in a single decision. When you are not certain, do not guess in your favor. Call your building department, describe the scope in one clear sentence, and let them tell you. That call is the cheapest insurance in this entire playbook, and it is far less painful than discovering the answer during an inspection, a fine, or a home sale years later.
Step 2: Find your local building department and their requirements
Once you know a permit is likely, find the specific office that issues it and learn exactly what they want, because permits are handled locally and no two jurisdictions are identical. For most homeowners the right office is the building department of your city or, if you live in an unincorporated area, your county. Your local government website almost always has a building, permitting, or development services section that lists the office, its hours, its forms, and its fee schedule. If you cannot find it, a phone call to the main municipal line will point you to the right counter.
What you are after at this stage is their published requirements for your specific project type. Many departments post permit-type guides or handouts that spell out what a deck, a remodel, or an electrical permit requires: which forms, what drawings, how many copies or which upload format, and which inspections the project will need. Read these before you prepare anything, because they tell you the standard your plans must meet and save you from preparing the wrong thing. As an illustrative example, one department might accept a hand-drawn site plan for a small deck while another requires a scaled drawing showing setbacks from property lines.
This is also the moment to surface any additional approvals beyond the building permit itself. Zoning rules may govern where and how large a structure can be, a historic district may add a design review, and a homeowners association may require its own approval that is entirely separate from the government’s. Watch out for treating the building permit as the only hurdle, because an HOA or a zoning setback can stop a project the building department would have approved. Ask the department directly whether your project needs zoning sign-off or any other department’s review, and check your HOA rules yourself. Knowing the full list of approvals now prevents a nasty surprise after you have already paid a fee.
Step 3: Prepare your plans and documents
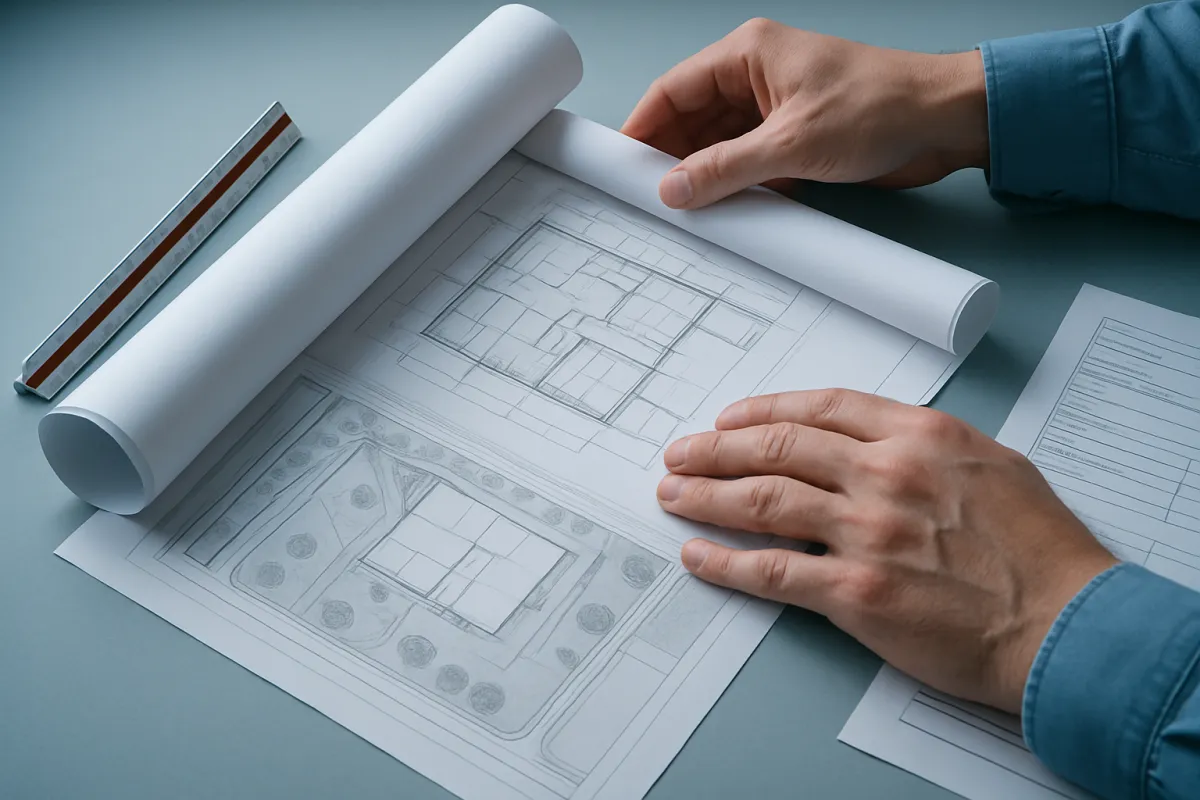
With the requirements in hand, assemble the plans and documents the department asked for, because this package is what they actually review and it is the most common place a permit stalls. The scope of what you need scales with the project. A small, simple job may require little more than a completed application, a site plan showing the work’s location on your lot, and a basic drawing or specification. A larger or structural project can require detailed, scaled construction drawings, and some work needs the stamp of a licensed engineer or architect, particularly where structural load or complex systems are involved.
A typical package includes a few recognizable pieces. The site plan shows your property lines and where the project sits relative to them, which is how the department checks setbacks. The construction drawings or plans show what you are building in enough detail to verify it meets code, such as framing, footings, and dimensions for a deck. A written scope or specification describes materials and methods. If you are hiring a licensed pro, their license and insurance details usually go in the package too. As an illustrative example, a deck permit might ask for a site plan, a framing plan showing joist and beam sizes and footing depth, and the contractor’s license number.
The watch-out here is the incomplete or wrong package, which is the number one reason a review drags. Missing dimensions, a site plan without setbacks, drawings that do not match the written scope, or a required stamp left off will all bounce back as a correction, adding a full round-trip of time. Prepare the plans to the standard in the department’s own handout, double-check that every document they listed is present, and keep a copy of everything you submit. Reading a contractor’s proposal against this same standard is covered in our walkthrough on how to read a contractor estimate, which helps confirm the scope on paper matches what you are permitting. Get the package right once, and the rest of the process moves.
Step 4: Submit the application and pay the fees
With a complete package assembled, submit the application through whatever channel your department uses and pay the required fees. Submission methods vary: some jurisdictions still take paper packages at a counter, many now use an online portal where you upload documents, and some offer both. Follow the department’s stated method exactly, including how many copies of drawings they want or which file format the portal accepts, because a submission that ignores the format requirement can be rejected before anyone even reviews the substance.
Fees are where homeowners most often want a number this playbook cannot honestly give, because permit fees vary widely by locality and by the size and value of the project. The common structure ties much of the fee to the project’s valuation, so a larger job costs more, with additional flat charges for plan review and for each inspection. As a rough illustration only, and not a quote, permit fees are frequently a modest percentage of the project value plus those flat charges, but your local fee schedule is the only real figure. Look up your department’s published fee schedule for your project type, or ask them directly, and budget from that rather than from any general number. Run your underlying job through the job cost estimator so you at least know the project value the fee may be based on.
At submission you will usually receive a confirmation or an application number, which is how you track the review. Watch out for two things here. First, submitting an incomplete package to save time backfires, because the department will simply return it and you lose the days it sat in the queue. Second, do not treat paying the fee as permission to start work. Paying and submitting only begins the review; the permit is not issued until it clears Step 5. Keep your application number, confirmation, and payment receipt together, because you will reference them at every later stage.
Step 5: Get through plan review
After you submit, the department reviews your plans to confirm the project meets code and zoning before it issues the permit. For simple work, this can be an over-the-counter review that approves the permit the same day. For anything more involved, the plans go into a review queue where an examiner checks them against the applicable codes, which takes longer and is where most of the waiting in the whole process lives. The outcome of review is either an approved permit or a set of corrections you must address.
Corrections are normal, not a failure, so do not be alarmed if your plans come back with comments. The reviewer might note a missing dimension, a framing detail that does not meet code, a setback problem, or a document that was left out. Your job is to address each comment, revise the plans, and resubmit, at which point the reviewer checks the revisions. As an illustrative example, a deck plan might return with a note that the footing depth is not specified or that a required guardrail height is missing; you add those details and resend. Each round-trip adds time, which is exactly why the effort you put into a complete, correct package in Step 3 pays off here.
Watch out for the slow-motion stall, where a correction sits on your desk for two weeks because you were waiting on your contractor or hoping the issue would resolve itself. The clock only moves when the ball is in the reviewer’s court, so turn corrections around quickly and completely, answering every comment rather than a few. If a comment is unclear, call the examiner and ask what they need rather than guessing and triggering another round. When review is complete and any corrections are resolved, the department issues your permit, often as a document or card you must post at the job site. That issued permit, not your application or your paid fee, is what finally authorizes you to begin work.

Step 6: Schedule inspections during the work
A permit is not a one-time approval you collect and forget; it comes with inspections that happen while the work is underway, and passing them in order is how the permit stays valid. Once your permit is issued and work begins, you or your contractor must call for inspections at the stages the department specifies. The whole point is to verify each stage meets code before the next stage covers it up, which is why the timing of these inspections is not negotiable and cannot be batched to the end.
The pattern most projects follow is one or more rough-in inspections followed by a final inspection. Rough-in inspections happen while systems are still open and visible: framing before insulation and drywall, electrical rough-in before the walls close, plumbing and mechanical rough-ins likewise. As an illustrative example, on a bathroom remodel a plumber’s rough-in and an electrical rough-in are commonly inspected before any wall is closed, because that is the only moment the inspector can see the pipes and wiring. Your permit or the department’s project guide lists exactly which inspections yours requires and in what order.
The watch-out here is the most expensive scheduling mistake in the whole process: covering work before it has been inspected. If you drywall over a wall whose electrical rough-in was never inspected, the inspector can require you to open it back up, undoing finished work to verify what is behind it. Schedule each inspection with enough lead time, because inspectors work on their own calendars and a same-day request is rarely granted, and do not let the crew move past a stage until its inspection has passed. Keep the permit posted at the site and your inspection records together. Coordinating this rhythm with your crew is part of running the job well, which our walkthrough on how to hire a contractor covers from the hiring decision through managing the work.
Step 7: Pass final inspection and close out the permit
The last step is the one homeowners most often forget, and forgetting it quietly leaves a permit open on the record. Once the work is complete and all rough-in inspections have passed, you call for the final inspection, in which the inspector verifies the finished project meets code and matches the approved plans. If everything passes, the inspector approves the final, and depending on the project and locality you may receive a certificate of occupancy or completion for work that requires one. That approval is what officially finishes the permit.
Do not assume a passed final is automatic. The inspector may find items that need correction before they sign off, sometimes called a punch of failed points, and you address those and call for a re-inspection just as you would during plan review. As an illustrative example, a final on a deck might catch a guardrail spacing that is slightly too wide or a missing set of stair details, which you fix and have re-checked. Only when the inspector approves the final is the physical work truly done in the eyes of the department.
Closing out the permit is the administrative finish that makes the whole effort count. In many jurisdictions a permit that passes final is closed automatically, but in some you must confirm it is closed, and permits can otherwise sit open or even expire if inspections lapse, which can resurface exactly at a home sale. Watch out for walking away after the last inspection without confirming the permit’s status on the record. Verify with the department that your permit is finaled and closed, and keep the closed permit and the certificate, if you received one, with your home records. A properly closed permit is the clean paper trail that protects the value of the work when you refinance, insure, or sell, which is the entire reason you permitted the job in the first place.

The permit process timeline
Illustrative share of the total elapsed time for a project that needs full plan review. Simple over-the-counter permits compress the review to near zero.
The shares are illustrative and vary widely by locality and project. The shape is the lesson: plan review is usually the longest single stretch, which is why complete plans that avoid correction rounds are the biggest time saver you control.
A worked example: permitting a backyard deck
Walk one illustrative project through all seven steps to see how the process feels in practice. A homeowner wants to build a 12 by 16 foot attached deck, raised a few feet off the ground with stairs and a railing. Step 1 settles quickly: a deck of this size, attached to the house and elevated, is the kind of structural exterior work that almost always needs a permit, so they assume yes and move on rather than gambling on an exemption. Step 2 sends them to their city’s building department website, where a deck-permit handout lists the forms, the drawings required, and the inspections to expect, and a quick call confirms the deck must also meet a zoning setback from the rear property line and that their HOA requires a separate design approval.
Step 3 is the real work. The homeowner prepares a site plan showing the deck’s footprint and its distance from the property lines, plus a framing plan giving joist and beam sizes, footing depth, and the guardrail and stair details the handout asked for. Because they are hiring a licensed carpenter, the contractor’s license number goes in the package. Step 4 submits the package through the city’s online portal and pays the fee. The homeowner does not know the exact fee in advance, so they check the published fee schedule, which ties it to project valuation plus flat plan-review and inspection charges; the number they budget is illustrative and comes straight from that schedule, not from a general guess.
Step 5 brings the deck plans back with two corrections: the footing depth was not specified and the guardrail height was missing. The homeowner adds both details, resubmits the same day, and the permit is issued a few days later as a card to post at the site. Step 6 unfolds during the build: an inspector checks the footings before concrete and the framing before the decking boards go down, and the crew waits for each pass before continuing rather than racing ahead. Step 7 closes it out. The final inspection catches one guardrail gap slightly too wide, the crew tightens the spacing, a re-inspection passes, and the homeowner confirms with the department that the permit is finaled and closed, then files the paperwork with their home records. Every figure and timeframe here is illustrative, but the sequence is exactly how a real deck permit runs.
Common mistakes when getting a building permit
Most permit trouble traces back to the same short list of avoidable errors, and every one of them costs more to fix later than it would have cost to do right.
- Skipping the permit entirely, the costly mistake. This is the big one. Doing required work without a permit invites stop-work orders, fines, and being forced to expose finished work for inspection, and it can stall a home sale or complicate insurance for years. The money and stress saved by skipping the permit are almost always dwarfed by the cost of resolving it later.
- Submitting incomplete or wrong plans. The most common cause of a stalled review is a package missing dimensions, setbacks, a required stamp, or a document the department listed. Incomplete plans do not fail fast; they sit in the queue and then bounce back, adding a full round-trip. Prepare to the department’s own standard and check every listed item is present.
- Starting work before the permit is issued. Paying the fee and submitting the application is not approval. Beginning work before the permit is actually issued is a violation in its own right, separate from any code issue, and it can undo whatever you built before inspection.
- Missing or batching inspections. Covering a wall before its rough-in inspection is the classic version, forcing you to reopen finished work. Inspections must happen at the right stage, in order, with lead time, not saved up for the end.
- Doing work yourself where a licensed pro is required. Some trades, commonly electrical, plumbing, and gas, may legally require a licensed professional to perform or at least to pull the permit for the work. Doing that work yourself where it is restricted can void the permit and the inspection, and it is a genuine safety issue, not just a paperwork one.
Every one of these is prevented by the same discipline: confirm the requirement, prepare completely, wait for the actual permit, and inspect each stage in order before covering it.
Troubleshooting: permit problems and edge cases
Even a careful applicant hits situations the seven steps do not resolve on the first pass. Here is how to think about the common ones.
What if my permit is denied or my plans keep getting rejected? A denial or repeated corrections almost always means the plans do not yet meet code or zoning, not that the project is impossible. Read the reviewer’s comments literally, address every point rather than a few, and call the examiner to ask exactly what they need if a comment is unclear. For a persistent structural or code issue, bringing in a licensed engineer, architect, or a contractor experienced with your department can resolve in one revision what several homeowner guesses could not.
What if I am in a historic district or have an HOA? Treat these as separate approvals layered on top of the building permit, not part of it. A historic district may add a design review with its own standards and timeline, and a homeowners association can require approval that the government does not, and can deny something the city would allow. Surface both early, in Step 2, because discovering an HOA architectural rule after the permit is issued is a common and avoidable setback. Get the separate approvals in writing before you rely on the building permit alone.
What if my contractor pulls the permit instead of me? In many places the licensed contractor pulls the permit for their own work, and that is commonly the safer arrangement, because the permit holder is generally responsible to the department for the work meeting code. If a contractor asks you to pull the permit for their work, understand that you may be taking on that responsibility and some liability. Confirm your local rules on who may pull a permit for each trade, and be cautious of any pro who wants you to pull a permit they should be pulling themselves.
What if unpermitted work is discovered later? Whether it was yours or a previous owner’s, the usual path is to disclose it and, where required, obtain a retroactive permit and pass inspection, which can mean exposing or correcting work to current code. It is more painful than permitting up front, but it is resolvable. When it surfaces during a sale, it can stall the deal until addressed, which is the practical reason to permit required work when you do it rather than hope it stays hidden.
The building-permit checklist
Save this and run your project through it before you file, during the work, and at the finish.
- Permit need confirmed: you have checked with the building department whether your specific scope requires a permit, rather than assuming, and you know which permit types apply.
- All approvals identified: you know whether zoning, a historic district, or an HOA requires a separate approval beyond the building permit, and you have started those in parallel.
- Complete plans prepared: your package has every document the department listed, including a site plan with setbacks, drawings that match your scope, any required stamp, and contractor license details if applicable.
- Application submitted correctly: you followed the department’s submission method and format, kept your application number and payment receipt, and did not treat paying the fee as permission to start.
- Permit issued before work: you have the actual issued permit in hand, posted at the site, before any work begins.
- Inspections scheduled in order: you know every inspection your project needs, you call each with lead time, and you never cover a stage before its inspection passes.
- Final passed and permit closed: the final inspection is approved, any punch items are corrected and re-inspected, and you have confirmed with the department that the permit is finaled and closed, with the paperwork filed in your home records.
Run the underlying job through the job cost estimator first, so you know the project value your permit fee may be based on and can budget the whole thing, permit included, from a realistic number.
The bottom line
Getting a building permit rewards the homeowner who treats it as part of the project rather than an obstacle to dodge. Confirm whether your scope needs a permit, find the right department and learn their requirements, prepare a complete plans package, submit it correctly and pay from the real fee schedule, work the plan review and its corrections quickly, schedule inspections at each stage before covering the work, and pass the final and confirm the permit is closed. Do that and the permit stops being a mystery and becomes the clean paper trail that proves your work is safe, legal, and built to code.
The whole discipline comes down to a single reflex: never skip the permit and never cover work before it is inspected. The permit you pulled up front is almost always cheaper and calmer than the unpermitted work you resolve at a home sale, a fine, or an inspector’s stop-work order. Because rules, fees, and timelines genuinely vary by locality, confirm every specific with your own building department, and when a project’s structure or systems are involved, bring in the licensed professionals the work requires. When you are ready to line up the crew that will do the work and pull their own trade permits, our step-by-step walkthrough on hiring a contractor carries you from the hiring decision through a well-run, well-inspected job.
ProsNook publishes this playbook to help homeowners understand the permitting process, not to serve as legal, engineering, or professional advice. Permit requirements, fees, timelines, exemptions, and inspection rules are set locally and vary widely, so every threshold and dollar figure above is illustrative and general rather than a rule for your address. Confirm what applies to your project with your own building department, and where structural, electrical, plumbing, or gas work is involved, engage the licensed professionals your locality requires before you begin.
Frequently asked questions
Do I really need a building permit for a small home project?
It depends entirely on what the project touches, not on how small it feels. As a general rule, purely cosmetic work like painting, flooring, trim, and swapping cabinets in the same spot is commonly exempt, while anything structural, electrical, plumbing, mechanical, or gas related usually requires a permit even on a small scale. A single new circuit or a relocated drain can trigger a permit that a whole room of new paint would not. The only authority on your specific job is your local building department, because thresholds and exemptions vary by locality, so a quick call to confirm is far cheaper than guessing wrong. When you are unsure, assume a permit is needed until the department tells you otherwise.
What happens if I do work without a permit?
Skipping a required permit is the costly mistake this playbook exists to prevent. If unpermitted work is discovered, common consequences include stop-work orders, fines, and being required to expose finished work so an inspector can verify what is behind the wall, sometimes tearing out drywall or finishes to do it. Unpermitted work can also complicate or delay a home sale, because buyers, appraisers, and lenders may flag it, and it can create insurance problems if a claim traces back to work that was never inspected. The exact penalties vary by locality, but the pattern is consistent: getting the permit up front is almost always cheaper and calmer than resolving unpermitted work later.
How much does a building permit cost?
There is no single national figure, because permit fees vary widely by locality and by the size and value of the project. Many jurisdictions tie the fee to the project's valuation, so a larger job carries a larger fee, and they add flat charges for plan review and for each inspection. As a rough illustration only, permit fees are often a modest percentage of the project value plus those flat charges, but your local fee schedule is the only real number. Call or check your building department's published fee schedule for your project type, and treat any figure you read elsewhere, including in this playbook, as illustrative rather than a quote.
How long does it take to get a building permit?
Timelines vary a great deal by locality and by how complex the project is. Some simple, over-the-counter permits for straightforward work can be issued the same day you apply, while projects that require full plan review can take from a couple of weeks to considerably longer, especially if the reviewer returns corrections you have to address and resubmit. Busy seasons, understaffed departments, and additional approvals like a homeowners association or a historic district review can all add time. The most reliable way to shorten it is to submit complete, correct plans the first time, because incomplete applications are the most common reason a review stalls.
Can I pull my own permit or does the contractor have to?
In many places a homeowner can pull a permit for work on the home they occupy, and a licensed contractor pulls the permit for work they perform. Who pulls the permit matters more than it sounds, because the permit holder is generally the party responsible to the building department for the work meeting code. If you pull the permit for a contractor's work, you may be taking on that responsibility and some liability, which is why it is commonly advised to let the licensed pro pull the permit for their own trade. Confirm your local rules, because some jurisdictions restrict who may pull a permit for certain trades like electrical or plumbing.
What projects usually do not need a building permit?
Purely cosmetic and like-for-like maintenance work is the category most often exempt, though every locality draws its own line. Painting, wallpapering, installing flooring over an existing subfloor, replacing trim, and installing cabinets or countertops in the same location are commonly permit-free. Small repairs that do not change the structure, wiring, or plumbing often are as well. The exemption tends to disappear the moment a job touches a load-bearing element, adds or moves a circuit, or alters plumbing or gas, so the same room can be exempt for new paint and permit-required for a moved outlet. Always confirm with your building department, because a project that seems cosmetic can cross into permit territory in a single step.
What is a permit inspection and how many will I have?
An inspection is a visit from a local building inspector who verifies that a stage of the work meets code before the project moves on. The number and type depend on the scope, but a common pattern is one or more rough-in inspections while systems are still open and visible, such as framing, electrical, plumbing, and mechanical rough-ins, followed by a final inspection once everything is complete. The point of the rough-in inspection is to check the work before it gets covered by drywall or finishes, which is why closing up a wall before it has been inspected is a classic and expensive mistake. Your permit or your building department will tell you exactly which inspections your project requires.
What happens if unpermitted work is discovered when I sell my home?
Unpermitted work is one of the common snags that surfaces during a home sale, because inspections, appraisals, and disclosure requirements can bring it to light. Depending on the locality and the buyer, you may be asked to disclose it, to obtain a retroactive permit and pass inspection, or to correct work that does not meet current code, any of which can cost time and money at an inconvenient moment. In some cases the deal can stall while the issue is resolved. Resolving unpermitted work after the fact is usually harder than permitting it up front would have been, which is the practical reason to permit required work when you do it rather than hoping it never comes up.