What's on this page
- Before you start
- Why exterior waterproofing is a different job than interior drain tile
- Step 1: Confirm exterior work is actually the right fix
- Step 2: Start with grading around the whole perimeter
- Step 3: Extend downspouts and check for underground drain blockage
- Step 4: Add window well covers and improve window well drainage
- Step 5: Understand how a contractor excavates to the footing
- Step 6: Understand the membrane, drainage board, and footing drain install
- Step 7: Understand backfill and landscape restoration
- Step 8: Know what to put in writing before an exterior waterproofing contract
- Step 9: Maintain the exterior system after it’s installed
- A worked example: sixty feet of perimeter with heavy hardscape on one side
- What drives the cost of exterior waterproofing
- Common mistakes when approaching basement waterproofing from outside
- Troubleshooting: when exterior access is blocked
- The exterior basement waterproofing checklist
- The bottom line
Short answer: Waterproofing a basement from the outside means correcting grading and downspouts yourself first, since that resolves a real share of wet-basement cases on its own, then understanding that a full fix, excavating to the footing, sealing the wall, installing a membrane and footing drain, and backfilling, is a professional job. Illustratively it runs near $150 to $400 per linear foot, with access to the wall, open yard versus a driveway or patio against it, as the biggest swing factor.
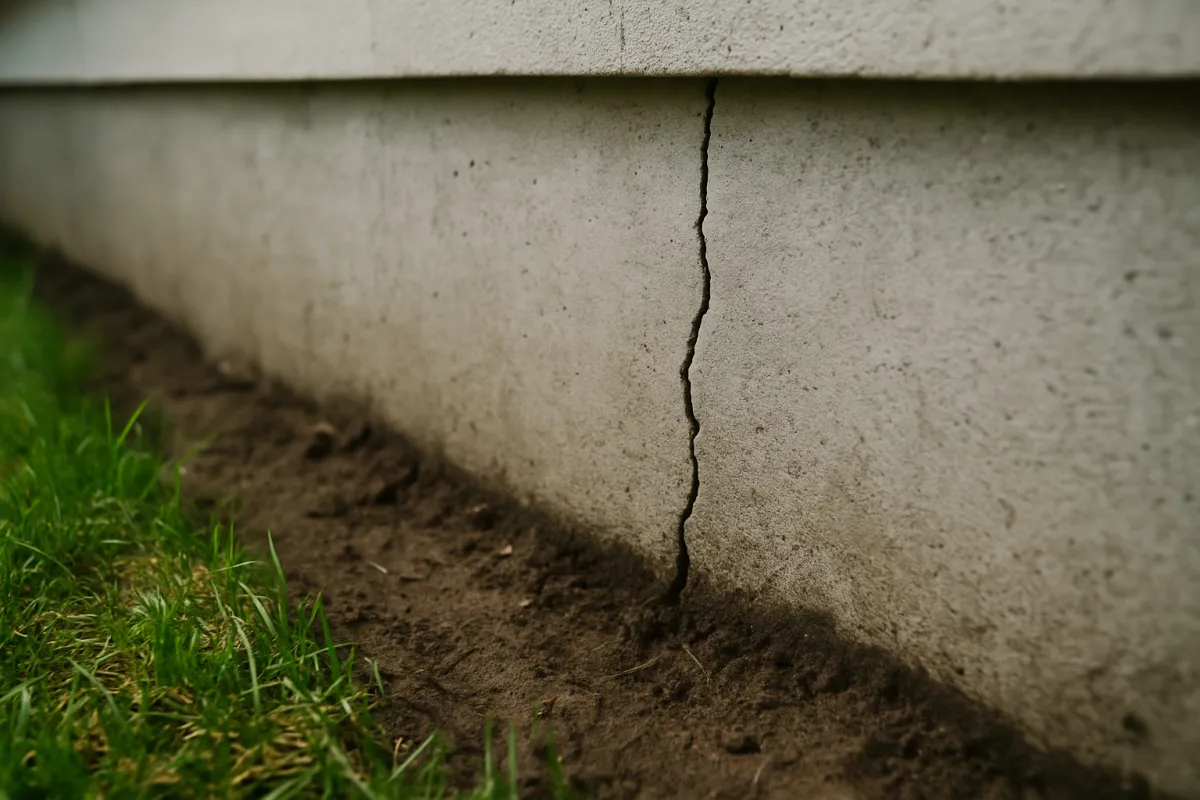
Waterproofing a basement from the outside means two genuinely different things, and conflating them is where most homeowners get confused before they even call a contractor. One is the inexpensive exterior work that redirects water before it ever reaches the foundation: grading, downspouts, and window wells. The other is a full excavation down to the footing to seal and drain the wall itself, which is major construction next to a structural element of your house. Both are “exterior waterproofing” in casual conversation. Only one of them is realistic to do yourself.
This walkthrough separates the two clearly. It covers what you can competently handle around the perimeter of your house this weekend, and it walks through what a full exterior dig actually involves, step by step, so you can evaluate a contractor’s proposal and scope against the real process rather than trusting a sales pitch. For the interior alternative, which is cheaper and far more often the realistic choice when a driveway or patio sits against the wet wall, see our companion walkthrough on waterproofing a basement wall from the inside. Pricing for every method, interior and exterior, is in our basement waterproofing cost file. Enter your own perimeter into the exterior waterproofing companion as you read for an illustrative cost range built from your access and depth.
Key takeaways
- Exterior waterproofing splits into two different jobs: grading, downspouts, and window wells, which a homeowner can handle, and a full dig to the footing, which is a professional job.
- Illustratively, a full exterior excavation with a new membrane and footing drain runs near $150 to $400 per linear foot, with access to the wall as the biggest swing factor.
- A house with a driveway, patio, or structure against the wet wall often cannot be excavated practically, and interior drain tile becomes the realistic option even when exterior would otherwise be preferred.
- Full excavation typically goes six to eight feet below grade to reach the footing on a full basement, which is why the digging itself, not just the membrane, drives much of the cost.
- Backfill material and a properly wrapped footing drain determine whether the system lasts decades or clogs and fails early, and both are worth asking your contractor about directly.
Before you start
Separate your own project into what you can do and what you are evaluating a contractor to do, since this walkthrough covers both.
- A hose, a shovel, and a few wheelbarrows of topsoil, for the grading correction most homeowners can handle without hiring anyone.
- Downspout extensions or splash blocks, inexpensive and often the single highest-value fix on this entire page.
- A tape measure and a notepad, to record the linear feet of wall that actually need full exterior treatment, which is what any contractor’s bid will be built around.
- Two or three written, itemized bids if you are moving toward full excavation, comparing scope, membrane product, backfill material, and footing drain details, not just a bottom-line number. Our note on how to compare contractor quotes covers how to read those line by line.
- A plan for what sits against the wall now: a driveway, patio, deck, or mature landscaping against the section that needs excavation changes both the cost and the realistic timeline, and it is worth knowing before the first contractor walks the property.
- An illustrative cost range for your perimeter, which the exterior waterproofing companion on this page will estimate from your linear feet, access, and depth.
Time and difficulty: the grading and downspout pieces are a single afternoon. A full excavation and membrane job, by contrast, is professional work measured in days to weeks depending on scope, weather, and how much landscape restoration follows. Know which category each step below falls into as you read.
Why exterior waterproofing is a different job than interior drain tile
Exterior and interior waterproofing solve the same underlying problem, water reaching a basement wall, at two different points, and which one actually fits your house depends heavily on what is sitting against the wall right now. The chart below is an illustrative read of which situations tend to favor which approach, based on the access pattern our own cost research describes.
What decides exterior versus interior, illustratively
Illustrative share of wet-wall situations where access points toward each approach.
The shares are illustrative. The principle is fixed: access, not preference, usually decides which approach is actually buildable on a given house.
Keep that split in mind through the rest of this walkthrough. The steps below that describe excavation and membrane work assume access exists or can be created; if your situation falls into the last bar, the honest next step is reading our sump pump installation cost file and the interior walkthrough linked above instead of pursuing a dig that will cost far more than it needs to for removing and rebuilding hardscape alone.
Step 1: Confirm exterior work is actually the right fix
Before planning around excavation, confirm the water problem actually calls for it. Exterior waterproofing earns its cost on a wall under real hydrostatic pressure from saturated soil, a wall with a failed or aging original waterproofing coating, or a situation where the finished interior cannot be disturbed and the yard access is open and simple. It is usually overkill for a problem that grading and downspout correction alone would solve, and it is not the right tool for a structural crack, bowing wall, or foundation settlement, which belongs with our foundation repair cost file instead.
Watch the wall through a few rain events if you have not already, and try the cheaper exterior corrections in the next two steps first. A real share of wet-basement situations resolve at that level alone, and confirming that before calling an excavation contractor saves a conversation you did not need to have.
It also helps to separate a cosmetic efflorescence stain, the white chalky residue minerals leave behind as moisture evaporates through concrete, from an active leak. Efflorescence on its own, with no wet surface and no water accumulating anywhere, is often a sign of ordinary vapor movement through porous concrete rather than a leak that needs excavation, and a masonry coating from the inside is frequently enough to address it. Reserve the exterior-dig conversation for walls that are genuinely wet, not just chalky.
Step 2: Start with grading around the whole perimeter
This is the single highest-value step most homeowners can do themselves, and it is worth doing around the entire perimeter, not just the section that is currently wet. Soil should slope away from the foundation for at least the first six to ten feet, dropping roughly an inch or two per foot as a rough guide. Low spots that hold water against the wall after rain are the pattern to fix, whether that means adding and compacting topsoil or regrading an area that has settled over time.
Pay particular attention to mulch beds built up directly against the foundation, since mulch piled high against siding or a wall can hold moisture against it even when the underlying grade is correct. Pull mulch back a few inches from the foundation and keep the visible grade sloping away. This step costs little beyond a few wheelbarrows of soil and an afternoon of labor, and it is the one most likely to make everything that follows unnecessary.
Step 3: Extend downspouts and check for underground drain blockage
Downspouts that discharge at or near the foundation are one of the most common, and most fixable, causes of a wet basement wall. Extend every downspout on the affected side of the house at least four to six feet away from the wall, using rigid extensions, flexible accordion pipe, or a buried solid pipe routed to a safe discharge point. If the downspouts already connect to an underground drain line, check that it actually discharges somewhere useful and is not crushed, disconnected, or clogged partway along its run, since an underground line that fails silently often looks fine at the downspout while doing nothing at all.
While you are at it, clear gutters so water is not overflowing at a random point along the roofline instead of reaching the downspout as intended. Our gutter installation cost file covers that separate project if your gutters themselves need work. This step and the grading step together are the cheapest, highest-value exterior correction available, and they belong first regardless of whether a bigger project follows.
Step 4: Add window well covers and improve window well drainage
Basement window wells are a common, underappreciated entry point, since a well without proper drainage or a cover can fill with rain and sit against the window and the wall beneath it. Check that your window wells drain, either to a gravel bed with a perforated pipe tied into the footing drain system if one exists, or at minimum to loose gravel deep enough to let water percolate away rather than pool against the glass and frame.
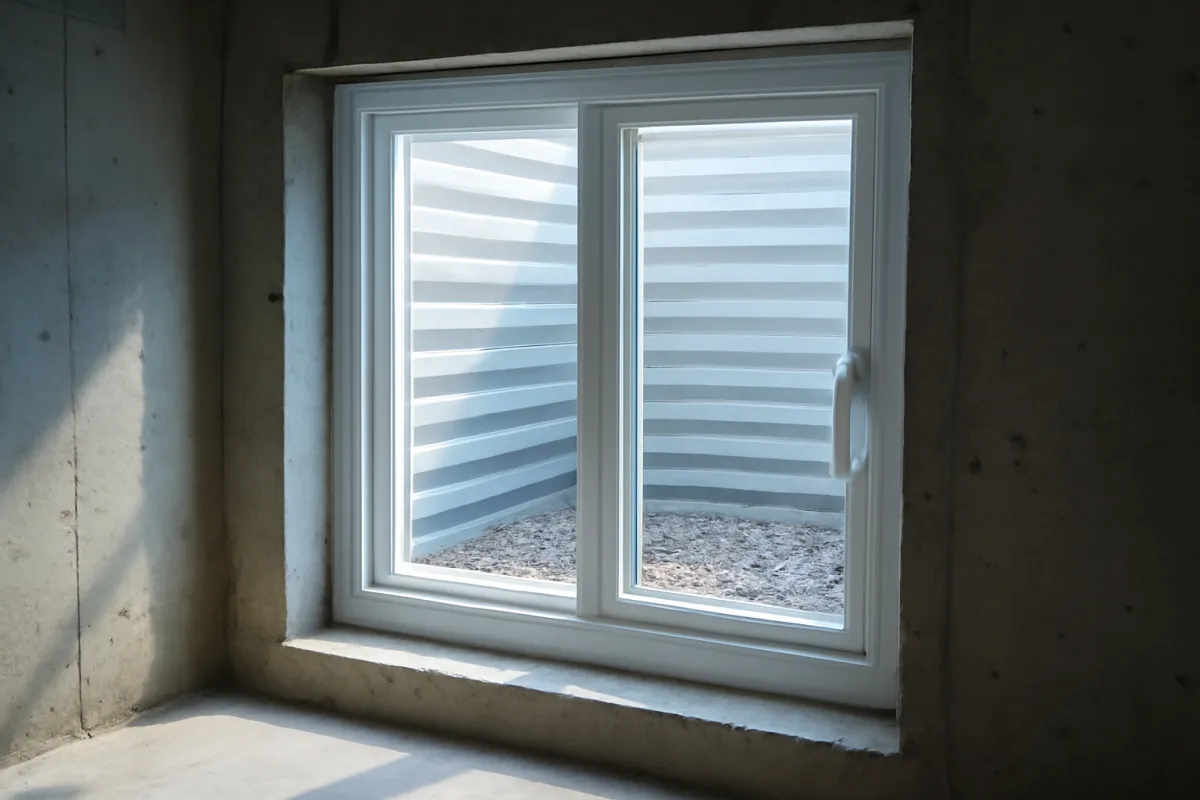
Clear covers, which let light through while keeping out rain and debris, are inexpensive and a straightforward weekend addition if your wells do not already have them. If a well consistently holds standing water after rain even with a clear path for drainage, that is worth investigating further, since it can indicate the surrounding soil is already saturated, a signal connected to the escalation discussed in Step 8.
Step 5: Understand how a contractor excavates to the footing
This step and the two that follow describe professional work, not a homeowner task, written so you understand what you are paying for and can evaluate whether a contractor’s proposal actually matches it. A full exterior waterproofing job starts with excavation along the affected section of wall, typically down to the footing, which on a full basement commonly means six to eight feet below grade. The crew digs a trench wide enough to work in, generally a few feet, and the depth and any shoring required depend on soil type and local safety requirements for excavation near a structure.
As the dig proceeds, the crew exposes the full wall face, which lets them see the actual condition of the concrete or block for the first time, including any cracks, honeycombing, or deteriorated areas that were invisible from inside. This is also the point where old, failed waterproofing coating or membrane, if any exists, gets removed before new material goes on. A contractor who skips straight to spraying a new coating over old, failed material without addressing what is underneath is cutting a corner that tends to show up again within a few years.
Safety around the open trench matters too, both during the work and for anyone on the property. A trench several feet deep next to a foundation is an excavation hazard, which is exactly why many localities require shoring or a maximum open-trench time past a certain depth, and why the work is almost always scheduled to close and backfill each section within the same visit rather than leaving a deep trench open overnight. If a contractor’s plan leaves an open trench unprotected for an extended stretch, especially with children, pets, or regular foot traffic nearby, that is worth raising before work starts, not after.
Step 6: Understand the membrane, drainage board, and footing drain install
With the wall exposed and cleaned, any cracks get sealed, commonly the same injection and hydraulic cement techniques described in our interior wall walkthrough, since a crack that was leaking does not stop being a problem just because the excavation happened. A waterproofing membrane, which can be a sprayed or trowelled rubberized asphalt, a sheet membrane, or another product depending on the contractor’s system, is then applied to the full exposed wall face to keep water from reaching the concrete at all.
Many systems add a dimpled drainage board over the membrane, which protects it from backfill damage and channels any water that does reach the wall straight down to the footing rather than letting it sit against the membrane. At the base, a footing drain, a perforated pipe wrapped in filter fabric and bedded in gravel, collects water at the lowest point and carries it by gravity to a safe discharge point or into a sump system inside. The filter fabric wrap matters more than it sounds: without it, fine soil silts into the drain over years and can clog it long before the membrane itself would ever fail.
Ask specifically where the footing drain discharges. A gravity discharge to daylight well downhill of the house is the simplest and most maintenance-free option where the lot’s slope allows it. Where the lot is flat or the house sits at a low point, the footing drain instead ties into an interior or exterior sump pit with its own pump, which means the exterior system now depends on that pump staying powered and functional, the same dependency discussed in our sump pump installation cost file. Knowing which setup your house has tells you what ongoing maintenance the finished system actually needs.
Step 7: Understand backfill and landscape restoration
Once the membrane, drainage board, and footing drain are in place and inspected, the trench gets backfilled, ideally with clean fill free of sharp rock, construction debris, or large stones that could puncture the membrane or drainage board during or after placement. Backfill is typically placed and compacted in layers rather than dumped in all at once, both to avoid damaging the new system and to reduce future settling that would leave a low spot right where water should be draining away.
The final layer is graded to slope away from the foundation, restoring the correct drainage pattern discussed in Step 2 as a permanent feature of the finished job, not an afterthought. Landscape restoration, reseeding grass, replacing mulch beds, or rebuilding a walkway, patio, or section of driveway that had to come up for the dig, is frequently priced and scheduled separately from the waterproofing itself, and it is worth asking explicitly whether your bid includes it or treats it as a follow-up cost.

Step 8: Know what to put in writing before an exterior waterproofing contract
Before signing anything, get specifics in writing rather than a general description of “exterior waterproofing.” Ask for the exact membrane product and whether a drainage board is included, the footing drain material and whether it is wrapped in filter fabric, the backfill material being used, and whether landscape and hardscape restoration is part of the quoted price or billed separately. Ask whether a permit will be pulled and who is responsible for it, since excavation near a structural foundation is exactly the kind of work that benefits from inspection.
Our walkthroughs on how to vet a contractor and how to read a contractor estimate cover the general version of this discipline in more depth; apply both here, since exterior waterproofing is exactly the kind of large, one-time, hard-to-inspect-later project where a vague proposal is the biggest risk in the whole process. A contractor who answers every one of these questions specifically and in writing is behaving like someone confident in the work; one who waves the questions off with “don’t worry, we do this all the time” is not actually answering them.
Step 9: Maintain the exterior system after it’s installed
A completed exterior waterproofing system is not maintenance-free forever, even though the hard work is now underground. Keep the restored grading intact: do not pile mulch, soil, or new landscaping back up against the foundation over the years in a way that recreates the original problem. Keep downspout extensions in place and functional, since a knocked-loose extension quietly undoes Step 3 without anyone noticing until the next wet season.
If your system ties the footing drain into a sump inside, maintain that sump the same way you would any standalone system, since the exterior work and the interior pump are now one connected system rather than two separate ones. Watch for any new settling in the backfilled area, which can indicate the fill is compacting further and may eventually need a small amount of additional soil to maintain the proper slope. None of this is difficult, but it is the reason a properly installed system reliably outlasts a neglected one by decades rather than years.
A worked example: sixty feet of perimeter with heavy hardscape on one side
Walk through one illustrative house to see how access changes the plan. A homeowner has water entering along roughly sixty linear feet of basement wall across two sides of the house. On the back side, thirty feet, the yard is open with no hardscape against the wall. On the side yard, the other thirty feet runs directly beneath a concrete driveway poured close to the foundation.
Following Step 1 through Step 4, the homeowner first corrects grading and downspouts on both sides and adds covers to two window wells, which measurably reduces but does not eliminate the water on the driveway side. For the open back thirty feet, full exterior excavation is realistic: a contractor digs to the footing, seals a minor crack found during the dig, applies a membrane and drainage board, installs a footing drain, and backfills with clean fill, landscape restoration included in the written scope. For the driveway side, removing and later replacing thirty feet of driveway to excavate adds enough cost that an interior drain tile and sump system, covered in the basement waterproofing cost file, becomes the more sensible choice for that thirty feet specifically.
Entering thirty feet with open access and full basement depth into the exterior waterproofing companion on this page returns an illustrative cost range toward the lower-middle of the $150 to $400 per linear foot band; entering the same thirty feet with heavy hardscape access returns a range toward the top of it, reflecting why the homeowner chose differently for each side. Every figure here is illustrative, but the lesson holds generally: access decides the approach at least as often as preference does.
The homeowner also gets two written bids for the back-yard excavation before choosing a contractor, comparing the membrane product, the footing drain wrap, and whether the quoted price includes reseeding the disturbed grass afterward. One bid lists all three clearly and includes restoration; the other mentions “waterproofing membrane” with no product named and no restoration line. The clearer, fully scoped bid is not automatically the cheaper one, but it is the one that lets the homeowner compare like against like rather than guessing what is actually included.
What drives the cost of exterior waterproofing
Once the decision is made to excavate, the chart below breaks down where the cost of a full exterior job illustratively goes, based on the process described in Steps 5 through 7.
Where exterior waterproofing cost goes, by phase
Illustrative share of a full exterior job's cost, summing to 100.
The shares are illustrative. Excavation and access carry the largest share for a reason: the digging itself, not the waterproofing product, is usually the more expensive half of the job.
That is also why access is the single biggest line-item question to ask a contractor before assuming a per-foot number applies to your house. A driveway, mature tree, or attached structure in the way does not just add a restoration cost at the end, it changes the entire excavation portion that makes up over a third of the total.
Common mistakes when approaching basement waterproofing from outside
Most problems with exterior waterproofing projects, whether homeowners are doing the inexpensive pieces or hiring out the full dig, trace back to the same handful of avoidable errors.
- Jumping to excavation before trying grading and downspouts. A real share of wet-wall cases resolve with the cheapest fixes alone. Confirm the expensive option is actually needed before committing to it.
- Accepting a vague scope like “we’ll waterproof it.” Get the membrane product, the footing drain material and wrap, and the backfill material specified in writing, not implied.
- Not asking whether restoration is included. Landscape and hardscape restoration is frequently a separate line item, and it is a common source of a surprise bill at the end of the project.
- Ignoring access when comparing bids. A low bid on a wall behind a driveway that will actually need the driveway removed and rebuilt is not comparable to a bid for the same linear footage in an open yard.
- Backfilling with whatever soil came out of the hole, including sharp rock or debris, instead of clean fill, which risks puncturing the membrane or drainage board years before it should fail.
- Letting grading or mulch creep back up against the foundation afterward, which slowly recreates the original problem on top of a system that was built to prevent exactly that.
Troubleshooting: when exterior access is blocked
Even a well-planned exterior project runs into access problems. Here is how to think through the common ones.
What if a driveway or patio sits directly against the wet wall? Removing and rebuilding hardscape to reach the footing is expensive enough that it often tips the decision toward interior drain tile instead, covered in our basement waterproofing cost file. Get a written comparison of both options from your contractor before committing to either.
What if a mature tree is close to the section that needs excavation? Root damage during digging is a real risk to the tree, and root intrusion is a long-term risk to the new membrane and drain. A contractor experienced with this situation may be able to hand-dig carefully around significant roots, but expect the timeline and cost to extend, and get an honest conversation about the tree’s prospects before work starts.
What if the footing drain daylights somewhere that floods a neighbor’s yard? This is exactly the kind of detail a permit and inspection process exists to catch. Confirm the discharge point with your contractor and your local building department before the trench is backfilled, since correcting it after the fact means reopening finished work.
What if water still shows up inside after a full exterior job? Give the system a full wet season to prove itself, since a single storm is not always a fair test. If water persists after that, the most common causes are a secondary entry point that was not addressed during the original scope, such as a window well or a different section of wall, or damage to the system during backfill. Bring the original contractor back under warranty before assuming the whole approach failed.
What if I only have budget for part of the perimeter this year? Prioritize the section with the worst and most frequent water intrusion, and apply the inexpensive grading and downspout corrections from Steps 2 and 3 around the entire house regardless of what gets excavated this year, since those help everywhere for comparatively little cost.
What if the contractor wants to backfill with the soil that came out of the trench instead of clean fill? Ask specifically what is in it. Native soil that is reasonably clean, with rocks and debris screened out, is often fine and is sometimes even specified by a system manufacturer. Native soil mixed with construction debris, large rock, or heavy clay that will not drain is a different story, and it is worth asking the contractor to bring in clean fill for at least the material directly against the membrane and drainage board, even if the rest of the trench uses screened native soil.
What if my neighbor’s yard sits lower than mine and I am worried about sending water their way? This is worth raising directly with your contractor before excavation starts, not after a complaint arrives. A footing drain daylighting onto a lower neighboring property without their knowledge, or a regrade that measurably increases runoff toward them, can become a real dispute even when the work itself was done correctly. A contractor who routes discharge to a storm drain, a dry well, or a point well within your own property line avoids the question entirely, and it is a reasonable thing to ask for by name.
The exterior basement waterproofing checklist
Save this and work through it as you plan your own project.
- Grading corrected around the full perimeter, sloping away from the foundation, not just the wet section.
- Downspouts extended well past the wall on every side, with underground drain lines checked for blockage.
- Window wells covered and draining, with gravel or a tied-in drain rather than standing water against the glass.
- Access assessed honestly for any section being considered for full excavation: open yard, light hardscape, or heavy hardscape against the wall.
- Multiple written bids gathered, each specifying the membrane product, footing drain material and wrap, and backfill material.
- Restoration scope confirmed in writing, including whether landscape and hardscape rebuilding is in the price or separate.
- Permit plan confirmed, with the contractor pulling any required permit and scheduling inspection.
- System maintained afterward: grading kept clear, downspout extensions kept functional, any tied-in sump maintained.
Run your own perimeter through the exterior waterproofing companion as you plan, so the illustrative cost range updates against your actual access and depth.
The bottom line
Waterproofing a basement from the outside is really two projects wearing one name. The inexpensive half, correcting grading, extending downspouts, and fixing window wells, is genuinely a homeowner’s job and resolves a meaningful share of wet-basement cases by itself. The expensive half, excavating to the footing, sealing and membraning the wall, and installing a footing drain, is major construction next to your foundation and belongs with a professional, with access to the wall as the single biggest factor in whether it is even realistic.
Do the cheap steps first, know honestly which category your situation falls into, and if the full dig is where you land, put the membrane product, the footing drain details, the backfill material, and the restoration scope in writing before anyone breaks ground. A driveway or mature tree against the wall is not a reason to assume exterior waterproofing is out of reach, but it is a reason to get a straight comparison against interior drain tile before committing to either one.
ProsNook publishes this walkthrough to help homeowners understand the exterior basement waterproofing process and separate what they can do themselves from what a professional should handle, not as engineering or construction advice. Every cost figure, depth, and timeframe above is illustrative, and products, soil conditions, and local permit and code requirements vary by region, so confirm specifics with your local building department and a qualified contractor. If you find a structural crack, a bowing wall, or water arriving under heavy, continuous pressure, treat it as a question for a professional assessment before planning any excavation.
Frequently asked questions
How much does it cost to waterproof a basement from the outside?
Full exterior excavation with a new membrane and footing drain commonly runs somewhere around $150 to $400 per linear foot of treated wall as an illustrative range, which on a typical perimeter run puts a full job well into the thousands to tens of thousands of dollars depending on how much of the house needs it. Access is the biggest swing factor: an open yard with no hardscape against the wall prices toward the lower end, while a driveway, patio, or structure sitting against the wall that has to be removed and rebuilt pushes it toward the upper end or beyond. Our basement waterproofing cost file prices every method, including the much cheaper exterior steps like grading and downspout correction, side by side.
Can I waterproof my basement from outside myself?
Parts of it, yes. Correcting grading so soil slopes away from the foundation, extending downspouts well past the wall, and adding or repairing window well covers are all realistic weekend projects within reach of a homeowner with basic tools. Full excavation down to the footing, applying a new membrane, and installing a footing drain is a different category of work: it involves heavy equipment or extensive hand digging next to a structural wall, correct drainage slope, and a membrane and drain system installed to hold up for decades, and it is a job most homeowners hire out. Do the inexpensive exterior pieces yourself first, since they resolve a real share of wet-basement cases on their own, and treat the full dig as a professional job.
What is the process for exterior basement waterproofing?
At a high level: a contractor excavates around the affected section of foundation down to the footing, removes the old waterproofing or coating if present, repairs any cracks in the wall itself, applies a new waterproofing membrane to the wall face, installs a footing drain at the base wrapped in gravel and filter fabric to carry water away, adds a drainage board in some systems to protect the membrane and channel water down to the drain, then backfills with the right material and restores the yard on top. Every system varies in the specific products and sequence a company uses, which is exactly why comparing written scopes between contractors matters more than comparing a single price number.
How deep do you have to dig to waterproof a basement?
Down to the footing, which is the base of the foundation wall and typically sits below the basement floor level, commonly in the range of six to eight feet below grade for a full basement, though the exact depth depends on your home's specific foundation and local frost depth requirements. A shallower crawl space or stem wall foundation requires less digging. This is one of the main reasons exterior work costs more than interior drain tile: the excavation itself, at that depth and often right next to a structure, takes real equipment time and careful shoring, independent of whatever waterproofing product goes on the wall afterward.
Is exterior or interior basement waterproofing better?
Neither is universally better; they solve the problem at different points and access usually decides which one is realistic for your house. Exterior work keeps water from ever reaching the wall by waterproofing the outside face and draining it away before it arrives, which is thorough but requires digging around the house and is the more expensive and disruptive option outside. Interior drain tile accepts that water will reach the wall and manages it with a drain and sump before it reaches the floor, which is far cheaper and disrupts the inside of the basement instead of the yard. A house with an open yard can often choose either approach; a house with a driveway, patio, or neighboring structure against the wet wall frequently has only the interior option available.
How long does exterior basement waterproofing take?
For a partial run of wall, commonly a few days from excavation to backfill, weather permitting, since the crew needs to dig, prep and seal the wall, install the drain, and backfill before moving to landscape restoration. A full perimeter job on a larger house can run one to two weeks or more. Landscape restoration, meaning regrading, reseeding, or replacing hardscape like a walkway or patio that had to be removed, is often a separate timeline from the waterproofing itself and can take additional weeks depending on what has to regrow or cure.
What damages exterior waterproofing membranes?
The membrane itself is durable once installed and properly protected, but a few things commonly shorten its life. Backfilling with sharp rocks or construction debris instead of clean fill can puncture it during or after backfill. Large trees or aggressive roots planted too close to the foundation afterward can eventually press against or penetrate it. A footing drain that clogs with silt over years because it was not wrapped in filter fabric, or landscaping changes that redirect water back toward the wall, can undermine the whole system even if the membrane itself is intact. Ask your contractor what backfill material they use and whether the footing drain is wrapped, since both answers affect how long the system actually lasts.
Do I need a permit to waterproof my basement from outside?
Often yes, particularly for work that involves excavation near a structural foundation, a new footing drain tied into a discharge point, or any grading change that affects drainage onto a neighboring property. Requirements vary by locality, and some jurisdictions treat straightforward waterproofing as routine maintenance while others require a permit for any excavation past a certain depth. A legitimate contractor pulls the required permit and schedules any needed inspection as a normal part of the job; treat reluctance to do so as a warning sign rather than a convenience, since unpermitted excavation next to your foundation is exactly the kind of work you want inspected.