What's on this page
- What window air conditioner installation costs
- Unit cost by BTU and room size
- How to size a window AC by BTU
- DIY versus professional installation cost
- What drives window AC installation cost
- Window type and compatibility
- Height, floor, and access
- Support brackets and safety
- Electrical and circuits
- Running cost of a window air conditioner
- Where a window AC budget goes
- Window AC installation cost by BTU
- Window AC versus portable and mini-split
- Energy efficiency and CEER
- Labor and the handyman rate
- Seasonal timing and where to buy
- Removal, storage, and off-season care
- Common mistakes installing a window AC
- A worked example a bedroom window unit
- How to save on a window AC install
- How to get and compare quotes
- The bottom line
Short answer: A window air conditioner illustratively runs about $150 to $900 for the unit depending on its BTU capacity, and installation adds near nothing if you mount it yourself with a bracket and kit, or roughly $100 to $300 if you hire a handyman for the lift and seal. Size by capacity at roughly 20 BTU per square foot, so a 250 square foot bedroom points to about 5,000 BTU, and avoid oversizing.
A window air conditioner installation cost is unusual among cooling projects because the unit, not the labor, is almost the whole price. A central system or a ductless mini-split is dominated by installation, the crew, the refrigerant lines, the electrical, and the mounting, but a window air conditioner is built to be dropped into an open window by the homeowner, so the sticker price of the unit is most of what you pay. What separates a $200 job from a $900 one is not the difficulty of the install, it is the cooling capacity you need, the window you have to work with, and whether you handle the lift yourself or pay someone to do it safely.
Illustratively, a window air conditioner commonly runs about $150 to $900 for the unit depending on its size in BTU, and installation adds only a little on top: near nothing if you mount it yourself with a bracket and a kit, or roughly $100 to $300 if you hire a handyman for the lift and the seal. That makes a window AC one of the cheapest ways to cool a single room. This cost file prices the job the way it actually breaks down: the unit first, sized to the room, then the small install cost, then the running cost you live with all season. Our HVAC maintenance checklist covers keeping any cooling system healthy, and our window replacement cost file is a useful sibling when the window itself is part of the picture. Size your own room in the job cost estimator as you read, and the ranges below turn into numbers you can plan around.
Key takeaways
- Illustratively, a window air conditioner runs about $150 to $900 for the unit depending on its BTU capacity, and installation adds near nothing DIY or roughly $100 to $300 for a handyman, so the unit is the budget.
- Size by capacity: a common rule of thumb is roughly 20 BTU per square foot, so a 250 square foot bedroom points to about 5,000 BTU and a 450 square foot living room to about 10,000 BTU, adjusted for sun, ceilings, and occupancy.
- Oversizing is a mistake, not a margin: too much capacity cools fast without running long enough to pull out humidity, leaving a cold clammy room.
- Window type decides fit: standard units need a double-hung or single-hung window, while casement and slider windows need special models or a different approach entirely.
- Running cost is its own line, set by wattage, hours, efficiency (CEER), and your electricity rate, and a more efficient unit costs more up front but less every month.
What window air conditioner installation costs
Priced honestly, a window air conditioner installation cost is really two small numbers stacked on one larger one: the unit, which is most of the price, plus a modest install cost that depends on who does the work. As an illustrative guide, the unit commonly runs about $150 to $900 depending on its cooling capacity, with a small bedroom unit near the bottom and a large unit for an open living space near the top. Installation is cheap by comparison: mounting it yourself with a bracket and a kit adds little more than the hardware, while hiring a handyman for the lift, the leveling, and the weather seal adds an illustrative $100 to $300.
The reason the total stays low is that a window air conditioner is a self-contained appliance, not a built-in system. Everything that makes central air or a mini-split expensive, the ductwork or line set, the outdoor unit, the refrigerant charge, the extensive electrical and mounting, simply does not exist here. You buy a box that already contains the compressor, coils, and fan, and you set it in a window. That is why the install is measured in dollars rather than thousands, and why the size you choose matters far more to your budget than the labor.
The practical takeaway is to price the unit first, sized to your room, then add a small allowance for the install and a separate estimate for the running cost. If you know the capacity you need and whether you will mount it yourself, you can build a planning number in minutes rather than waiting on quotes. The estimator works the same way, letting you set the room and the install choice and watch the total build, so the headline range becomes a figure that fits your actual space.
Unit cost by BTU and room size
The single biggest driver of a window air conditioner’s price is its cooling capacity, measured in BTU, because a bigger unit costs more to build and moves more heat. Capacity scales roughly with the room it can cool, so pricing the unit really means matching BTU to square footage first, then reading the price band for that size. A small unit around 5,000 to 6,000 BTU, sized for a bedroom or a home office, sits at the bottom of the range, a mid-size unit around 8,000 to 12,000 BTU for a large bedroom or a living room sits in the middle, and a large unit around 14,000 to 25,000 BTU for an open space sits at the top.
The table below pairs common room sizes with an illustrative BTU and an illustrative unit price, so you can find your room and read across. Treat the capacities as starting points from the roughly 20 BTU per square foot rule of thumb, and the prices as illustrative bands that move with brand, efficiency, and features rather than fixed quotes.
| Room size (sq ft) | Illustrative capacity | Typical room | Illustrative unit cost |
|---|---|---|---|
| 100 to 150 | ~5,000 BTU | Small bedroom, office | $150 to $250 |
| 150 to 250 | ~6,000 BTU | Bedroom | $180 to $300 |
| 250 to 350 | ~8,000 BTU | Large bedroom, small living room | $250 to $400 |
| 350 to 450 | ~10,000 BTU | Living room | $300 to $500 |
| 450 to 550 | ~12,000 BTU | Large living room | $400 to $600 |
| 550 to 700 | ~14,000 BTU | Open living and dining | $500 to $750 |
| 700 to 1,000 | ~18,000 BTU | Open floor, studio | $600 to $900 |
| 1,000 to 1,400 | ~24,000 BTU | Large open space | $700 to $1,100 |
Read the table as a map, not a quote. The step from a 5,000 BTU bedroom unit to an 18,000 BTU unit for an open floor is a real change in capacity and price, not a rounding difference, so start from the row that matches your room, then adjust for the exposure, ceiling height, and occupancy that the next section covers. The estimator turns your own square footage into a capacity and a price band directly, so you can anchor on a number that fits your space rather than a mid-table average.
How to size a window AC by BTU
Sizing is the step that decides both which unit you buy and whether the room actually feels comfortable, so it deserves care. The starting point is the rule of thumb of roughly 20 BTU per square foot of floor area, which puts a 150 square foot bedroom near 3,000 to 5,000 BTU (5,000 being the smallest common unit), a 300 square foot room near 6,000 to 8,000 BTU, and a 450 square foot living room near 9,000 to 10,000 BTU. That base figure is a reasonable first estimate for an average room with average ceilings, and it is where sizing should begin rather than end.
Several adjustments move the number off the base. A room that gets strong afternoon sun, typically south or west facing, needs more capacity, while a heavily shaded room needs less, a common adjustment being roughly ten percent in either direction. High ceilings add air volume and therefore load, a kitchen adds heat from cooking, and each person who regularly occupies the room adds body heat, so a busy room needs a bit more than an empty one of the same size. These are the reasons two rooms of identical square footage can call for different units.
The mistake to avoid is oversizing, which feels like buying safety margin but is not. A unit that is too large for the room cools the air quickly and then shuts off, which sounds good but means it never runs long enough to pull humidity out of the air, leaving the room cold and damp rather than cool and dry. An undersized unit, by contrast, runs constantly and never quite catches up on a hot day. The goal is to match the capacity to the room, not to exceed it, which is exactly what the estimator helps you do when you enter your square footage and exposure.

DIY versus professional installation cost
Here is where a window air conditioner differs most from other cooling work: it is genuinely DIY friendly, and doing it yourself is almost always the cheaper path. A window AC is designed to be installed by the homeowner, and the only added cost beyond the unit is a support bracket and a mounting or side-panel kit, often an illustrative $20 to $60 together. For a small unit in a ground-floor window, a capable homeowner can complete the install in under an hour, which is why so many window units never involve a paid installer at all.
Hiring a handyman or an installer adds labor, an illustrative $100 to $300, and the honest case for paying it is not complexity but weight and height. A large unit is heavy and awkward to hold level while securing it, and an upper-floor window turns a slip into a genuine fall risk for both the unit and the person. A unit that is not properly secured, leveled, and pitched slightly toward the outside can leak indoors or, in the worst case, work loose and fall, so the labor buys safety and a correct seal more than it buys skill.
The practical framing is to let the unit and the window decide. A small unit at a ground-floor window is a straightforward DIY job where paying for labor adds little. A heavy unit, a high window, or a homeowner who is not comfortable with the lift is exactly where a professional install earns its modest cost. This is the same weigh-the-risk logic our DIY versus hire planner applies to bigger projects, scaled down: the question is less about capability than about consequence, and the consequence of a dropped unit two floors up is serious.
What drives window AC installation cost
Even though the install itself is cheap, several factors decide where inside the small range it lands, and naming them keeps a quote honest. The first is the unit size, which drives both the purchase price and the labor, since a heavier unit is harder to lift and secure and may push a DIY job toward a paid one. The second is the window type, because a standard double-hung window is the easy case while a casement or slider needs a special unit and sometimes more fiddly fitting.
The third factor is height and access, meaning which floor the window is on and how reachable it is, since an upper-floor install is slower and riskier and therefore more likely to justify paid labor. The fourth is the support and hardware, the bracket, the kit, and any weatherproofing, which is a small line but a real one, especially for larger units that need a rated bracket. The fifth is electrical, which is usually a non-issue for small units on an existing outlet but can add real cost for a large unit that needs a dedicated or higher-voltage circuit.
The practical point is that none of these are large individually, but together they explain why one window AC install costs a little more than another. A small unit, a double-hung window at ground level, and an existing outlet is the cheapest combination, close to just the price of the unit. A large unit, an upper-floor casement, and a circuit that needs an electrician is the most expensive, and the gap between them lives entirely in these five factors rather than in any single big line. Reading a quote against them, the way our estimate-reading guide teaches, tells you where any extra cost is coming from.
Window type and compatibility
Before capacity or price, the very first thing to check is whether the window will accept the unit, because not every window can. A standard window air conditioner is built for a double-hung or single-hung window, the common style where the lower sash slides up vertically and the unit rests on the sill with its accordion side panels extending to fill the gaps. If that is your window, you are in the easy case, and the unit drops in as designed.
A casement or crank-out window, which swings open on a hinge rather than sliding up, will not accept a standard unit, and this catches many buyers by surprise. Those windows need a special vertical or casement-style air conditioner shaped to fit a tall narrow opening, or a different cooling approach such as a portable unit or a through-the-wall install. A horizontal sliding window is a third case, needing a unit designed to sit vertically in the track. Buying a standard unit for a casement or slider means returning it, so the window style has to be confirmed first.
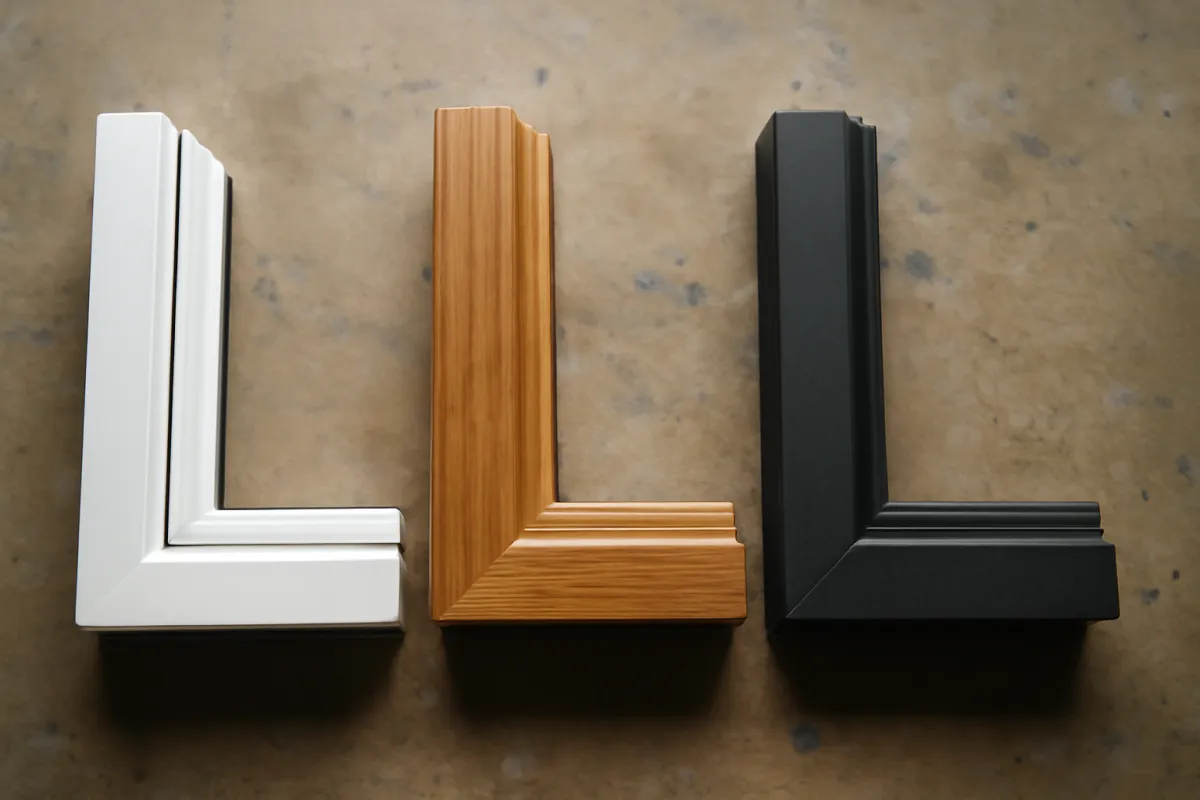
The practical move is to identify your window style and measure the opening width and height before you shop, then match the unit’s dimensions to it. Confirm too that the sash and frame can bear the weight, since an old or lightweight window may need a support bracket to carry the load safely. Matching the unit to the window, rather than assuming any model fits any opening, is the step that prevents the most common and most frustrating mistake in the whole project.
Height, floor, and access
Which floor the window is on, and how easy it is to reach, quietly shapes both the cost and the safety of the install. A ground-floor window is the simplest case: you can steady the unit from outside if needed, a slip is low consequence, and the whole job is quick. This is where DIY makes the most sense and where paid labor adds the least, since there is little risk to price in.
An upper-floor window changes the calculation. Holding a heavy unit level while securing it in a second or third-floor window, with the outside of the sill over open air, is a genuine fall hazard for the unit and a safety risk for the installer. This is the situation where a support bracket is not optional and where paying a handyman who can do the lift safely is often worth the modest cost. The added labor is not about the window being harder to fit, it is about the consequence of a mistake being far greater up high.
The practical framing is to weigh the height honestly rather than treating every window the same. A small unit at a ground-floor window is a confident DIY job. A large unit at a high window is exactly where the install cost is justified, because a dropped unit from a height can injure someone below and destroy the unit. Access also affects convenience: a window over a sink, behind furniture, or in a tight corner is more awkward to work in, which adds a little time whether you or a pro does the work. Match the effort to the window, and do not let a low sticker price tempt an unsafe lift.
Support brackets and safety
A detail that homeowners underweight is the support bracket, the L-shaped or arm-style mount that carries the unit’s weight from outside the window so the sill and sash are not bearing the full load. For a small unit in a sturdy window, the built-in support and the closed sash may be enough, but for a heavier unit or an older window, a bracket is the difference between a secure install and a slow-developing problem. A bracket is an illustrative $20 to $60 and is cheap insurance against a unit working loose over a season.
Beyond the bracket, a correct install has two safety essentials. The unit must be secured so it cannot be pushed out or fall, which matters both for anyone below and, on an accessible floor, for security. And it must be pitched very slightly toward the outside so that condensate drains away from the house rather than pooling on the sill or dripping inside. A unit installed dead level or tilted inward can leak indoors and cause water damage over time, which is a common and avoidable failure.
The practical point is that the hardware and the details are a small share of the budget but a large share of whether the install is safe and lasts. Skimping on a bracket for a heavy unit, or skipping the outward pitch, trades a few dollars or a few minutes for a unit that leaks, loosens, or falls. Weatherproofing the gaps with the included side panels and a bit of foam or weatherstripping finishes the job, sealing out air leaks that would otherwise waste the cooling you are paying to run. Spend the small amount on doing it right, because the failures here are messier than the cost to prevent them.
Electrical and circuits
For most window air conditioners, the electrical is a non-issue, which is part of why the install is so cheap. Small and mid-size units run on a standard 120 volt household outlet, the same one you would plug a lamp into, so no wiring work is needed. You plug the unit in and it runs. That said, there are two cautions worth naming so the electrical does not surprise you.
First, a window AC draws a meaningful current while the compressor runs, so it is best on a circuit it does not have to share with other heavy loads. Running the unit on the same circuit as a microwave, a space heater, or another large appliance can trip the breaker when they run together. Using the unit on its own outlet, and avoiding extension cords, which are a fire risk with an air conditioner’s draw, keeps it running reliably. If a circuit trips repeatedly, that is a sign the unit is sharing with too much else, not a fault in the AC.
Second, the largest units, typically the biggest capacities meant for wide open spaces, sometimes require a dedicated circuit or even a 240 volt outlet, the kind a dryer uses. That would mean bringing in an electrician to add the circuit, which is a real added cost that turns a cheap install into a more involved one. Check the unit’s electrical requirements on the label or in the manual before you buy, so a large unit’s wiring need does not become an unplanned expense. Where a dedicated or 240 volt circuit is required, the same licensed electrical work that a bigger project like a whole-house generator install needs applies in miniature, and it belongs in the budget up front.
Running cost of a window air conditioner
The purchase price is only the start, because a window air conditioner has a running cost you pay every month it operates, and for a unit that runs all summer that adds up. The running cost is set by four things: the unit’s wattage, which tracks its capacity, the hours you run it per day, the unit’s efficiency, and your local electricity rate. Because all four vary, the running cost is best estimated for your own situation rather than quoted as a single number.
As an illustrative example, a mid-size unit drawing roughly 900 watts, running about eight hours a day at an illustrative electricity rate, might cost somewhere around $20 to $50 a month during cooling season. A small bedroom unit drawing less power costs less, and a large living-room unit drawing more costs more, so the monthly figure scales with the size you chose and how much you run it. The way to estimate your own is straightforward: take the unit’s wattage, multiply by the daily hours to get watt-hours, divide by 1,000 for kilowatt-hours, and multiply by your rate.

The practical framing is to treat the running cost as a real part of the decision, not an afterthought. A cheaper, less efficient unit can cost more over a few summers than a pricier efficient one, because the monthly power bill is where the difference shows up. Setting the unit only during the hours a room is occupied, keeping the room’s doors closed, and sizing the unit correctly all trim the running cost. The estimator reflects the same relationship, so you can see how the hours you run and the size you pick move the monthly figure.
Where a window AC budget goes
Assemble the pieces and the shape of a window AC budget is unusual: the unit dominates, and everything else is a thin slice. The proportions below are illustrative for a pro-installed mid-size unit, with the unit, the labor, the bracket and hardware, and the extras shown as their own bands so you can see how lopsided the split is compared with a central system.
Where the money goes on a pro-installed window AC
Illustrative shares for a mid-size window unit installed by a handyman. A DIY install removes the labor band almost entirely.
Shares shift with the job: a DIY install shrinks the labor band toward zero and pushes the unit past 80 percent of the total, while a large unit needing a dedicated circuit would add an electrical band this simple case does not have.
Two readings matter here. First, the unit is the overwhelming majority of the cost even with paid labor, which is the opposite of a central system where the install dominates, so buying the right unit at a good price is the single most valuable decision. Second, a DIY install removes the labor band almost entirely and pushes the unit’s share above eighty percent, which is why doing it yourself makes such a difference to the total. Budget from the whole bar, but recognize that the unit is where nearly all of your money goes.
Window AC installation cost by BTU
Zoom out and one fact organizes the whole budget: the total tracks the unit size, because the unit is most of the cost. A small bedroom unit, a mid-size room unit, a living-room unit, and a large open-space unit are four different price points on the same simple idea. Using an illustrative installed total for each, including a modest bracket and light labor, the chart below shows how the total scales with capacity.
Illustrative installed cost by window AC size
Midpoint totals including the unit and a modest install. Your room size sets which bar you are actually reading.
Illustrative installed midpoint totals for four sizes. A DIY install pulls each bar down toward the unit price alone, while a large unit needing a dedicated circuit and an electrician would push its bar well past the top of this range.
Read those bars as the shape of the decision, not as your quote. The step from a 5,000 BTU bedroom unit to an 18,000 BTU open-space unit is a real change in capacity and price, and it is driven almost entirely by the unit rather than the labor. Anchor on the bar that matches the room you are cooling, then adjust for whether you install it yourself and whether the electrical is simple. The estimator treats the size as its own field so you can see the swing directly as you change the room.
Window AC versus portable and mini-split
It helps to place a window air conditioner against the two alternatives homeowners weigh, the portable AC and the ductless mini-split, because they solve the same problem at very different prices. A portable unit sits on the floor and vents its heat outside through a hose run to a window kit. For the same rated capacity it is usually less efficient than a window unit, because exhausting heat through a hose is less effective than a window unit that pushes heat directly outdoors, and it takes up floor space. Its advantages are that it does not block the window, moves easily between rooms, and works where a window will not accept a standard unit, such as a casement.
A ductless mini-split is a different class entirely: a permanently installed system with an outdoor compressor and one or more indoor heads, far more efficient and quieter than a window unit and able to both cool and heat. The catch is the price. A mini-split is a professionally installed system, so unlike a window AC where the unit is the cost, a mini-split’s installation dominates and the whole project runs many times the price of a window unit. It is a long-term upgrade to a home rather than a seasonal appliance.
The practical framing is to match the tool to the situation. A window unit is the most cost-effective choice for cooling a single room where the window suits it and the unit can stay put for the season. A portable unit trades some efficiency for flexibility and works in incompatible windows. A mini-split is the premium, permanent solution for whole-home or multi-room comfort where the budget supports a real installation. For most single rooms and modest budgets, the window unit wins on cost per degree of comfort, which is why it remains the default. Weighing the up-front against the long-term is the same discipline our renovation budget guide applies to any home spend.
Energy efficiency and CEER
Two window air conditioners with the same BTU capacity can cost different amounts to run, and the difference is efficiency, measured by a rating called CEER (Combined Energy Efficiency Ratio). A higher CEER means the unit delivers the same cooling for less electricity, so it costs less every hour it runs. Because the running cost accumulates all season, the efficiency rating is a real financial factor, not a spec-sheet detail, and it is worth reading alongside the price.
The tradeoff is that a more efficient unit usually costs more up front, so the decision is between paying less now and paying less every month. For a unit that runs many hours a day through a long cooling season, the more efficient model can pay back its premium over a few summers through lower power bills, while for a unit that runs only occasionally the payback is slower and the cheaper unit may make sense. There is no universal answer, only the arithmetic of your own hours and rate against the price difference.
The practical move is to compare units on both the sticker price and the CEER, and to estimate the running cost for each the way the running-cost section describes. A model that costs a little more but carries a noticeably higher CEER is often the better long-run buy for a room you cool heavily, while the efficiency premium matters less for a guest room used a few weeks a year. An efficient unit paired with correct sizing and good sealing is the cheapest room to run over time, which is why efficiency, sizing, and installation quality are worth treating as one connected decision rather than three separate ones.
Labor and the handyman rate
When you do pay for installation, the cost is labor, and it helps to understand what that labor covers and why it varies. A window AC install is not licensed trade work in the way plumbing or electrical is, so it is typically a handyman or a general helper rather than a specialized installer, and the rate reflects that. The illustrative $100 to $300 for a paid install mostly buys the lift and the leveling, securing the bracket, seating the unit safely, sealing the side panels, and confirming the outward pitch so it drains correctly.
The labor time and cost move with the same factors that drive the whole job. A small unit at a ground-floor window is quick and sits at the bottom of the labor range, while a heavy unit at an upper-floor window takes longer, needs more care, and sits at the top. Regional labor rates vary as they do for any trade, which is one reason the same install costs different amounts in different markets, and our general contractor cost file explains how those local rates are built and why they differ by area.
The practical framing is to weigh the handyman’s rate against the safety it buys rather than chasing the lowest number, especially for a heavy unit or a high window where a mistake is costly. For a simple ground-floor install the labor adds little value over doing it yourself, but for the harder cases it is money well spent. If you are hiring for several small jobs at once, bundling the AC install with other handyman work can spread the trip charge and lower the effective cost, the same way our contractor hiring guide suggests batching small tasks to make paid labor worthwhile.
Seasonal timing and where to buy
The timing of your purchase is a real lever on the unit price, because window air conditioner prices follow demand. The most expensive time to buy is the middle of a summer heat wave, when demand spikes, popular sizes sell out, and retailers have no reason to discount. The cheapest time is the off-season, meaning fall, winter, and early spring before the first hot spell, when stores discount to clear inventory and the full range of sizes is in stock.
If you can anticipate the need and buy ahead, you often pay meaningfully less for the same unit, and you avoid the scramble of shopping when every store is picked over and the size you want is gone. A homeowner who buys a unit in the spring for the summer ahead, or grabs an end-of-season clearance unit for next year, is buying the same appliance for less than the person shopping in a July heat wave. The unit does not change; the price does, purely on timing.
The practical move is to treat the purchase like any seasonal buy: plan ahead where you can, watch for off-season and clearance pricing, and do not wait until the room is unbearable if you can help it. Where you buy matters less than when, since the same models are widely available, though comparing a few sellers is still worth a few minutes for a large unit. Pairing smart timing on the unit with correct sizing and an efficient model is how you keep both the purchase price and the running cost down, which together are the whole budget for this kind of cooling.
Removal, storage, and off-season care
A window air conditioner is a seasonal appliance, and how you handle it in the off-season affects both its life and your comfort, so it is worth a short accounting. Leaving a unit in the window through the winter has real downsides: it is a cold-air and draft leak around the panels, it exposes the unit to weather it was not built to sit in year-round, and it can be a security weak point on an accessible floor. Many homeowners remove and store the unit for the winter for those reasons.
Removal is the install in reverse and carries the same safety caution, since the unit is just as heavy coming out as going in, and an upper-floor removal is the same fall risk. If the unit was hard to install safely, it is worth the same care or the same paid help to take it out. Once removed, storing it upright in a dry space, ideally covered, keeps it clean and ready for next season. A unit left in place year-round should at least be covered on the outside to shield it from winter weather and reduce the draft indoors.
The practical framing is to decide up front whether this unit will be removed each season or left in place, because it affects both the effort and the hardware. A unit you will remove yearly argues for an install that is secure but not permanent and for keeping the kit and bracket. Off-season care is cheap and simple, cleaning or replacing the filter and wiping the coils before storage, and it is the same preventive habit our HVAC maintenance checklist applies to larger systems: small attention in the off-season prevents a dirty, weak, or failed unit when the heat returns.
Common mistakes installing a window AC
A handful of avoidable mistakes account for most of the frustration with window units, and naming them upfront saves money and hassle. The most common is buying before measuring, ending up with a unit that does not fit the window opening or, worse, a standard unit for a casement window that cannot accept it. The fix is simple: confirm the window style and measure the opening width and height before you buy anything.
The second mistake is sizing wrong, usually oversizing on the theory that bigger is safer. As the sizing section covered, an oversized unit short-cycles and leaves the room cold and humid, while an undersized one never keeps up, so matching capacity to the room matters more than erring large. The third is installing it level or tilted inward, which sends condensate dripping into the house instead of draining outside, a slow water-damage problem that a slight outward pitch prevents. The fourth is skipping the bracket on a heavy unit, trading a few dollars for a unit that can loosen or fall.
The remaining mistakes are about power and sealing. Running the unit on a shared circuit or an extension cord trips breakers and creates a fire risk, so it belongs on its own outlet without a cord. Poor sealing around the side panels wastes the cooling you are paying to run and lets in bugs and noise, so finishing the gaps with the panels and a bit of weatherstripping is worth the few minutes. None of these are hard to avoid, but each is common, and together they separate an install that works quietly all season from one that leaks, trips, or underperforms. Reading the unit’s own instructions is the cheapest insurance against all of them.
A worked example a bedroom window unit
Take one ordinary project, cooling a 250 square foot bedroom on the ground floor of a home with a double-hung window, and cost it in layers so the structure of the number becomes concrete. Every figure is illustrative; the method is the lesson. Assume an average-exposure room, a homeowner comfortable with a simple DIY install, and an existing standard outlet nearby.
Start with sizing. At roughly 20 BTU per square foot, a 250 square foot room points to about 5,000 to 6,000 BTU, and since the exposure is average no big adjustment is needed. That is a small, common unit, so the capacity is easy to buy and cheap to run. Buy the unit. At an illustrative price for a 6,000 BTU unit, the unit alone comes to roughly $180 to $300, which for this simple job is nearly the entire budget.
Add the install. Because it is a ground-floor double-hung window and the homeowner is doing the work, the only added cost is a side-panel kit and a light bracket, an illustrative $20 to $40, so the installed total lands around $200 to $340. Then estimate the running cost. A 6,000 BTU unit drawing a few hundred watts, run about eight hours a day at an illustrative rate, might cost somewhere around $15 to $30 a month in cooling season. If instead this were a heavy 15,000 BTU unit at a third-floor casement window needing an electrician, the same worked example would look nothing alike, which is exactly the point: the room, the window, and the install choice set the number. Run your own room, window, and install choice through the estimator, and the same worked example prices itself around your space.
How to save on a window AC install
Once you understand the levers, you can trim a window AC budget without buying a regret. The safest saving is buying in the off-season, since the same unit costs less outside a heat wave, so planning ahead is free money. The next is doing the install yourself where it is safe to do so, a small ground-floor unit being the clear case, which removes the labor band almost entirely. Right-sizing the unit to the room rather than oversizing keeps both the purchase price and the running cost down, so accurate sizing saves twice.
A few more choices save without cutting corners. Choosing an efficient unit with a higher CEER costs a little more up front but less every month, which pays back on a unit you run heavily. Sealing well around the panels stops you from paying to cool the outdoors, and running the unit only when the room is occupied, with the door closed, cuts the hours that drive the bill. Bundling a paid install with other handyman work, if you are hiring anyway, spreads the trip charge across several tasks.
The places not to save are the ones that protect safety and the unit. Skipping the bracket on a heavy unit, forgoing paid help on a risky upper-floor lift, using an extension cord to avoid moving the unit near an outlet, or ignoring a large unit’s dedicated-circuit requirement all trade a small saving for a real hazard or a damaged unit. Save on the timing, the sizing, the efficiency, and the DIY where it is safe; spend properly on the bracket, the safe lift, and the correct electrical, and let the estimator show you how each choice moves the total.
How to get and compare quotes
Because most window AC installs are DIY, you often will not gather quotes at all, but when the unit is heavy or the window is high enough to justify paid help, a little comparison keeps the labor fair. Start by being clear about the scope: the lift and placement, the bracket, the leveling and outward pitch, the side-panel sealing, and, if needed, any electrical. A handyman quoting on the same defined scope gives you a number you can actually compare, rather than a vague figure that hides what is and is not included.
For the unit itself, comparing sellers is worth a few minutes on a larger, pricier model, though the same units are widely available and prices cluster. The bigger saving is timing and size, not hunting for a marginally cheaper listing. If the job needs an electrician for a dedicated or 240 volt circuit, that is separate licensed work and should be quoted on its own, since it is the one part of a window AC project that can carry a real trade cost.
The practical move is to normalize any paid quotes to the same scope and hold them against your own figure from the estimator, the same discipline our quote-comparison manual applies to bigger jobs. For a project this small, an outlier quote usually means someone is padding a simple task or, on the low side, skipping the bracket or the safe lift. Because the labor is a minor share of the total, the more valuable comparison is on the unit, its size, its efficiency, and its price, since that is where nearly all of your money goes.
The bottom line
A window air conditioner installation cost is dominated by the unit, not the labor, which is what makes it one of the cheapest ways to cool a single room. Illustratively, the unit runs about $150 to $900 depending on its BTU capacity, and installation adds near nothing if you mount it yourself or roughly $100 to $300 if you hire a handyman for the lift and the seal. The honest way to price it is to size the unit to the room first, then add a small install allowance, then estimate the running cost you will live with all season.
Then buy the job like someone who understands it: confirm the window style and measure the opening before anything else, size the unit to the room with the roughly 20 BTU per square foot rule adjusted for sun, ceilings, and occupancy, and resist oversizing because it leaves the room cold and clammy rather than comfortable. Decide honestly whether the lift is a safe DIY job or a paid one based on the unit’s weight and the window’s height, use a support bracket on a heavy unit, pitch the unit outward so it drains away from the house, and put it on its own outlet without an extension cord. Weigh the efficiency and the running cost alongside the sticker price, since a slightly pricier efficient unit can cost less over a few summers, and buy in the off-season where you can to pay less for the same appliance. The homeowners who come out of a window AC project satisfied are the ones who measured first, sized correctly, installed it safely, and treated the running cost as part of the decision rather than a surprise on the power bill.
This cost file exists to explain how window air conditioner costs are assembled, not to price your specific room, and nothing in it replaces reading the unit’s own instructions or, where the lift or the electrical calls for it, hiring a qualified person. Every dollar figure, BTU range, wattage, and running-cost reference above is illustration only: your real cost shifts with the capacity you need, your window style and floor, whether you install it yourself or pay for the lift, the unit’s efficiency, your local electricity rate, and how many hours you run it. Sizing rules of thumb are starting points, not exact specifications, and a room’s sun exposure, ceiling height, and occupancy all move the right capacity. Electrical requirements vary by unit, and a large model needing a dedicated or 240 volt circuit is licensed work to price separately. Confirm the window opening and the unit’s requirements before you buy, get a written quote for any paid install or electrical work, and treat any figure here as a planning range that varies by region, so get quotes for the parts you hire out.
Frequently asked questions
How much does it cost to install a window air conditioner?
A window air conditioner installation cost is mostly the unit itself plus a small amount for mounting or labor, so the honest answer is a range rather than one number. As an illustrative guide, a window air conditioner commonly runs about $150 to $900 for the unit depending on its cooling capacity, and installation adds only a little on top: near nothing if you mount it yourself with a bracket and kit, or roughly $100 to $300 if you hire a handyman for the lift and seal. That makes a window AC one of the cheapest ways to cool a room, unlike a mini-split or central system where the install dominates the price. Treat every figure here as a starting range, because your real cost shifts with the size you need, the window you have, the floor it sits on, and whether you do the work or pay someone.
What size window air conditioner do I need for my room?
Window air conditioners are sized by cooling capacity in BTU, and a common rule of thumb is roughly 20 BTU per square foot of room, so a 250 square foot bedroom points to about 5,000 BTU and a 450 square foot living room to about 10,000 BTU. That base figure shifts with the room: a sunny south or west facing room needs more, a heavily shaded room needs less, high ceilings and a busy kitchen add load, and extra people in the room add heat. Oversizing is a real mistake, not a safety margin, because an oversized unit cools the air fast without running long enough to pull out humidity, leaving the room cold and clammy. Use the roughly 20 BTU per square foot rule as a starting point, adjust for your room, and confirm the size against the specific space rather than buying the biggest unit on the shelf.
Is it cheaper to install a window AC yourself or hire someone?
Doing it yourself is almost always cheaper on paper, because a window air conditioner is designed to be homeowner installable, and the only added cost is a support bracket and a mounting or side-panel kit, often around $20 to $60. Hiring a handyman for the install typically adds an illustrative $100 to $300 for the labor, mostly the lift, the leveling, the bracket, and the weather seal. The case for paying someone is not complexity but weight and height: a large unit is heavy and awkward, an upper floor window is a genuine fall risk, and a unit that is not properly secured and pitched can leak or fall. If the unit is small and the window is at ground level, DIY is sensible; if the unit is heavy or the window is high, the labor buys safety more than skill.
How much does it cost to run a window air conditioner?
A window air conditioner's running cost depends on its size, its efficiency, how many hours it runs, and your local electricity rate, so it is best estimated rather than quoted. As an illustrative example, a mid-size unit drawing roughly 900 watts, running eight hours a day at an illustrative electricity rate, might cost somewhere around $20 to $50 a month during cooling season, with a small bedroom unit costing less and a large living room unit costing more. A more efficient unit, measured by its CEER rating, uses less power for the same cooling and costs less to run, which is why the sticker price and the running cost are two separate things worth weighing together. Estimate your own by taking the unit's wattage, multiplying by the hours you run it, converting to kilowatt-hours, and applying your rate, and treat any single figure as a rough illustration only.
Can a window air conditioner go in any window?
No, and the window type is one of the first things to check before buying, because a standard window air conditioner is built for a double-hung or single-hung window where the lower sash slides up and the unit sits on the sill with side panels filling the gaps. A casement or crank-out window, which swings open rather than sliding vertically, will not accept a standard unit, and those windows need a special vertical or casement model or a different cooling approach entirely. A horizontal sliding window also needs a specific style of unit sized to sit vertically in the track. Measure the window opening width and height before you buy, confirm the sash and frame can support the unit's weight, and match the unit to the window rather than assuming any model fits any opening.
Do I need a special outlet or circuit for a window AC?
Most small and mid-size window air conditioners run on a standard household 120 volt outlet, so no special wiring is needed, but there are two cautions worth naming. First, a window AC draws a meaningful amount of current, so it should ideally have a circuit it does not have to share with other heavy loads, since running it alongside a microwave or space heater on the same circuit can trip the breaker. Second, larger units, typically the biggest capacities meant for wide open spaces, sometimes require a dedicated 120 volt circuit or even a 240 volt outlet, which would mean an electrician and added cost. Check the unit's electrical requirements before buying, avoid extension cords and use the unit on its own outlet where possible, and if a large unit calls for a dedicated or 240 volt circuit, factor an electrician into the budget.
Is a window AC or a portable AC better?
For most single rooms a window air conditioner is more efficient and usually cheaper to run than a portable unit of the same rated capacity, because a portable AC sits on the floor and vents its heat out through a hose, which is less effective than a window unit that exhausts heat directly outside. The tradeoff is that a portable unit does not block the window, is easier to move between rooms, and works where a window will not accept a standard unit, such as a casement window. A window unit generally cools better for the money and frees up floor space, while a portable unit trades some efficiency for flexibility and works in more window types. Choose the window unit when the window suits it and the unit can stay put, and the portable when the window is incompatible or you need to move the cooling around.
When is the cheapest time to buy a window air conditioner?
Window air conditioner prices tend to follow demand, so the cheapest time to buy is usually outside peak cooling season, meaning the fall and winter months and early spring before the first heat wave, when retailers discount to clear inventory. Buying in the middle of a summer heat wave is the most expensive time, because demand spikes, popular sizes sell out, and there is no incentive to discount. If you can anticipate the need and buy in the off-season, you often pay less for the same unit, and you avoid the scramble of shopping when every store is picked over. Treat the timing as a real lever on the unit price, plan ahead where you can, and remember that the running cost over the season matters as much as the sticker price you pay at purchase.