What's on this page
- What luxury vinyl plank flooring costs per square foot
- LVP flooring cost by grade and wear layer
- What drives LVP flooring cost up or down
- Wear layer thickness: the durability lever
- SPC vs WPC core: which costs more
- Click-lock vs glue-down installation cost
- Underlayment and what it adds
- LVP vs laminate vs hardwood cost and durability
- DIY LVP install cost versus hiring a pro
- Where an installed LVP dollar goes
- Total LVP project cost by room size
- LVP cost for a whole house
- Cost by room: kitchen, bath, basement, bedroom
- Cost of luxury vinyl tile (LVT) versus plank
- Is LVP flooring waterproof
- LVP pros and cons
- How long LVP flooring lasts
- Is LVP flooring worth it
- What an LVP flooring quote should include
- A worked example: LVP in a living room
- Common mistakes that inflate LVP flooring cost
- How to save on LVP flooring cost
- The bottom line
Short answer: Luxury vinyl plank flooring cost commonly runs an illustrative $4 to $12 per square foot installed, with the material at an illustrative $2 to $7 and professional install labor adding $2 to $4; a do-it-yourself click-lock install removes the labor line. Wear layer thickness is the strongest lever on price and durability: budget planks run 6 to 12 mil, most homes want 12 to 20 mil, and 20 mil and up suits heavy traffic and pets.
Luxury vinyl plank flooring cost, or LVP flooring cost in the shorthand most quotes use, is one of the most searched numbers in home improvement, and for good reason: luxury vinyl plank has become the default choice for homeowners who want a wood look without the price or fragility of real wood. Yet the same room can be quoted at a few dollars a square foot for a builder-grade floating floor or several times that for a thick, premium plank installed by a crew, and both quotes can be honest. The gap is not padding. It reflects genuinely different plank grades, different wear layer thicknesses, different cores, and the simple question of whether you or an installer supplies the labor.
This cost file lays out what luxury vinyl plank flooring actually costs, so you can read a quote and know which kind of floor you are buying. It covers illustrative price per square foot for material and install, what drives the number up or down (wear layer thickness in mils, SPC versus WPC core, click-lock versus glue-down, and underlayment), how LVP compares on cost and durability to laminate and hardwood, the honest do-it-yourself versus professional math, total project cost by room size and for a whole house, the pros and cons, and whether the floor is worth it. Every dollar figure is illustrative and varies with your product, region, and installer, so treat the numbers as a planning framework and sketch your own floor in the flooring cost estimator before you budget. For the deeper head-to-head with laminate, our vinyl versus laminate flooring comparison sits alongside this cost file.
Key takeaways
- Illustrative LVP floors commonly run about $4 to $12 per square foot installed, with material at an illustrative $2 to $7 and professional install labor adding an illustrative $2 to $4 on top. A do-it-yourself install removes the labor line.
- Wear layer thickness (measured in mils) is the strongest lever on both price and durability: budget planks run 6 to 12 mil, most homes want 12 to 20 mil, and 20 mil and up suits heavy traffic and pets.
- Core matters too. Rigid SPC (stone-plastic composite) is harder and more dent resistant, WPC (wood-plastic composite) feels softer and warmer, and both cost a little more than thin flexible LVP.
- Click-lock floating install is the DIY-friendly default and slightly cheaper on labor, while glue-down costs a little more but stays put in large rooms and commercial spaces.
- Every figure here is illustrative and moves with your plank grade, room, local market, and installer, so get written quotes for your own floor rather than budgeting from a national average.
What luxury vinyl plank flooring costs per square foot
The most useful way to read LVP flooring price per square foot is as an installed figure, because it lets you compare a small bathroom to a whole main floor on equal footing. As a rough, illustrative guide, a professionally installed luxury vinyl plank floor commonly runs about $4 to $12 per square foot, and that band spans almost the entire residential market: a builder-grade floating floor in a simple rectangular room near the bottom, and a thick, premium plank in a cut-up space toward the top. Step into thick commercial-grade planks and complex layouts and the number can climb further.
Underneath that installed figure sit two moving parts. The plank material itself typically lands at an illustrative $2 to $7 per square foot depending on grade, and professional install labor adds an illustrative $2 to $4 per square foot on top. Underlayment, trim, transitions, and removing the old floor round out the total with smaller lines. A do-it-yourself install removes the labor slice entirely, which is why LVP is such a popular first flooring project, though it asks you to do the prep and the cutting yourself.
Hold two ideas as you read the rest of this cost file. First, the grade of the plank, driven mostly by its wear layer, moves the material price more than almost anything else. Second, per-square-foot math flatters big open floors and punishes small, cut-up rooms, because the fixed costs of showing up, prepping, and trimming spread thin over a large area and thick over a tiny one. Sketch your own space in the flooring cost estimator so every figure below sits next to a number for your floor.
LVP flooring cost by grade and wear layer
The clearest driver of the material price is the grade of the plank, and grade is largely a story about the wear layer, the clear protective top surface measured in mils (thousandths of an inch). The table below lays out illustrative material costs per square foot by grade, from least to most expensive, along with the room each grade tends to suit. Treat it as a shape rather than a quote, because your real number depends on the brand, the core, and your market.
| Grade (wear layer, illustrative) | Illustrative material per sq ft | Best suited for |
|---|---|---|
| Budget (about 6 to 12 mil) | About $2 to $3 | Light-traffic rooms, rentals, short stays |
| Mid-range (about 12 to 20 mil) | About $3 to $5 | Most homes, everyday family traffic |
| Premium (about 20 to 28 mil) | About $5 to $7 | Pets, high traffic, long-term ownership |
| Commercial (about 28 mil and up) | About $6 to $9 | Heavy traffic, light commercial spaces |
Two patterns run through the table. The first is that the wear layer, not the printed wood image, is what you are really paying for as the price climbs, because it is the layer that decides how long the floor keeps looking good. The second is that a mid-range plank covers most family homes comfortably, so paying up to premium makes sense mainly when pets, heavy traffic, or a long ownership horizon justify the extra durability. The companion on this page turns any of these grades into an installed total for your own square footage, so you can price the floor you actually want.
What drives LVP flooring cost up or down
No single factor sets the price, so it helps to see how much each one tends to pull on the total. The plank grade and its wear layer thickness carry the most weight, because they move the material line directly and span a wide range. The core type and overall quality come next, since a rigid SPC or WPC plank costs more than thin flexible LVP. The installation method and labor, the size and layout of the room, and the smaller lines for underlayment, trim, and old floor removal round out the picture.
What drives LVP flooring cost
Illustrative weighting of how much each factor tends to pull on the total.
The weights are illustrative. The pattern is fixed: the plank grade and core carry the most weight, and install, room, and the smaller lines settle the rest.
Hold this shape in mind when you read a quote. If one bid is far below the others, the gap almost always lives in the two heaviest factors, the grade and the core, because those are the easiest lines to quietly thin by substituting a cheaper plank. A quote that names the specific product, its wear layer in mils, and its core type is describing a real floor; one that just names a price and a color is hiding where the money went. Our note on comparing contractor quotes shows how to normalize bids so the true low price reveals itself.
Wear layer thickness: the durability lever
If you remember one spec about LVP, make it the wear layer, because it is the single number that best predicts how long the floor keeps looking new. The wear layer is the clear, tough top coat that sits above the printed wood image, and it is measured in mils. A thin wear layer scuffs and scratches sooner, letting the printed image below show wear, while a thick one shrugs off the grit, claws, and dragged furniture that dull a floor over years. Two planks that look identical in a showroom can wear completely differently based on this one spec.
The practical grades are easy to hold in mind. Around 6 to 12 mil is budget territory, fine for a guest room, a rental, or a floor you expect to replace before long. Around 12 to 20 mil is the sweet spot for most family homes, balancing cost against a floor that holds up to everyday traffic. Above 20 mil is aimed at pets, high-traffic entries and kitchens, and homeowners who want the floor to last the length of their ownership. Commercial-grade planks push higher still for spaces that take real abuse.
Because more wear layer means more material, it also raises the price, which is why the grade table above climbs with the mil count. The honest move is to match the wear layer to the room’s traffic rather than defaulting to the cheapest plank or overspending on a lightly used bedroom. A thick wear layer in a busy kitchen with a dog is money well spent; the same plank in a quiet study is more floor than the room needs. Set your grade in the companion on this page and watch the material line respond.
SPC vs WPC core: which costs more
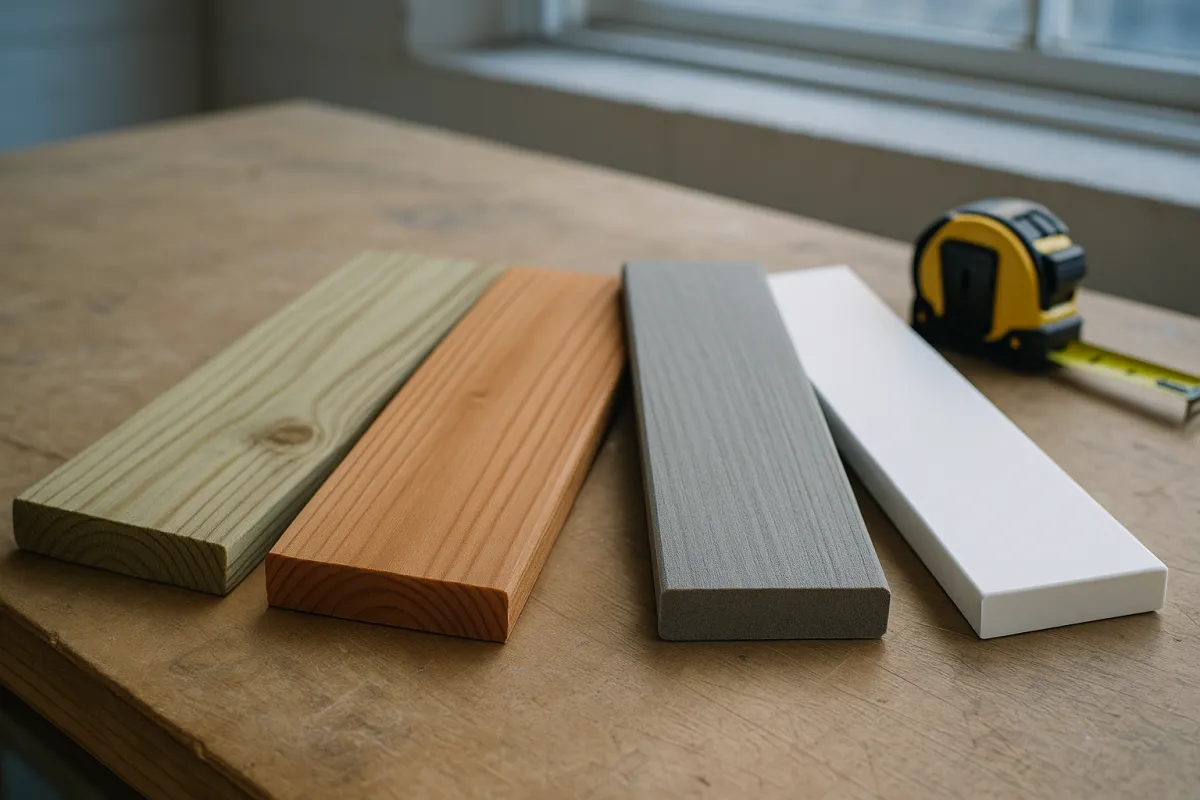
Beneath the wear layer sits the core, and the choice between the two rigid-core families, SPC and WPC, shapes how the floor feels and what it costs. SPC stands for stone-plastic composite: its core is built around limestone powder, which makes it dense, hard, and very dimensionally stable, so it resists dents and holds steady through temperature swings. That toughness is why SPC is often recommended for busy rooms, over imperfect subfloors, and in spaces like sunrooms where a floor sees heat and cold.
WPC stands for wood-plastic composite, though despite the name there is no structural wood; the core is a foamed plastic that is lighter and has a bit more give. That gives WPC a softer, warmer step and a slightly quieter feel underfoot, which some homeowners prefer in living spaces, at the cost of a little less dent resistance than SPC. Both are rigid enough to feel solid and to hide minor subfloor flaws, which is their main advantage over thin flexible LVP that telegraphs every bump.
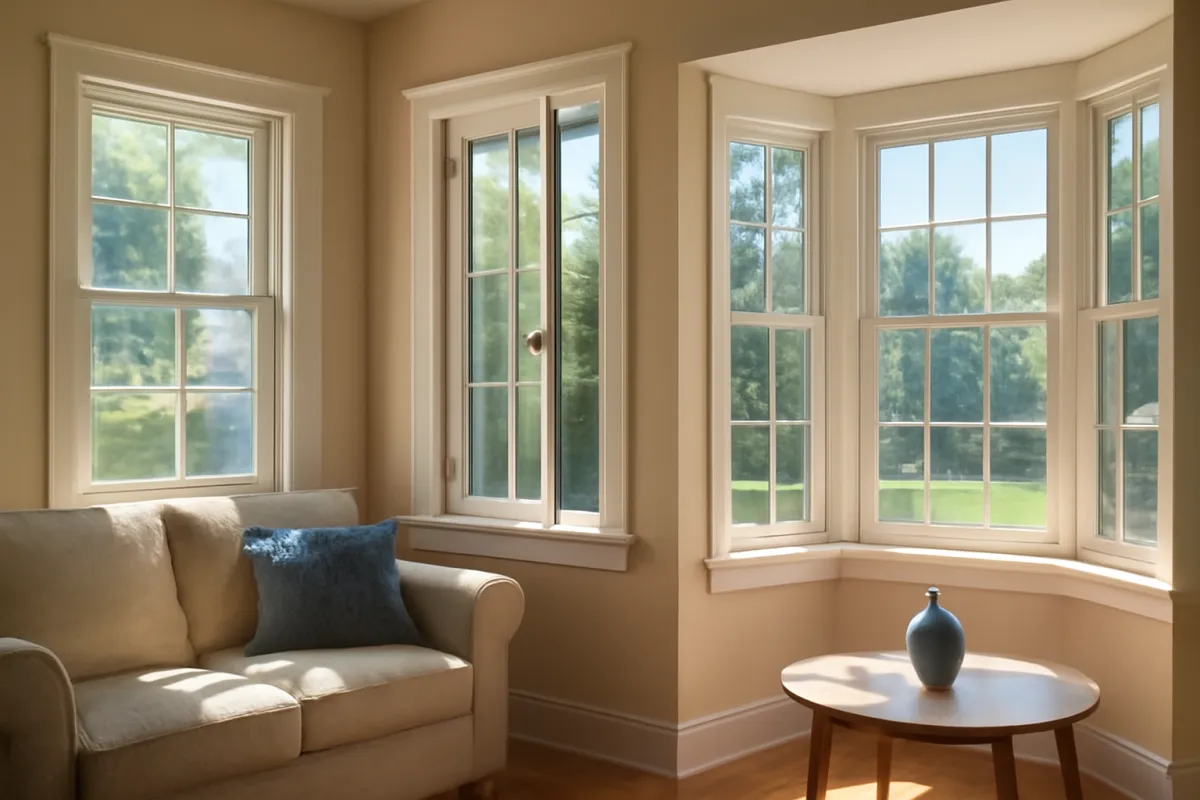
In cost terms the two are close, and both sit above thin flexible LVP because there is more material in a rigid plank. The choice usually comes down to feel and use rather than price: SPC for toughness and stability, WPC for comfort and quiet. One caution is that marketing names vary between brands, and some products blend features, so confirm which core a given plank actually uses before you compare it on price. The companion lets you price either core against your own room.
Click-lock vs glue-down installation cost
How the floor attaches to the room is the other big installation choice, and it changes both the labor cost and where the floor makes sense. The large majority of residential LVP today is click-lock, a floating floor whose planks snap together edge to edge over a thin underlayment without any adhesive. It is the faster method, the more forgiving one for a first-timer, and slightly cheaper on labor because there is no glue to spread and less cure time to manage. For most homes, click-lock is the sensible default.
Glue-down LVP bonds each plank directly to the subfloor with adhesive. That takes more labor and adds the cost of the adhesive itself, so it typically prices a little higher installed, and it demands a cleaner, flatter subfloor because there is no floating layer to bridge small flaws. In exchange, a glued floor stays put, feels very solid underfoot, and copes better with the wide temperature swings and large open spans that can make a big floating floor expand and contract. It is common in large rooms, commercial spaces, and sunrooms.
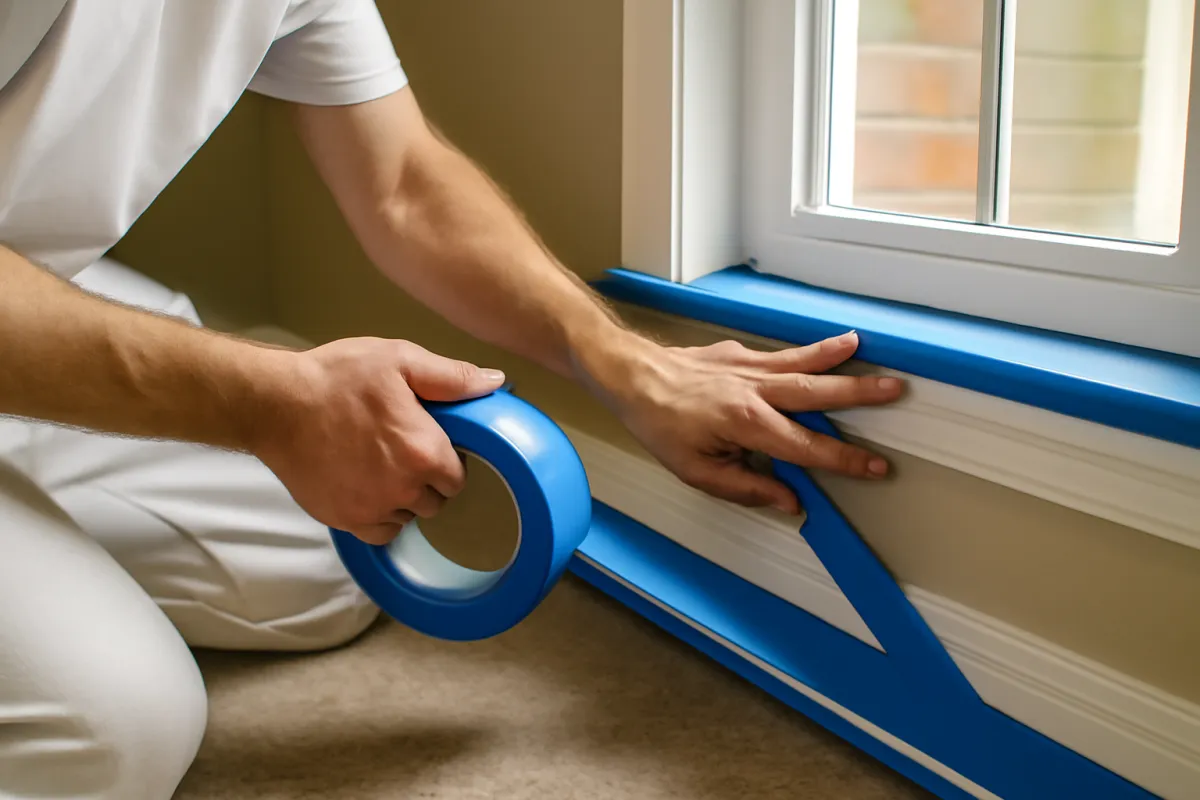
The cost difference between the two methods is usually modest next to the plank grade you pick, so the smart order is to choose the method by the space, then price it. A standard rectangular room in a home almost always suits click-lock; a very large open floor, a commercial job, or a room with big temperature swings may argue for glue-down. Whichever you choose, the subfloor prep matters more than the method, because both fail if the surface underneath is not flat, clean, and dry.
Underlayment and what it adds
Underlayment is the thin layer between the subfloor and a floating LVP floor, and it is a small line that does real work. It cushions the step, dampens sound so the floor does not click or echo, smooths out minor subfloor imperfections, and in some cases adds a moisture barrier over a concrete slab. On a floating click-lock install it is effectively required, and skipping it or using the wrong type is a common way a cheap floor ends up feeling hollow or noisy underfoot.
The cost is modest but not zero, typically an illustrative $0.50 to $1 or so per square foot depending on the type and thickness. Basic foam is the least expensive, cork and rubber underlayments cost more and add better sound damping, and moisture-barrier products are worth the premium over a concrete slab or in a basement. Many LVP planks now come with a thin underlayment pad already attached to the back, which simplifies the install and can save the separate line, though a premium separate underlayment can still improve comfort and sound.
The practical rule is to treat underlayment as part of the real cost of the floor rather than an optional add-on to cut. A quote that leaves it out, or that pairs a bargain foam with a premium plank, is a quote to question. Over a concrete slab in particular, confirm the moisture strategy, because water vapor pushing up through a slab is a classic way a floating floor develops problems. Set your room in the companion and the underlayment line is folded into the installed total so it does not surprise you later.
LVP vs laminate vs hardwood cost and durability
It helps to see where LVP sits among the floors it competes with, because the choice is rarely LVP in a vacuum. The table below lays out illustrative installed costs, water resistance, and typical lifespan for the four most common wood-look options. Every figure is illustrative and varies by product, tier, and market, so treat it as a shape rather than a quote.
| Floor type (per sq ft, installed, illustrative) | Typical installed cost | Water resistance | Typical lifespan |
|---|---|---|---|
| LVP (luxury vinyl plank) | About $4 to $12 | Highly water resistant, often waterproof | About 15 to 25 years |
| Laminate | About $3 to $10 | Water sensitive wood-fiber core | About 15 to 25 years |
| Engineered hardwood | About $6 to $15 | Moderate, real wood veneer | About 20 to 30 years |
| Solid hardwood | About $8 to $20 or more | Low, but refinishes for decades | 30 or more years |
The pattern is clear. Laminate is often a touch cheaper than LVP on material at each tier, but it trades away the water resistance that makes LVP so popular in kitchens and baths. Hardwood, both engineered and solid, costs more and is more sensitive to moisture, but it offers something neither vinyl nor laminate can: real wood you can sand and refinish, which extends its life for decades. LVP occupies the practical middle, cheaper than wood and more water resistant than laminate.
Which one wins depends on the room and the horizon. For a wet-prone or heavy-traffic space, LVP is usually the safest spend. For a dry room where a wood-authentic look is the priority and the budget favors it, laminate competes well, and our vinyl versus laminate flooring comparison walks that decision in depth. For a forever home where refinishing matters, hardwood earns its premium. Price LVP against your own room in the flooring cost estimator before you commit.
DIY LVP install cost versus hiring a pro
The do-it-yourself versus professional choice is the biggest single fork in the LVP budget, because install labor is a large slice of the installed cost. On a professional job, labor commonly adds an illustrative $2 to $4 per square foot on top of the material, so on a 200 square foot room that can be several hundred dollars of the total. Because most LVP is click-lock, a patient first-timer can capture that saving by flooring a simple rectangular room over a weekend with a saw or cutter, spacers, and a tapping block.
The professional route costs more because you are buying speed, clean edges, and a crew that has prepped hundreds of subfloors. Installers get the first row straight (which sets the whole floor), cut neat borders around doorframes and cabinets, handle transitions between rooms, and spot subfloor problems before they become failures. On a complicated layout, an uneven slab, or a glue-down job, that expertise is often worth the labor, and because the labor rate is similar across plank grades, hiring a pro does not push you toward a cheaper or pricier floor.
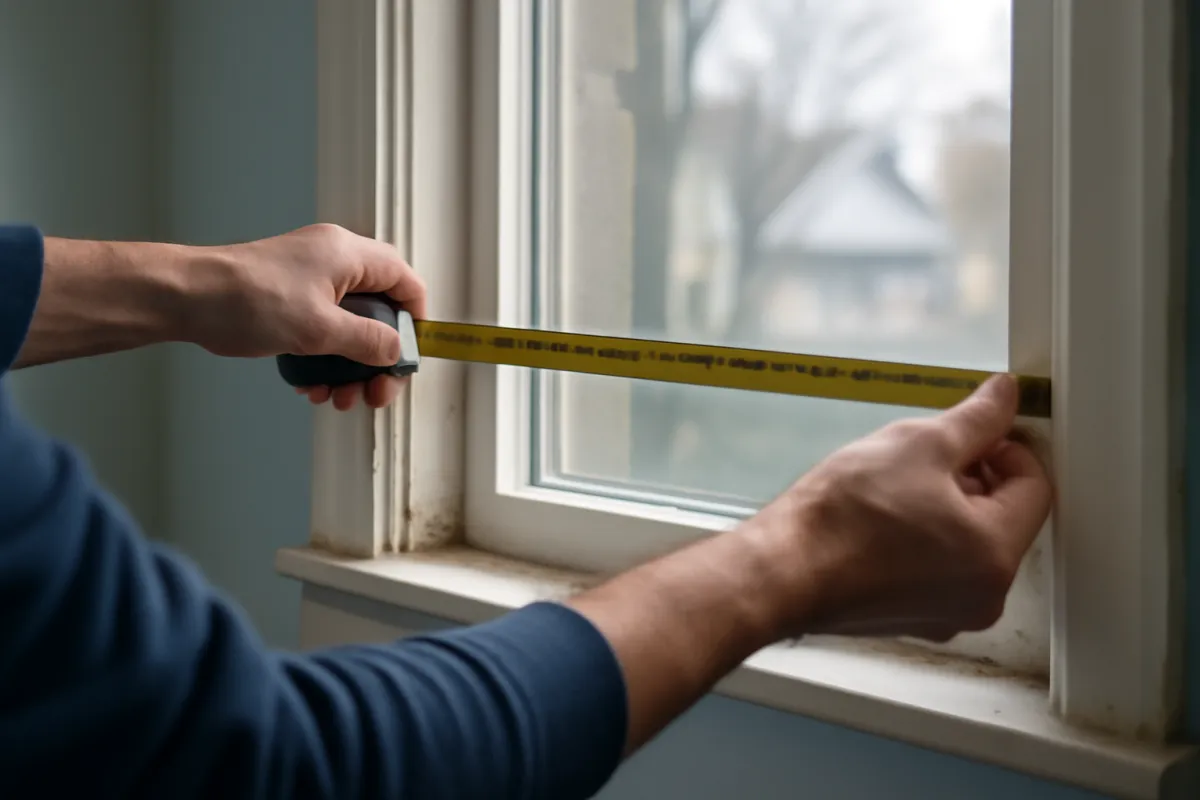
The honest verdict is that do-it-yourself LVP is worth it on a simple room with a sound subfloor and realistic expectations, and a false economy when the layout is complex, the subfloor needs leveling, or the job is glue-down. A wavy floor laid over an unprepped subfloor costs more to fix than the labor saved. Our note on planning a do-it-yourself versus hire decision helps you weigh the saving against the risk for your own room, and the companion prices both paths.
Where an installed LVP dollar goes
It helps to see how an installed LVP budget divides, because it explains why doing the work yourself changes the total so much and why a suspiciously low quote usually cut a real corner. On a typical professionally installed floor, the plank material is the largest single band, the install labor is the next largest, and the smaller lines cover underlayment, trim and transitions, and removing and prepping the old floor. The exact split shifts with the product and the room, but the shape is consistent.
Where an installed LVP dollar goes
Illustrative breakdown of a professionally installed floor, summing to 100.
The shares are illustrative. The principle is fixed: material and labor are the two big bands, so doing the install yourself removes a real slice of the total.
The labor band is the one you can supply yourself, which is why DIY-friendly flooring is such a popular way to trim a project’s cost. It also explains the trap in the cheapest quote: a bid far below the others usually thinned one of these bands, most often the prep or the underlayment, and those are exactly the lines that decide whether the finished floor stays flat and quiet. When you compare LVP quotes, check that the prep and underlayment are actually in the price, not assumed away.
Total LVP project cost by room size
Because LVP prices per square foot, total project cost scales with the room, so it helps to see how the installed range plays out across common spaces. A small bathroom of roughly 50 square feet might land at an illustrative $200 to $600 installed, a 120 square foot bedroom near an illustrative $500 to $1,400, a 200 square foot living room around an illustrative $800 to $2,400, and a 400 square foot open living and dining area at an illustrative $1,600 to $4,800. These bands widen with the grade you pick and the complexity of the layout.
Two quirks bend those numbers. First, small rooms cost more per square foot than the headline range suggests, because the fixed costs of showing up, prepping, and trimming spread thin over a large floor and thick over a tiny one, so a single bathroom rarely hits the bottom of the range. Second, cut-up rooms with many corners, closets, and transitions take more cutting and waste more material than a clean rectangle of the same area, which nudges both the labor and the material up.
Waste and overage deserve their own line in any project. Plan to order about ten percent more plank than the room’s measured square footage to cover cuts, mistakes, and a small stash of spares for future repairs, and more like fifteen percent for a diagonal layout or a very cut-up room. That overage is real cost, but a mid-project shortage that stops the job while you wait for a matching dye lot is worse. Set your room size and grade in the flooring cost estimator to see the total, including overage, for your own space.
LVP cost for a whole house
Flooring a whole house is the same math at scale, so a rough, illustrative way to sketch it is to multiply your finished area by an all-in figure of about $4 to $12 per square foot installed. On that basis, a 1,500 square foot home might land near an illustrative $6,000 to $18,000 professionally installed, a 2,000 square foot home near an illustrative $8,000 to $24,000, and a 2,500 square foot home proportionally more. The wide spread within each is driven mostly by the plank grade and how cut-up the floor plan is.
Whole-house jobs bring a few cost levers that single rooms do not. Doing the whole house in one material and one dye lot avoids awkward transitions and often earns a better material price by the pallet, while phasing it room by room spreads the cost but risks dye-lot mismatches later. Stairs, if you are flooring them in matching LVP, are labor-intensive and priced separately per tread and riser, so a staircase can add a surprising amount to an otherwise simple job. Removing old carpet, tile, or glued-down flooring across a whole house adds a real removal and disposal line.
For a homeowner weighing new floors as part of a larger project, it helps to see where flooring sits among the other lines. Our kitchen remodel cost file and bathroom remodel cost file show where the floor lands in those rooms, and our cost to finish a basement file covers where a water-resistant floor fits a below-grade budget. Price your own footprint and grade in the companion so the whole-house number sits next to real inputs rather than a rule of thumb.
Cost by room: kitchen, bath, basement, bedroom
LVP is a favorite precisely because one material can run sensibly through almost every room, but each space brings its own cost notes. In the kitchen, LVP is a strong pick because it handles spills, drips, and the occasional appliance leak, and its warmth underfoot is welcome where you stand to cook. Kitchens are often cut up with islands, cabinets, and appliance bays, so the labor and waste run a little higher than a clean rectangle of the same size.
In bathrooms, laundry rooms, and mudrooms, LVP’s water resistance is the whole point, and it is usually the safer spend than laminate in any room that meets water. These rooms are typically small, so the per-square-foot cost tends toward the top of the range even though the total dollar figure stays modest. Careful sealing at the perimeter and around fixtures matters as much as the plank itself, because a floating floor still lets water reach the subfloor through gaps if a leak sits.
Basements are another natural home for LVP, since a below-grade space that could see moisture punishes wood and laminate but suits a water-resistant plastic plank. The cost note here is the subfloor: a concrete slab needs a moisture strategy and often a rigid-core plank that copes with minor unevenness, and rigid SPC is a common recommendation. Bedrooms, living rooms, and hallways are the easy rooms, reliably dry and often simple rectangles, so they tend to price toward the lower, cleaner end of the range. For the full room-by-room reasoning on where each floor type fits, our vinyl versus laminate flooring comparison lays it out.
Cost of luxury vinyl tile (LVT) versus plank
Luxury vinyl tile is the same product family as luxury vinyl plank, cut into square or rectangular tiles instead of long boards, and the cost of luxury vinyl tile tracks plank closely at each grade. The layers are the same: a printed image, a clear wear layer measured in mils, and a flexible or rigid core. So the illustrative material band of about $2 to $7 per square foot and the illustrative professional labor band of $2 to $4 apply to tile as well, with the wear layer again doing most of the work on price. Where LVT differs is the look. It usually mimics stone, ceramic, or concrete rather than wood, which is why it shows up in baths, mudrooms, and laundry rooms more often than in living rooms.
Two details can nudge tile above plank of the same grade. Groutable LVT, installed with small gaps that are filled with a flexible grout to mimic real tile, adds the grout material and more labor, so it typically prices a little higher installed than a click-lock plank. And tile layouts with a pattern, a border, or a diagonal set waste more material in cuts than a straight plank run, so order overage generously. Neither difference is large next to the grade you choose, so pick the format by the look and the room, then price it.
It also helps to place luxury vinyl flooring cost, plank or tile, against plain vinyl flooring cost. Sheet vinyl and thin peel-and-stick tiles are a simpler product with a much thinner wear layer, and they generally sit below luxury vinyl on price, which is why they remain common in rentals and utility rooms. What luxury vinyl adds for the extra money is the thicker wear layer, the rigid core, the more convincing image, and a click-lock or groutable install a homeowner can do. Sketch either format in the flooring cost estimator and the same grade math applies.
Is LVP flooring waterproof
Water resistance is the headline feature that made luxury vinyl plank the default in wet-prone rooms, so it is worth stating precisely. Quality LVP is highly water resistant, and many rigid-core products are marketed as fully waterproof, because the plank itself is plastic and does not absorb water the way a laminate’s wood-fiber core does. Spill a glass, mop the floor, or catch a small appliance leak, and an LVP plank shrugs it off where a laminate might swell and lift. That single property is why LVP has taken over kitchens, baths, laundry rooms, and basements.
The important caveat is that waterproof describes the plank, not the entire floor system. On a floating click-lock floor, water can still find its way through seams and gaps and sit on the subfloor underneath, where it can foster mold or damage the subfloor even though the planks themselves are unharmed. A major leak or a flood should still be dried out promptly, the floor lifted if needed, and the subfloor confirmed dry. Waterproof means the plank survives; it does not mean you can ignore standing water indefinitely.
The practical takeaway is to confirm the specific waterproof rating on any product and follow its installation requirements, especially the perimeter and transition details, before relying on it in a full bathroom or basement. Water resistance is a real advantage of LVP over laminate, and it is a large part of why the floor is worth its cost in the rooms that need it, but it rewards a correct install rather than excusing a careless one.
LVP pros and cons
Every floor is a set of tradeoffs, and LVP’s are worth stating plainly so the cost sits next to what you get. On the plus side, luxury vinyl plank is highly water resistant and often waterproof, comfortable and quiet underfoot, convincingly wood-look in its better grades, easy to clean, and DIY-friendly to install, all at a fraction of hardwood’s price. Rigid-core versions hide minor subfloor flaws, and the click-lock system makes both installation and single-plank repairs approachable. For a durable, practical, water-resistant floor, the pros are substantial.
The cons are real but manageable. LVP is a plastic product, so it cannot be sanded and refinished the way real wood can; when the wear layer eventually gives out, the floor is replaced rather than restored. Its softer surface can show scratches more readily than laminate’s very hard top layer, though a thick wear layer narrows that gap. Cheap, thin planks can dent under heavy furniture, feel hollow without good underlayment, and look obviously synthetic, which is why grade matters. Some homeowners also prefer the environmental profile and resale cachet of real wood.
On balance, the pros dominate for most everyday homes, especially in rooms where water, traffic, or budget rule out hardwood. The cons mostly argue for two things: buying enough wear layer for the room’s traffic, and choosing a reputable rigid-core product rather than the thinnest bargain plank. Match the grade to the use, and most of the downsides shrink to footnotes. Weigh the pros and cons against your own room and budget in the flooring cost estimator before you commit.
How long LVP flooring lasts
Lifespan is where the price differences between grades pay off or come back to bite, so it is worth setting honest expectations. A quality LVP floor commonly lasts somewhere in the illustrative range of fifteen to twenty-five years in a home when it is installed well and matched to the room, while a thin budget plank in a busy space can look tired in a handful of years. The range is wide because durability depends far more on the wear layer and the install than on the brand name on the box.
The factors that shorten any LVP floor’s life are predictable: a thin wear layer that scratches through in a high-traffic path, grit that is not swept and acts like sandpaper, heavy furniture without felt pads that dents a softer plank, a poorly prepped subfloor that leaves the floor wavy or lets seams work loose, and direct sun that can fade or, on some products, cause a floating floor to expand. Matching the wear layer to the traffic and prepping the subfloor correctly does more for longevity than any single product choice.
Spread over a realistic service life, even a premium plank often works out to a modest illustrative cost per year, which is worth remembering when a bargain plank tempts you. A floor that costs more up front but lasts twenty years can be cheaper per year than a thin plank replaced twice in the same span, and it spares you the labor and disruption of redoing it. Durability, in other words, is a cost factor, not just a quality one, and the companion lets you weigh a thicker grade against a thinner one for your own room.
Is LVP flooring worth it
For most homes, LVP is worth it, and the value case is easy to state. It delivers a convincing wood look, real water resistance, comfortable and quiet footfeel, and easy maintenance at a fraction of what hardwood costs, and it installs DIY-friendly over a weekend. In kitchens, baths, basements, and busy family spaces, where water and traffic would punish a more delicate floor, that combination of durability, water resistance, and cost is hard to beat, which is exactly why LVP has become the default choice in so many homes.
The value case weakens in specific situations worth naming honestly. If you specifically want a floor you can sand and refinish for decades, only real wood offers that, and a forever home may justify hardwood’s premium. If a room is reliably dry and you prefer a slightly crisper wood look for less money, laminate competes well, as our vinyl versus laminate flooring comparison explains. And a bargain, thin plank in a hard-working room is a false economy that will look worn fast, so the value depends on matching the grade to the use.
The honest framing is that LVP is worth it for a durable, water-resistant, low-maintenance floor that fits most budgets, and a poorer choice when refinishing or a specific look outweighs those strengths. The deciding questions are whether the room’s water risk and traffic favor a resilient plank, and whether the grade you can afford matches how hard the floor will work. Answer those two well and the durability and low maintenance usually justify the illustrative cost several times over. Price it against your own room in the flooring cost estimator before deciding.
What an LVP flooring quote should include
A complete LVP quote protects you from the low bid that cut a real corner, so it helps to know what belongs in one. A thorough quote should name the specific product and its wear layer in mils, the core type (flexible, SPC, or WPC), the installation method (click-lock float or glue-down), the underlayment, the trim and transition pieces, the removal and disposal of the old floor, and any subfloor prep such as leveling. When those lines are itemized, you can compare bids on equal footing instead of guessing what each one assumed.
The lines that quietly disappear from a cheap quote are usually the prep, the underlayment, and the plank grade, and those are exactly the ones that decide whether the finished floor stays flat, quiet, and durable. A bid far below the others has to have thinned something real, most often by substituting a thinner-wear-layer plank or assuming the subfloor is ready when it is not. Before you choose on price, confirm each quote includes the same grade, the same underlayment, and the same prep, not just the same square footage of planks.
Ask two more questions of any flooring quote: what happens if the installer finds a subfloor problem once the old floor is up, and what the labor warranty covers. Subfloor surprises are common, and knowing in advance whether they are a change order or included prevents a mid-job dispute. Hold every quote against your own flooring cost estimator sketch, so a number far above or below your illustrative range is a prompt to ask why, and lean on our note on comparing contractor quotes to normalize the bids.
A worked example: LVP in a living room
Walk one illustrative project through the numbers to see how the factors connect. A homeowner has a roughly 250 square foot living room with a sound but slightly uneven subfloor, a dog, and a plan to stay in the home for many years. They want a floor that looks like wood, survives the dog, and does not need refinishing, so they are choosing between a budget plank and a premium rigid-core LVP, and deciding whether to install it themselves.
The budget path prices out first. A flexible budget plank at an illustrative $2 per square foot for material, ordered with ten percent overage so 275 square feet of plank covers the 250 square foot room, runs about $550 of plank plus about $206 of underlayment and trim at an illustrative $0.75 per square foot, or roughly $756 all in with a do-it-yourself install that adds only their weekend and a few tools. It would produce a serviceable floor, but the thin wear layer and the dog are a poor match, and the slightly uneven subfloor argues for a rigid core the budget plank does not provide. The premium path prices next: a 20 mil rigid SPC plank at an illustrative $6.50 per square foot for material, a premium grade plus the rigid-core premium, with the same overage and underlayment, installed by a pro at an illustrative $3 per square foot on the 250 measured feet. That lands the room near an illustrative $1,788 of plank, $206 of underlayment and trim, and $750 of labor, or about $2,744 all in and roughly $11 per square foot, and the companion on this page reproduces exactly that math so they can adjust it for their own grade and labor rate.
The homeowner weighs the roughly $1,990 difference against the stakes. Because the dog and the long ownership horizon reward a thick wear layer, and because the uneven subfloor suits a rigid SPC core and a professional install, they choose the premium floor, judging the extra cost as buying years of good looks and a floor that lies flat. Had the room been a lightly used, reliably flat guest bedroom, the budget plank and a self-install would have been the smarter spend. The lesson is the shape, not the exact dollars: let the room’s traffic and subfloor decide the grade and the install path, and price both before choosing.
Common mistakes that inflate LVP flooring cost
Most LVP regrets and overspends trace back to a short list of avoidable errors, and every one is a factor the buyer assumed instead of checking.
- Buying on the plank price alone. A cheap quote almost always thinned the wear layer, the underlayment, or the prep. Compare the specific product, its mil rating, and its core, not just the price and the color.
- Choosing a thin wear layer for a busy room. A 6 to 12 mil plank under heavy traffic or a pet wears through fast and looks tired in a few years. Match the wear layer to how hard the room works.
- Skipping subfloor prep on a DIY install. A floating floor telegraphs every bump underneath, so a floor laid over an unprepped subfloor feels wavy and can fail at the seams. The prep is the job, not an optional extra.
- Forgetting underlayment or using the wrong type. Skipping it, or pairing bargain foam with a premium plank, leaves the floor hollow, noisy, or exposed to slab moisture. Treat underlayment as part of the real cost.
- Ordering exactly the room’s square footage. Without overage for cuts, waste, and spares, a mid-project shortage stops the job while you wait for a matching dye lot. Order about ten percent extra, more for a cut-up room.
- Ignoring the small-room premium. A single bathroom or closet costs more per square foot than a big open floor, because fixed costs spread thin over area. Do not expect a tiny room to hit the bottom of the range.
Every one of these is prevented by the same discipline: match the grade to the room, prep the subfloor, budget the underlayment and overage, and compare full quotes rather than plank prices.
How to save on LVP flooring cost
Saving on LVP is possible without gutting the quality, as long as you cut the right things and not the wear layer or the prep. The largest legitimate saving is your own labor, but only on a floor that suits a do-it-yourself install: a simple rectangular room with a sound, flat subfloor and a click-lock plank. On that kind of room, renting a cutter and doing careful prep yourself captures most of the professional result for the material cost alone. The saving evaporates the moment the layout is complex or the subfloor needs leveling you are not equipped to do.
Other honest savings come from scope, product, and timing rather than corner-cutting. Choosing a mid-range wear layer that matches the room, rather than defaulting to premium in a lightly used space, right-sizes the material spend. Buying the whole house in one dye lot by the pallet often earns a better price than buying room by room. Flooring only the rooms that need new floors, watching for end-of-line or overstock plank deals in a grade that still suits the room, and bundling the job with other work while a crew is mobilized all trim the total honestly.
The saving to never chase is a thinner wear layer or skipped prep on a floor that will work hard, because that is the discipline that pays for itself. A floor that scratches through or waves at the seams is not a saving; it is a second job. Sketch your own floor in the flooring cost estimator to find the grade and scope that fit your budget, and let the quotes compete on an itemized scope so the cut comes from the right place. Our note on planning a do-it-yourself versus hire decision helps you decide where your own labor saves the most.
The bottom line
LVP flooring cost looks confusing only until you see what the price is really buying. Illustrative professional floors run about $4 to $12 per square foot installed, with material at an illustrative $2 to $7 and install labor adding an illustrative $2 to $4, while a do-it-yourself install removes the labor line on a simple room. The single biggest lever behind any quote is the plank grade, driven mostly by the wear layer thickness in mils, followed by the core type and the install method, which is why the cheapest bid so often turns out to be a thinner, shorter-lived floor.
Choose by matching the plank to the room. A busy kitchen with a pet rewards a thick wear layer and a tough rigid core; a quiet, dry bedroom can take a modest grade and a careful self-install; a wet bath or basement wants LVP’s water resistance above all. Compare quotes on the specific product, its mils, its core, and its install method rather than on the total, budget for underlayment and overage, prep the subfloor, and treat every dollar figure here as an illustrative starting point. Sketch your own floor in the flooring cost estimator so the decision sits next to real numbers, and get written quotes for the room you actually have.
ProsNook publishes this cost file to help homeowners understand what a luxury vinyl plank floor should cost and why quotes vary, not to serve as professional installation, product, or design advice. Every dollar figure, cost per square foot, wear layer rating, and lifespan above is illustrative and will differ with your chosen product, its core and mil rating, your local market, the condition of your subfloor, and your installer, so treat them as a planning framework rather than a quote. Confirm the specific waterproof rating, warranty terms, and installation requirements of any plank with the manufacturer before you buy, verify your subfloor is flat, clean, and dry, and get written quotes from local installers for your own rooms, since the right floor depends on details of your home that no general article can see.
Frequently asked questions
How much does LVP flooring cost per square foot?
As a rough, illustrative guide, luxury vinyl plank flooring commonly runs somewhere between about $4 and $12 per square foot installed by a professional, with budget planks and a simple room near the low end and premium, thick-wear-layer planks in a cut-up room toward the top. The material alone typically lands at an illustrative $2 to $7 per square foot, and professional install labor adds an illustrative $2 to $4 per square foot on top of that. A do-it-yourself install removes the labor line, dropping the out-of-pocket cost to the material, underlayment, and trim. Every figure here is illustrative and varies with the plank grade, your room, your region, and your installer, so get written quotes for your own floor before you budget.
How much does it cost to install LVP in a whole house?
For a whole house, the number scales with square footage, so a rough, illustrative way to sketch it is to multiply your finished area by an all-in figure of about $4 to $12 per square foot installed. A 1,500 square foot home might land somewhere near an illustrative $6,000 to $18,000 professionally installed, and a 2,500 square foot home proportionally more, with the wide spread driven by the plank grade you choose and how many rooms, closets, and transitions the crew has to work around. Doing the install yourself can cut the labor slice substantially on simple rectangular rooms. These are planning ranges only, so price your own footprint and grade in the estimator on this page and gather local quotes before committing.
Is LVP cheaper than laminate or hardwood?
On material alone, laminate is often a touch cheaper than comparable luxury vinyl plank at each quality tier, though the ranges overlap so much that a premium laminate can cost more than a budget LVP. Both are far less expensive than hardwood: engineered hardwood commonly runs an illustrative $6 to $15 per square foot installed and solid hardwood an illustrative $8 to $20 or more, while LVP typically lands at an illustrative $4 to $12 installed. What LVP buys over the cheaper laminate is water resistance, and what hardwood buys over LVP is the ability to be sanded and refinished for decades. The right pick depends on the room and how long you plan to own the home, not on the sticker price alone.
What is the difference between SPC and WPC LVP?
SPC stands for stone-plastic composite and WPC for wood-plastic composite, and both are rigid-core versions of luxury vinyl plank that feel more solid underfoot than thin flexible LVP. SPC has a denser, harder core built around limestone powder, so it is more dent resistant, more dimensionally stable in temperature swings, and usually a little thinner and firmer underfoot. WPC has a lighter, foamed core that feels slightly softer and warmer and can be a touch quieter, but it dents a little more easily. In cost terms the two are close and both sit above flexible LVP, with the choice coming down to whether you value SPC's toughness or WPC's comfort. Confirm which core a given product uses, since marketing names vary.
Does wear layer thickness affect LVP cost and durability?
Yes, the wear layer is one of the strongest predictors of both price and how long an LVP floor keeps looking good, and it is measured in mils (thousandths of an inch). A thin wear layer around 6 to 12 mil is common on budget planks and suits light-traffic rooms, rentals, or short stays, while 12 to 20 mil covers most family homes and 20 mil and up is aimed at heavy traffic, pets, and long ownership. A thicker wear layer resists the scratches and scuffs that dull a floor over time, so it often matters more than the brand name. Because more wear layer means more material, it also raises the per-square-foot price. Match the wear layer to the room's traffic rather than defaulting to the cheapest plank.
Should I click-lock or glue down LVP, and how does cost differ?
Most residential LVP today is click-lock (a floating floor that snaps together over an underlayment without adhesive), and it is the faster, more DIY-friendly method with a slightly lower labor cost. Glue-down LVP is bonded directly to the subfloor with adhesive, which adds the cost of the adhesive and more labor because prep and application are more involved, so it typically costs a little more installed. Glue-down is favored in very large rooms, commercial spaces, and areas with wide temperature swings because it stays put and can feel more solid underfoot. For most homes, click-lock is the sensible default. The cost difference is usually modest next to the plank grade you pick, so choose the method by the space, then price it.
Is LVP flooring really waterproof?
Quality luxury vinyl plank is highly water resistant and many rigid-core products are marketed as fully waterproof, because the core is plastic and does not absorb water the way a laminate's wood-fiber core does. That means spills, mopping, and the occasional appliance leak are far less likely to ruin an LVP floor, which is why it has taken over kitchens, baths, laundry rooms, and basements. The important caveat is that waterproof describes the plank, not the whole floor: water can still get under a floating floor through gaps and sit on the subfloor, so a leak should still be dried out promptly. Confirm the specific waterproof rating on any product and follow its installation requirements before relying on it in a wet room.
Is LVP flooring worth it?
For most homes, luxury vinyl plank is worth it because it delivers a convincing wood look, real water resistance, comfortable footfeel, and easy maintenance at a fraction of the cost of hardwood, and it installs DIY-friendly over a weekend. The value case is strongest in kitchens, baths, basements, and busy family spaces where water and traffic would punish a more delicate floor. It weakens if you specifically want the ability to sand and refinish the floor for decades, which only real wood offers, or if a room is reliably dry and you prefer laminate's slightly crisper wood look for less money. For a durable, water-resistant, low-maintenance floor that fits most budgets, LVP is usually a sound choice, but confirm the grade fits the room's traffic.