What's on this page
- What attic insulation costs
- Cost per square foot by material
- What an R-value target actually means
- How depth maps to R-value
- Blown fiberglass, priced honestly
- Blown cellulose, priced honestly
- Fiberglass and mineral wool batts
- Spray foam at the roof deck
- Adding over existing insulation
- When removal is the right call
- Air sealing comes first
- Baffles and keeping the soffit vents open
- The attic hatch, can lights, and bath fans
- Attic access and obstruction surcharges
- Knob and tube wiring and other stop conditions
- Where an attic insulation budget goes
- Vented attic versus conditioned attic
- DIY versus hiring a pro
- What the job looks like on the day
- Payback and how to think about savings
- Rebates, credits, and utility programs
- Regional and seasonal price swings
- A worked example on a typical attic
- What a good attic insulation quote itemizes
- Red flags in an attic insulation pitch
- The bottom line
Short answer: Blown fiberglass or cellulose attic insulation brought up to roughly R-49 commonly runs an illustrative $1.10 to $2.30 per square foot of attic floor installed, which places a typical 1,200 square foot attic in a rough band of $1,300 to $2,800 for the insulation itself. R-value targets are set by climate zone and commonly cited between R-30 and R-60, and air sealing, baffles and bath fan ducting are separate lines.
Attic insulation cost is one of the few home improvement numbers that behaves predictably, right up until somebody puts their head through the hatch and finds knob and tube wiring, a bath fan blowing into the rafters, and six inches of insulation that has been quietly compressed under storage boxes since the house was built. A clean attic with a walk up hatch, open framing and nothing in the way is a half day job with a total you can calculate from square footage and a target R-value. An attic with contaminated material to vacuum out, penetrations to seal, soffit vents to reopen and an electrical question hanging over it is four jobs wearing one name.
Illustratively, blown fiberglass or cellulose brought up to roughly R-49 commonly runs somewhere around $1.10 to $2.30 per square foot of attic floor installed, which places a typical 1,200 square foot attic in a rough band of $1,300 to $2,800 for the insulation itself. This cost file prices the job the way a crew actually assembles it: the assessment first, then air sealing and prep, then baffles and clearances, then the insulation, with removal and spray foam treated as the separate scopes they are. Our crawl space encapsulation cost file is the natural sibling at the other end of the house, and our estimate reading guide explains how to tell these lines apart on a bid. Price your own attic in the job cost estimator as you read.
Key takeaways
- Illustratively, blown insulation to roughly R-49 runs around $1.10 to $2.30 per square foot, putting a 1,200 square foot attic near $1,300 to $2,800 for the insulation line alone.
- R-value targets are set by climate zone and are commonly cited between R-30 and R-60, so confirm the target for your address rather than accepting a national number.
- Depth is not the same as R-value: each material delivers a different R per inch, and the bag coverage chart is the only verifiable record of what was installed.
- Air sealing, baffles, hatch covers, recessed light clearances and bath fan ducting are separate lines that frequently add as much as the insulation itself.
- Adding over sound existing insulation is cheaper and usually correct; removal belongs to specific conditions like moisture, contamination or a planned conversion, not to every quote.
What attic insulation costs
Priced honestly, attic insulation is a per square foot number multiplied by how much R-value you are actually adding. As an illustrative guide, blown fiberglass or blown cellulose taken up to roughly R-49 in an accessible attic commonly runs around $1.10 to $2.30 per square foot, which puts a 1,200 square foot attic floor somewhere near $1,300 to $2,800. Batts land higher because they are slower to install, and spray foam at the roof deck is a different product at several times the price per square foot.
What sits outside that band is everything the crew has to do before a single bag goes into the hopper. Air sealing is its own line. Baffles at the eaves are their own line. Removing old material, boxing out recessed lights, ducting a bath fan to the exterior, building a dam around the hatch and insulating the hatch cover are all their own lines. None of them are optional extras invented to pad a quote; they are the work that makes the insulation perform, and on a typical attic they can total as much as the insulation.
The practical move is to price the job in layers rather than as one number. Assessment, prep, insulation and any removal are four different scopes, and a bid that collapses them into a single figure is nearly impossible to compare against another bid. Ask each contractor to break them out, because the gap between two quotes is usually about which layers each one included. The estimator keeps area, existing depth, material and prep as separate fields so you can build the number the same way.
Cost per square foot by material
Material choice sets the base rate, and the spread across the common options is wider than most homeowners expect. The chart below uses illustrative midpoint totals for the same 1,200 square foot attic taken to roughly R-49, so the comparison is like for like on area and target even though the products behave differently.
Illustrative installed totals by material, 1,200 square foot attic to roughly R-49
Midpoint estimates for the insulation line only, excluding air sealing, baffles and removal. The two foam bars describe a roof deck application, which is a different scope rather than a pricier version of the same one.
Illustrative midpoints only. Per square foot those bars work out to roughly $1.58, $1.79, $2.13, $2.95, $4.50 and $6.50, and your real rate moves with access, local labor rates, how much depth you are adding and how much prep sits underneath.
Two readings matter. First, the two blown products sit close enough together that the choice between them is usually about performance preference and installer familiarity rather than about price. Second, the step up to foam is not a premium version of the same job, it is a decision to move the insulated boundary from the attic floor to the roof deck, which changes ventilation, storage, ductwork and often the permit conversation.
Batts occupy an awkward middle. The material is inexpensive and available everywhere, but installing them well in an attic is slow, fiddly work around joists, wiring and framing, and the labor is where the money goes. In an attic with irregular joist spacing, cross bracing or existing insulation, batts are the option most likely to be installed badly, and a badly installed batt with a gap at the edge performs far below its rated number.
What an R-value target actually means
R-value measures resistance to heat flow through a material, and it adds up as you stack layers, which is the single most useful thing to know when pricing a top up. If you have an existing six inches of blown fiberglass sitting at roughly R-14, and your target is R-49, you are buying about R-35 of new material rather than a whole R-49 attic. That distinction is worth real money, and it is why any quote should state both the existing R-value estimate and the finished target.
Recommended targets are set by climate zone, and commonly cited ranges run from around R-30 in the warmest zones up to R-49 or R-60 in the coldest. Because the zone maps and the recommendations do get revised, the reliable answer for your address comes from your local building department or from the current official federal guidance rather than from a number in any article, including this one. Ask the contractor which zone they are working to and where that recommendation comes from.
Diminishing returns are real and worth understanding before you buy more than you need. Going from R-11 to R-30 removes a large fraction of the heat flow through that path. Going from R-49 to R-60 removes a much smaller additional fraction for a similar amount of material. The steepest part of the curve is at the bottom, which is why a nearly bare attic is the best value insulation project in most houses, and why an attic already at R-38 rarely justifies a full replacement.
How depth maps to R-value
Depth is the field measurement, R-value is the performance number, and the conversion between them is set by the product. Commonly cited figures run around R-2.2 to R-2.7 per inch for blown fiberglass, roughly R-3.2 to R-3.8 per inch for blown cellulose, roughly R-3.0 to R-3.8 per inch for fiberglass batts depending on density, and higher again for closed cell spray foam. Those spreads exist because products genuinely differ, so treat them as a way to sanity check a proposal, not as a specification.
Run the arithmetic in the direction that matters to you. A target of R-49 in blown fiberglass at roughly R-2.4 per inch works out near twenty inches of settled depth. The same target in blown cellulose at roughly R-3.5 per inch works out near fourteen inches. Neither number is wrong, and a homeowner comparing two bids on inches alone would reach exactly the wrong conclusion about which one delivers more.
The verifiable record is the coverage chart printed on the bag. It states, for a given product, how many bags per hundred square feet produce a given R-value and what settled depth results. A crew that leaves you the empty bag count and points at the chart has given you something you can check. Depth rulers stapled to the framing before blowing, which are standard practice on a professional install, give you a second check you can perform yourself with a flashlight a week later.
Blown fiberglass, priced honestly
Blown fiberglass is loose fill glass fiber delivered through a hose from a machine parked on the driveway, and it is the most commonly installed attic insulation for straightforward reasons. It is inexpensive per unit of R-value, it flows into irregular spaces around framing and wiring that batts cannot fill neatly, it does not absorb water readily, and it is not a food source for anything. Illustratively, installed cost to roughly R-49 commonly lands around $1.10 to $2.05 per square foot.
The trade offs are worth knowing. Fiberglass delivers less R per inch than cellulose, so reaching a high target takes noticeably more depth, which matters in a shallow attic or where storage decking limits how deep you can go. Loose fiberglass is also lighter, which makes it more susceptible to being disturbed by air movement in a leaky attic, and it does very little on its own to slow air leakage. Both of those are arguments for taking the air sealing line seriously rather than for choosing a different material.
Settling is the specification detail to ask about. Modern blown fiberglass products are rated at a settled depth, and the installed depth is typically blown somewhat higher to allow for it. A contractor who cannot tell you the initial and settled depths they are working to is quoting from habit rather than from the product data, and that is the same contractor most likely to come up light on bag count.
Blown cellulose, priced honestly
Blown cellulose is recycled paper fiber treated with fire retardant, installed through the same kind of machine and hose. It delivers more R per inch than blown fiberglass, it is denser so it resists air movement within the material better, and it fills irregular cavities well. Illustratively, installed cost to roughly R-49 commonly lands around $1.30 to $2.30 per square foot, a modest premium over fiberglass that is often justified by the depth saving alone.
Density has a downside worth checking: cellulose is heavier per square foot at a given R-value, and in an old house with undersized ceiling framing and existing drywall or plaster, weight is a legitimate question rather than a theoretical one. It is rarely a problem in ordinary construction, but if your ceiling is plaster on lath and the joists are original, ask the contractor to confirm the loading is appropriate before they blow fourteen inches of it in.
Moisture behavior is the other difference. Cellulose can absorb water and takes longer to dry than fiberglass, so an attic with an active roof leak or a bath fan discharging into the space is a bad candidate until that is fixed. That is not an argument against the material; it is an argument for finding the leak first, which is exactly what our roof repair cost file is for. Wet cellulose is a removal job, and removal is the most expensive way to discover you had a leak.
Fiberglass and mineral wool batts
Batts are pre cut blankets laid between and over the joists, and in an attic they are chosen for specific reasons rather than for price. They make sense in a small attic where mobilizing a blowing machine is disproportionate, in an attic with awkward access that a hose cannot reach well, or where a homeowner is doing the work themselves and prefers a material that does not require equipment. Illustratively, installed fiberglass batts to roughly R-49 commonly run around $1.55 to $2.70 per square foot.
Mineral wool batts sit higher, illustratively around $2.20 to $3.70 per square foot installed for the same target. The material costs more and is denser and heavier to handle, and it is chosen for its fire behavior, its sound damping, and its resistance to water and to sagging. In an attic it is a specification decision rather than a value decision, and it is more common around specific details such as a chimney chase clearance than as a whole attic solution.
The installation quality question matters more with batts than with anything else in this cost file. A batt with a gap at the edge, a batt compressed under wiring, or a batt cut short around a brace loses a disproportionate share of its rated performance, because heat takes the easiest path available. Batts laid in a single direction between joists also leave the joists themselves as continuous thermal paths through the assembly, which is why a second layer run perpendicular across the top is the standard way to reach a high target properly.
Spray foam at the roof deck
Spray foam in an attic usually means something structurally different from everything above: instead of insulating the attic floor and leaving the attic outside the conditioned envelope, foam is applied to the underside of the roof deck and the attic becomes part of the conditioned space. Illustratively, open cell foam commonly runs around $3.50 to $5.50 per square foot and closed cell around $5.00 to $8.00 per square foot, measured over the sloped roof area, which is larger than the attic floor.
The reasons to do it are real. Ductwork and air handlers that live in the attic stop sitting in an unconditioned space that swings a hundred degrees across a year, which is a genuine efficiency and comfort argument in houses built that way. Our new HVAC system cost file explains why attic equipment is such an expensive place to lose energy. Foam also air seals as it is installed, so a separate air sealing scope largely disappears into it.
The complications are equally real and belong in the conversation before you agree. Sealing the roof deck ends attic ventilation as designed, so soffit and ridge vents are closed off and the assembly has to be designed to handle moisture without them. Roof warranties, moisture management, ignition barrier requirements and permit expectations all enter the picture, and requirements vary by jurisdiction. Our permit guide covers how to ask that question locally. Existing floor insulation typically comes out as part of the conversion, which adds a removal line.
Adding over existing insulation
For most houses the cheapest correct answer is a top up, and it is worth understanding why so you can recognize when a contractor recommends otherwise. Blown insulation can be layered directly over existing blown material or over batts, because R-values stack. What you buy is the difference between where you are and where you want to be, and the crew skips an entire day of vacuum removal, bagging and disposal.
There are conditions on it. The existing material has to be dry, since sealing damp material under fresh insulation slows drying and hides the source. It has to be uncontaminated, meaning no rodent activity and no visible mold on the material or the framing beneath it. It has to be reasonably distributed rather than shoved to one side of the attic. And if it is faced batts, the facing on the existing layer is generally slit or the new layer is laid unfaced, because a second vapor retarder partway up an assembly is a moisture trap.
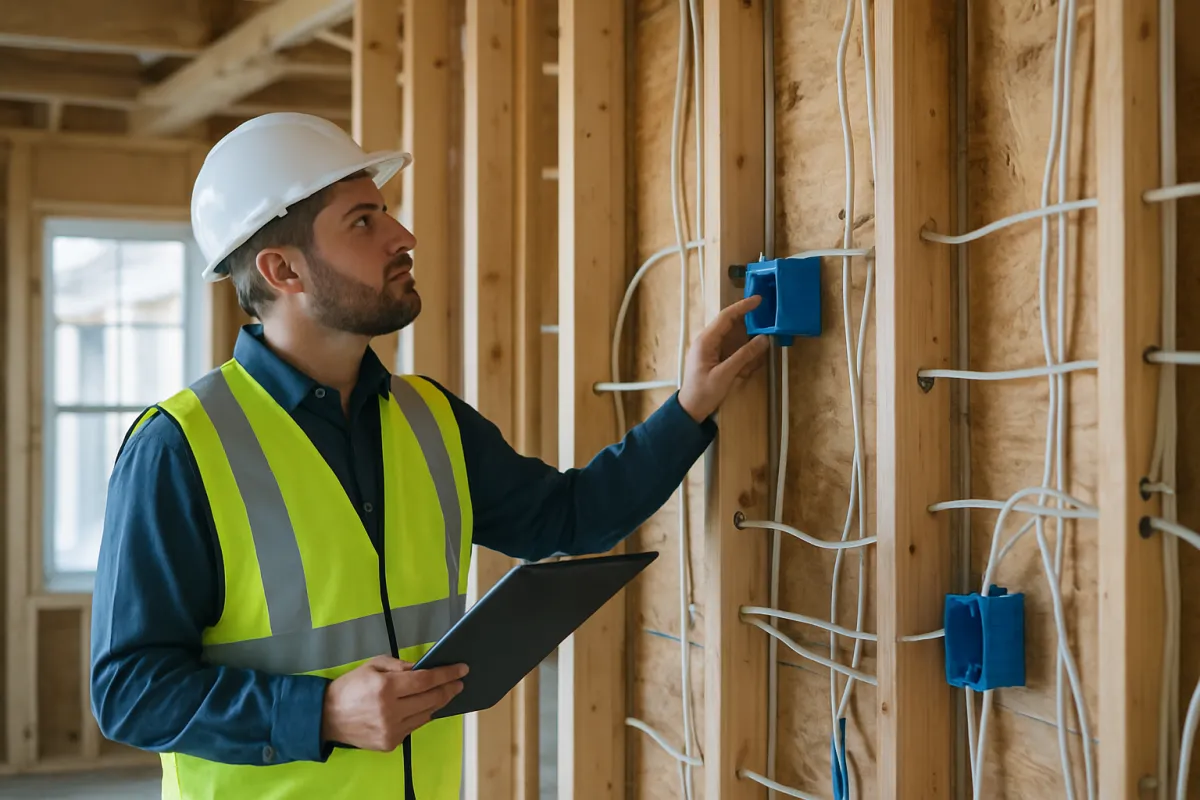
The practical framing is to make the assessment a distinct step. Someone should physically enter the attic, measure the existing depth in several places, identify the material, look at the framing for staining, and photograph what they find. A quote produced from the driveway or from a satellite image is guessing about the exact condition that decides between a $1,400 top up and a $4,000 removal and replacement. Ask for the photographs; a contractor who takes them is a contractor who went up there.
When removal is the right call
Removal is a real and sometimes necessary scope, illustratively adding around $1.00 to $2.00 per square foot for vacuuming out loose fill, bagging it and disposing of it, which on a 1,200 square foot attic is roughly $1,200 to $2,400 before anything new goes in. Contaminated material costs more because it involves containment, protective equipment and handling requirements that ordinary insulation does not.
The conditions that genuinely justify it are specific. Water damage from a roof leak or an ice dam leaves material that is compressed, stained and no longer performing. Rodent contamination is a health and odor problem that insulating over does not solve. Mold growth on the sheathing or the framing has to be assessed and addressed before anything covers it, and our mold remediation cost file explains how that scope is priced. Smoke damage after a fire is its own category. And a conversion to a conditioned attic removes floor insulation by design.
One condition deserves its own paragraph. Older attics, particularly in houses insulated in the middle of the last century, sometimes contain a loose granular material with a pebbly, layered appearance, and some of that material has historically been associated with asbestos contamination. The correct response is not to disturb it, not to let anyone blow over it casually, and to have it evaluated by a qualified professional before any work happens in that attic. Our asbestos removal cost file explains what that testing and abatement path looks like and why it is not a DIY question.
Air sealing comes first
Insulation slows heat conducting through materials. It does almost nothing to stop air moving through holes, and a typical attic floor has a startling number of holes. Top plate gaps where interior walls meet the ceiling, chimney and flue chases, plumbing vent penetrations, wiring holes, dropped soffits over kitchen cabinets, recessed light housings, and the attic hatch itself all move conditioned air out of the house and pull outside air in behind it. Insulation laid over an unsealed attic floor is a filter, not a barrier.
Illustratively, air sealing an average attic commonly adds around $400 to $1,200, depending on the number of penetrations, how accessible they are, and whether large openings such as a chimney chase or an open soffit cavity need proper fire rated detailing rather than a bead of caulk. It is inexpensive relative to what it accomplishes, and it is dramatically cheaper to do before the insulation goes in than after, since afterwards every penetration has to be excavated to reach.
The sequencing argument is the strongest one in this cost file. Air sealing costs a fraction of the insulation and improves both comfort and the performance of everything installed on top of it. A quote that lists insulation with no air sealing line is either assuming your attic is already sealed, which is unlikely, or is planning to bury the problem. Ask directly which penetrations they intend to seal and with what materials, and get the answer in writing alongside the R-value.
Baffles and keeping the soffit vents open
A vented attic works because air enters low at the soffits, rises, and leaves high at a ridge or gable vent, carrying moisture out with it. Insulation blown to a high depth at the perimeter will bury the soffit vents and stop that flow, which is why baffles, sometimes called rafter vents, are installed in each bay at the eave to hold a clear channel between the insulation and the roof sheathing.
Illustratively, baffles commonly run around $3 to $8 each installed, putting a typical attic somewhere near $150 to $600 depending on how many rafter bays there are and how tight the access is at the eaves. Working at the perimeter of an attic is the least comfortable part of the job, since headroom is lowest exactly where the work is, and that difficulty is reflected in the labor.
Blocked ventilation is not a cosmetic issue. In cold climates it contributes to ice damming, where heat escaping into the attic melts snow that refreezes at the cold eave and backs water up under the shingles. In any climate it traps moisture in the attic, which shows up as condensation on the sheathing and eventually as staining or growth. Our seasonal maintenance checklist covers what to look for from the ground, and our gutter cleaning cost file covers the drainage half of the same problem.
The attic hatch, can lights, and bath fans
Three small items account for a surprising share of a real attic quote, and all three are easy to leave off a cheap bid. The attic hatch is a hole in your insulated ceiling covered by a thin panel, and on a pull down stair it is a hole covered by an uninsulated folding assembly. Insulating and weatherstripping the cover, and building a dam around the opening so loose fill does not pour through, illustratively adds around $120 to $350.
Recessed lights need clearance or containment. Older housings that are not rated for insulation contact require a fire rated cover box built over them, and a shallow tented enclosure is not an acceptable substitute for a proper one. Illustratively, covers commonly run around $40 to $80 each installed, so six of them is roughly $240 to $480. Where the fixtures are old and problematic, replacing them with airtight rated units is sometimes cheaper than boxing them, and that is an electrician’s scope rather than an insulator’s.
Bath fans that terminate in the attic instead of at the exterior are one of the more common findings, and they dump humid air directly into the space you are about to seal and insulate. Correcting it means running insulated duct to a roof or gable termination with a proper damper, illustratively around $250 to $450 per fan. This is not an upsell; it is the difference between a dry attic and a wet one, and a contractor who reports it is doing their job.
Attic access and obstruction surcharges
Two attics of identical square footage can price very differently, and access explains most of it. A walk up stair or a wide pull down in a central hallway is the easy case. A small scuttle hole in a closet ceiling means every bag, every tool and every bag of removed material passes through an opening barely wider than a person, and the hose has to be routed through the house with everything below protected. That difference is measured in hours, and hours are the price.
Headroom and pitch are the next factor. A steep roof gives a crew standing room down the center and a manageable crawl at the edges. A low pitch attic means the whole job happens on hands and knees, and the perimeter, where the baffles go, may be almost unreachable. Some attics have to be worked partly from the exterior through the eaves, which is a specialist approach with its own price.
Obstructions finish the list. Ductwork crossing the attic floor, an air handler sitting in the middle of it, plumbing vents, structural bracing on a truss roof, and stored belongings all slow the work down and create places where insulation cannot be installed to full depth. Storage decking is its own decision: keeping usable storage means either accepting reduced insulation under the deck or raising the platform on framing above the new depth, and the second option is a carpentry line rather than an insulation one.
Knob and tube wiring and other stop conditions
Some findings stop the job rather than adding to it. Knob and tube wiring, the early electrical system with individual conductors run through porcelain insulators, was designed to shed heat into open air, and burying it under insulation is widely treated as unacceptable. Where an attic contains active knob and tube, the correct sequence is an electrician’s evaluation and typically replacement of that circuit before insulation goes anywhere near it, and that is a separate trade and a separate quote. Our electrician cost file covers how that work is priced.
Active roof leaks are the second stop condition. Staining on the sheathing, daylight visible at a penetration, or damp framing all mean water is arriving, and insulating over it converts a roof repair into a roof repair plus an insulation replacement. Get the roof assessed and fixed first, then insulate, in that order, without exception.
Combustion appliance issues are the third, and the most safety sensitive. Where a gas water heater or furnace vents through a flue that passes through the attic, the required clearance between the flue pipe and combustible material, including insulation, must be maintained with proper metal blocking rather than by hoping the loose fill stays back. This is not a detail to negotiate or eyeball. Any question about combustion venting belongs with a licensed professional, and our furnace replacement cost file explains why venting is treated so carefully.
Where an attic insulation budget goes
Assemble the pieces and the shape of a standard attic job becomes clear. The proportions below are illustrative for a straightforward blown in project with normal prep in an accessible attic, excluding removal and excluding any spray foam conversion, both of which are separate scopes rather than slices of this bar.
Where the money goes on a standard blown in attic job
Illustrative shares for an accessible attic with typical prep. Removal, electrical corrections and spray foam conversions sit outside this bar entirely.
Shares move with the job: a difficult hatch and a low pitch enlarge the labor band, an attic with many penetrations enlarges the sealing band, and an attic needing removal adds a scope that this bar does not contain.
Two things stand out. Material is the smallest of the four bands on a typical job, which is why comparing bids purely on bag price misses most of the money. And the two prep bands together are as large as the material band, which is the arithmetic behind the sequencing advice in this cost file: the prep is not a garnish on the insulation, it is a third of the project.
Vented attic versus conditioned attic
There are two coherent ways to insulate an attic, and mixing them produces the failures. The vented attic insulates the floor, keeps the attic outside the conditioned envelope, and moves air through it from soffit to ridge so that any moisture reaching the space leaves. It is the traditional approach, it is the cheaper one, and it works well when the floor is sealed, the depth is right and the vents are open.
The conditioned attic insulates at the roof deck, brings the attic inside the envelope, and closes the vents. It costs more, it is usually a foam application, and it is chosen when ductwork or air handlers live in the attic, when the roof geometry makes floor insulation impractical, or when the space is being used. It has to be designed as a system, because removing ventilation from an assembly that was built to be ventilated changes how it handles moisture.
The failure mode is the hybrid nobody planned: floor insulation left in place while soffit vents are blocked, or a partially foamed roof deck over a still vented attic, or a floor sealed on one side of the house and open on the other. Those attics get moisture problems that neither approach would have produced on its own. If a contractor proposes moving your boundary from the floor to the roof, ask them to explain the ventilation and moisture plan in the same conversation, not as an afterthought.
DIY versus hiring a pro
Blown insulation is one of the more accessible DIY projects in this trade, and the arithmetic is genuinely attractive. Illustratively, material for a 1,200 square foot attic to roughly R-49 might run around $550 to $1,050 at retail, against roughly $1,300 to $2,500 for the same insulation installed. Machines are commonly available to rent, sometimes with the rental discounted or waived against a minimum bag purchase, though that varies by retailer and is worth confirming rather than assuming.
What the price gap actually buys is worth being honest about. It buys a second person, because one feeds the machine while the other holds the hose. It buys protective equipment, meaning respirator, eye protection, gloves and covered skin, in a hot confined space where none of that is optional. It buys the judgement to recognise a non rated recessed light, a flue clearance, or knob and tube before burying it. And it buys the prep work, which most DIY attempts skip entirely and which is a third of a professional job for good reason. Our DIY or hire decision framework walks through that calculation properly.
A reasonable middle path exists and is underused: do the air sealing yourself over a couple of weekends, carefully and with the right materials, then have a crew blow the insulation in a few hours. Sealing is slow, precise, low equipment work that rewards patience, and it is the part a rushed crew is most likely to shortcut. Blowing is fast, equipment heavy and easy to do well with practice. Splitting the job along that line often gets the best of both.
What the job looks like on the day
Knowing the sequence helps you judge whether a crew is doing the work you paid for. A typical blown in job on an accessible attic is a half day to a full day for two people, longer where removal or heavy prep is involved. It starts with protection: drop cloths on the path from the door to the hatch, the hose routed with care, and the area below the opening covered.
Then comes the prep, which is the slow part. Sealing penetrations, installing baffles at every rafter bay, boxing or replacing non rated light fixtures, correcting any bath fan termination, building the dam around the hatch and stapling depth rulers to the framing where they will be visible afterwards. If a crew arrives and starts blowing within twenty minutes, they have skipped this, and the depth rulers are the easiest missing item to spot later.
The blowing itself is comparatively quick. The machine sits outside, one person feeds bags, the other works the attic from the far corner back toward the hatch so nobody walks on finished insulation. The finish is the walk through: the hatch cover insulated and weatherstripped, the bag count shown to you, the depth rulers photographed, the work area cleaned. Ask for the empty bag count and a photograph of a depth ruler in the far corner, because those two items are your only practical verification of a product you will never see again.
Payback and how to think about savings
Payback on insulation is real but it is specific to your house, and anyone who quotes you a confident percentage saving without knowing your climate, your fuel prices, your existing R-value and your air leakage is guessing. The honest method is arithmetic you can do yourself. Take what you spend annually on heating and cooling, apply a conservative saving percentage, and divide the quoted price by the result.
On purely illustrative numbers: a household spending $2,000 a year on heating and cooling, with an upgrade that trims that by ten to fifteen percent, saves $200 to $300 a year. Against a $3,600 project that is roughly twelve to eighteen years, and against the $1,400 insulation line by itself it is closer to five to seven years. Those are illustrations of a method, not a prediction about your house, and the correct way to use them is to substitute your own numbers.
Three things shift the arithmetic sharply. An attic that starts nearly bare gains far more than one already at R-38, because the steep part of the curve is at the bottom. A leaky attic floor gains disproportionately from air sealing, which is the cheapest line in the quote. And comfort, meaning upstairs bedrooms that stop being ten degrees hotter than the rest of the house in summer, is a genuine benefit that never appears in a payback calculation and is often the reason people are glad they did it.
Rebates, credits, and utility programs
Insulation upgrades have historically attracted utility rebates and energy efficiency incentives, and those programs can materially change what a project costs you. They also change: amounts, eligibility rules, qualifying R-values, participating contractor requirements and documentation standards all get revised, sometimes annually. For that reason this cost file states no incentive amount. Confirm what currently applies through your own utility’s efficiency program and the current official guidance for federal or state incentives before you sign anything.
Two structural points are worth knowing regardless of the current rules. First, many programs require something to happen before the work: a pre work assessment, an application, or the use of a contractor on an approved list. Missing that step is usually not correctable afterwards, and it is the single most common way homeowners lose an incentive they qualified for. Second, most programs require documentation of what was installed, meaning the R-value achieved and often the product, so keep the invoice, the bag count and the depth photographs.
Treat any incentive as a reduction to a price you already consider fair. A quote that is high by a thousand dollars and comes with a rebate is still a high quote. Sales approaches built around an expiring program deserve particular scepticism, and our contractor scam red flags covers the pattern. Verify the program independently through the utility or agency rather than through the company selling you the work.
Regional and seasonal price swings
The same attic costs different amounts in different places, and the drivers are worth understanding because they tell you which quote differences are legitimate. Labor rates are the largest factor, and they vary by metro area far more than material prices do. Climate zone changes the target R-value, so an identical attic in a cold zone is simply buying more material than the same attic in a warm one. Disposal costs vary locally and show up in removal jobs.
Season matters too. Insulation contractors are busiest in late autumn, when homeowners think about winter, and in the first cold snap the phones do not stop. Scheduling in a shoulder season, meaning late spring or early autumn, often means better availability, more attention, and occasionally better pricing. It is also more humane: attic work in midsummer is genuinely dangerous heat, and crews working in it move faster and take more shortcuts than crews working in mild weather.
The comparison discipline is the same everywhere. Get bids on an identical scope, meaning the same target R-value, the same material, the same prep list, and the same removal assumption, then compare. Our quote comparison guide explains how to normalise bids that arrive in different formats. A bid that is cheaper because it omitted baffles is not cheaper, it is different.

A worked example on a typical attic
Take one ordinary project and cost it in layers so the structure becomes concrete. Every figure here is illustrative; the method is the lesson. Assume a 1,200 square foot attic with about five inches of old blown fiberglass, which puts the existing performance near R-13, a target of R-49, pull down stair access, two bath fans discharging into the attic, six recessed lights of unknown rating, and no moisture or contamination.
Start with the prep. Air sealing the top plates, chases and penetrations illustratively runs about $750. Baffles at the eaves add about $350. Re ducting the two bath fans to exterior terminations adds about $600. Fire rated covers over the six recessed lights add about $300. An insulated, weatherstripped hatch cover with a dam around the opening adds about $200. Prep subtotal: roughly $2,200, or about $1.83 per square foot.
Then the insulation. Going from R-13 to R-49 means adding about R-36, which in blown fiberglass at roughly R-2.4 per inch is about fifteen inches of new material. At an illustrative blended rate that works out near $1,400 for the 1,200 square feet, since you are buying roughly three quarters of a full R-49 install rather than all of it.
Total: roughly $3,600, or about $3.00 per square foot all in. Notice that the insulation is under forty percent of it. That is the single most useful thing in this example, and it explains why a $1,500 bid and a $3,600 bid on the same attic can both be honest quotes for entirely different scopes. Run your own area, existing depth, material and prep level through the estimator and the same worked example rebuilds itself around your attic.
What a good attic insulation quote itemizes
A quote you can actually compare states the things that determine the price rather than describing the outcome. It should name the existing condition: measured depth, material identified, and whether removal is included or excluded. It should name the target: the finished R-value, the material, and the settled depth in inches that corresponds to it. Those two pairs of facts alone eliminate most bid confusion.
It should list the prep as separate lines: which penetrations will be air sealed and with what, how many baffles, what happens at the hatch, what happens at recessed lights, what happens at bath fans, and what happens at any flue clearance. It should state the area being treated in square feet, and it should state the bag count or coverage basis for blown products so the delivered quantity is checkable. It should state who cleans up and how disposal is handled.
Then the ordinary contract items apply exactly as they do on any trade work: license and insurance you have verified yourself rather than taken on trust, a written scope, a payment schedule that is not weighted heavily toward the deposit, a change order process in writing, and a stated warranty on workmanship distinct from any manufacturer warranty on the product. Our estimate reading guide covers how to read those terms, and it applies to a $2,000 attic job as much as to a kitchen.
Red flags in an attic insulation pitch
Attic work attracts a particular kind of sales approach, because the product is invisible once installed and the homeowner rarely goes up to check. The clearest red flag is a free inspection that arrives unsolicited, goes into the attic alone, and returns with photographs of an emergency. Photographs of an attic are not proof it is your attic. Ask to go up, or ask for a video that pans continuously from the hatch to the finding without a cut.
The second is urgency: a price good only today, a crew that happens to be in the neighbourhood, a program closing this week. Insulation has no emergency timeline. An attic that has been under insulated for thirty years will survive the week it takes you to get two more bids. The third is a single lump sum with no R-value, no depth, no material and no prep list, which is unquotable against and unverifiable afterwards.
The fourth is a recommendation to remove and replace everything in an attic that is dry and clean. Removal is a legitimate scope with specific triggers, and it roughly doubles a project, so it should come with a stated reason you can see in the photographs. And the fifth is any proposal to insulate over knob and tube wiring, over an unaddressed leak, or over unknown granular material, all of which tell you the person quoting is either unaware of the standard or not planning to follow it.
The bottom line
Attic insulation cost is an area based number multiplied by how much R-value you are actually adding, and the band around it exists because the prep varies far more than the insulation does. Illustratively, blown fiberglass or cellulose to roughly R-49 runs around $1.10 to $2.30 per square foot, putting a 1,200 square foot attic near $1,300 to $2,800 for the insulation line, with air sealing, baffles, hatch detailing, light covers and fan ducting frequently adding as much again. Removal and a spray foam conversion are separate scopes, not larger versions of the same one.
Then buy the work like a professional. Establish what you already have by measuring it, confirm the target R-value for your climate zone from your building department rather than from an article, and insist that every quote states existing depth, target R-value, material, settled inches and the prep list as separate lines. Sequence it correctly: fix the roof, address the electrical, seal the penetrations, install the baffles, then insulate. Verify license and insurance yourself, get the bag count and a photograph of a depth ruler in the far corner, and keep the paperwork for any incentive you intend to claim. The homeowners who come out of this satisfied are the ones who paid for the prep nobody sees, and who can still prove, two winters later, exactly what is up there.
This cost file explains how attic insulation projects are scoped and priced in general terms, not what your particular attic requires, and it is no substitute for an on site assessment and a written estimate from a licensed, insured contractor. Every dollar figure, per square foot rate, R-value, depth conversion, share and payback period above is illustration only: your real numbers move with climate zone, existing conditions, material selection, attic access and headroom, obstructions, disposal costs and local labor rates. Electrical questions such as knob and tube wiring or non rated light fixtures, combustion venting and flue clearances, roof leaks, moisture and mold findings, and any older granular material that could contain asbestos are all matters for a qualified professional to assess before work begins, and none of them should be handled on the basis of anything written here. Rebate, credit and utility program rules change frequently, so confirm current eligibility and requirements directly with the administering utility or agency before relying on any incentive.
Frequently asked questions
How much does attic insulation cost?
Attic insulation is priced per square foot of attic floor, and the figure moves with the material and with how much R-value you are adding rather than with the size of your house alone. As an illustrative guide, blown fiberglass or cellulose brought up to roughly R-49 commonly runs somewhere around $1.10 to $2.30 per square foot installed, which puts a 1,200 square foot attic in a rough band of $1,300 to $2,800 for the insulation line by itself. Spray foam applied at the roof deck is a different product and a different scope, and illustratively runs several times that per square foot. The prep work that surrounds the insulation, meaning air sealing, baffles, hatch covers and any removal, is quoted separately and frequently adds as much again.
What R-value should attic insulation be?
Recommended attic R-values are set by climate zone, and commonly cited targets range from roughly R-30 in the warmest zones up to R-49 or R-60 in the coldest. The specific recommendation for your address is worth confirming with your local building department or with the current federal guidance rather than taking from any general article, because zone maps and recommendations do get revised. What matters more than the exact number is that the target is measured against what you already have, since adding four inches over an existing eight inches is a very different job from filling a bare attic. Ask any contractor to state the target R-value in writing along with the depth in inches they intend to reach.
Is it cheaper to add insulation over existing insulation?
Adding over what is already there is almost always the cheaper path, and in most attics it is also the technically correct one. Blown insulation can be layered directly over old blown insulation or over batts as long as the existing material is dry, uncontaminated and not compressed into uselessness, and skipping removal takes an entire line item and a full day of disposal out of the quote. Removal becomes necessary when the existing material is wet, mold affected, rodent contaminated, or when the attic will be converted to a conditioned space. If a contractor recommends removal in an attic that appears dry and clean, ask what specific condition justifies it before agreeing.
Does attic insulation need air sealing first?
Air sealing before insulating is standard practice for good reason: insulation slows heat moving through materials, but it does very little to stop air moving through gaps. Top plate penetrations, chimney chases, plumbing and wiring holes, dropped soffits and the attic hatch itself can move a surprising volume of conditioned air into the attic, and burying those leaks under fresh insulation makes them harder to reach later. Illustratively, air sealing an average attic commonly adds somewhere around $400 to $1,200 depending on how many penetrations there are and how accessible they are. A quote that goes straight to blowing insulation with no air sealing line is worth questioning.
How many inches of insulation do I need for R-49?
Depth depends entirely on the material, because each product delivers a different R-value per inch. Commonly cited figures run around R-2.2 to R-2.7 per inch for blown fiberglass, roughly R-3.2 to R-3.8 per inch for blown cellulose, and higher again for closed cell spray foam, which is why the same target can mean sixteen to twenty inches of one product or thirteen to sixteen inches of another. The reliable number is on the coverage chart printed on the bag, which states how many bags per square foot achieve a given R-value and what settled depth that produces. Ask the contractor to leave the bag count and the coverage chart with you, since that is the one verifiable record of what was installed.
Can I install attic insulation myself?
Blown insulation is one of the more DIY accessible home improvements, since machines are commonly available to rent from the same retailers that sell the bags, and the technique is not difficult. Illustratively, material for a 1,200 square foot attic to roughly R-49 might run around $550 to $1,050 at retail, against roughly $1,300 to $2,500 for the same work installed by a crew. What the price gap buys is a helper, protective equipment, two hard days in a hot confined space, and the judgement to spot the things that need to be handled before insulation goes down. Air sealing, baffles, recessed light clearances and knob and tube wiring are the parts most often missed by a first time installer.
How long does attic insulation take to pay for itself?
Payback depends on your climate, your energy prices, how much insulation you already have and how leaky the house is, so no single number applies. The honest method is arithmetic you can do yourself: estimate what you spend annually on heating and cooling, apply a conservative percentage saving, and divide the quoted job cost by that figure. On purely illustrative numbers, a $3,600 project against a $200 to $300 annual saving lands somewhere between twelve and eighteen years, while the insulation line alone at around $1,400 pays back far faster. Attics that start nearly bare have the strongest case, and comfort improvements in upstairs rooms are a real benefit that never appears in the arithmetic.
Are there rebates or tax credits for attic insulation?
Insulation upgrades have historically been eligible for utility rebates and for federal or state energy efficiency incentives, but the programs, the amounts, the qualifying products and the paperwork all change, sometimes annually. Rather than relying on a figure quoted in an article or by a salesperson, confirm what currently applies through your utility's efficiency program page and the current official federal guidance before you sign anything. Some programs require a pre work assessment, a participating contractor, or specific documentation of the R-value installed, and missing one of those steps after the fact usually cannot be corrected. Treat any incentive as a possible reduction to a price you already consider fair, never as the reason to buy.