What's on this page
- What basement waterproofing costs, honestly
- Why the same basement gets wildly different bids
- Drainage problem or structural problem
- The order of operations that saves the most money
- Downspouts and roof water, the cheapest fix there is
- Grading and the first ten feet of soil
- Window wells and the water that arrives through them
- Interior wall coatings, and what paint can and cannot do
- Crack injection, sealing water out of a poured wall
- Interior drain tile and a sump system, priced per linear foot
- Sump pumps, discharge lines, and backup power
- Exterior excavation, membrane, and a footing drain
- Vapor barriers and encapsulation below the slab line
- Dehumidification and the humidity number nobody quotes
- Egress windows and wells, where waterproofing meets code
- Illustrative cost by method, cheapest to most invasive
- What actually drives the price: linear feet, wall type, and access
- Slab breakout, and why concrete is priced separately
- Demolition and rebuild in a finished basement
- The water table, the soil, and the lot you cannot change
- Where the money goes on an interior system
- What a waterproofing quote should itemize
- Warranties, and what to ask instead of what to assume
- Permits, discharge rules, and who signs off
- How to compare basement waterproofing quotes
- Pressure selling, and how to slow it down
- A worked example: 60 feet of wet wall in a half finished basement
- The honest DIY boundary
- What waterproofing does and does not do for resale
- The bottom line
Short answer: Basement waterproofing is priced by method. Illustratively, grading and downspout correction runs near $5 to $25 per linear foot, crack injection near $400 to $900 per crack, interior drain tile with a sump near $80 to $200 per linear foot, and exterior excavation with a membrane near $150 to $400 per linear foot. Roof water and grading cause many wet basements and cost the least to fix, so start outside.
Basement waterproofing cost is one of the few home repair numbers that can honestly be quoted anywhere from a few hundred dollars to well past thirty thousand, for what the homeowner describes in exactly the same words. You have water on the floor after heavy rain. Three companies come out. One suggests fixing the downspouts and regrading a corner. One proposes an interior drainage system with a sump. One proposes excavating the whole back of the house. Each of them is describing a real solution, and each of them is describing a different problem.
This cost file prices the work the way it should be bought, by method, arranged from the cheapest and least invasive to the most. It covers what each approach costs per linear foot and per job, what drives the number inside every band, why bids on the same wall diverge so hard, and how to tell a drainage problem from a structural one before you spend anything. Our foundation repair cost file covers the structural half of below grade work, and our crawl space encapsulation cost file covers the sealed variant of the same fight in a shallower space. Sketch your own wall in the job cost estimator as you read.
Key takeaways
- Illustratively, grading and downspout correction runs near $5 to $25 per linear foot, crack injection near $400 to $900 per crack, interior drain tile with a sump near $80 to $200 per linear foot, and exterior excavation with a membrane near $150 to $400 per linear foot.
- Roof water and grading cause a large share of wet basements and cost the least to correct, which is why every honest sequence starts outside rather than with a system.
- The number of linear feet treated, not the method, is usually the biggest single lever, and it is the first thing to compare between two quotes.
- On a finished basement, demolition and rebuild along the treated wall can be a third of the project at an illustrative $50 to $150 per linear foot, and it is frequently missing from the proposal.
- Water that arrives without structural movement is a drainage job. Displaced cracks, bowing walls, sticking doors and sloping floors are a different conversation and belong with an independent assessment first.
What basement waterproofing costs, honestly
The honest shape of this market is a ladder rather than an average. At the bottom rung a homeowner spends a couple of hundred dollars on downspout extensions and never has water again, which is a real and common outcome that no contractor gets paid to tell you about. At the top rung a house gets excavated to the footing on three sides, sealed, drained, backfilled and landscaped, and the invoice passes thirty thousand dollars. Between those poles sit six or seven distinct jobs that share the word waterproofing and almost nothing else.
As an illustrative framework, treat these bands as the shape of the ladder: downspout and gutter correction near $150 to $1,200 for a house, regrading and surface correction near $5 to $25 per linear foot of affected wall, an interior wall coating near $15 to $40 per linear foot, crack injection near $400 to $900 per crack, a dedicated dehumidifier near $1,300 to $2,500 installed, an interior drain tile and sump system near $80 to $200 per linear foot, and exterior excavation with a membrane and footing drain near $150 to $400 per linear foot.
Every one of those figures is illustration rather than a quote. They exist so that when a number is said out loud in your basement, you can tell whether it belongs to the problem you have or to a much larger one being sold to you.
Why the same basement gets wildly different bids
Spread this wide is unusual even in home repair, and the reasons are structural rather than dishonest. The first is that companies sell what they own. A drainage contractor sees a drainage problem, a coatings company sees a wall that needs coating, a foundation company sees movement, and a landscaper sees grading. None of them is necessarily wrong, and all of them are reaching for the tool in their own truck.
The second is that the treated length is a judgement call. One contractor prices the single wall where water appears. Another prices the full perimeter on the argument that water will simply find the next low point. On a house with 120 feet of perimeter and 30 feet of visible seepage, that decision alone changes an interior system from an illustrative $2,400 to $6,000 into $9,600 to $24,000 at the same per foot rate. Nothing about the price is different. The scope is.
The third reason is less comfortable. A flooded basement is frightening, it usually gets discovered in bad weather, and a frightened homeowner signs quickly. Some of the spread you see is what the market bears in that moment. Our quote comparison walkthrough covers the mechanics of forcing three proposals onto one scope so that price becomes the only variable left.

Drainage problem or structural problem
This is the question that decides whether you are reading the right cost file at all, and it is worth ten minutes before any of the numbers matter. A drainage problem is water arriving in a building that is otherwise sitting still. The signs are seepage at the joint where the floor meets the wall, damp patches that appear after rain and dry out between storms, efflorescence on the block, a musty smell, and water tracking from a specific crack or a specific corner.
A structural problem is a building that is moving, with water often along for the ride. The signs are different: a wall bowing inward, a horizontal crack along a mortar joint in a block wall, cracks where one side sits proud of the other, doors that stop latching, gaps opening at the top of a wall, and floors you can feel slope underfoot. Those symptoms belong in our foundation repair cost file and, more importantly, with somebody qualified who has stood in the basement.
The overlap is real and it is where homeowners get sold the wrong thing. Water causes movement and movement lets in water, so a house can genuinely have both. The sequence that protects you is to get the structural question answered independently first, then buy drainage against a defined scope. Nobody selling a drainage system should be the sole source of the opinion that you do not need structural work, and nobody selling piers should be the sole source of the opinion that you do.
The order of operations that saves the most money
Waterproofing has a natural sequence, and the money is saved by following it rather than by negotiating. First, remove the water you are creating. Roof water concentrated next to the wall is the single largest avoidable load, and correcting it costs almost nothing relative to any system. Second, correct the ground. The first several feet of soil around the house should shed water away rather than pond against it.
Third, watch a wet season. This is the step everyone skips and the one that saves the most, because a basement that stays dry through a full spring after the cheap work is a basement that never needed a system. Contractors will not suggest this and it is not their job to. It is yours.
Fourth, treat what remains. If water still arrives after roof and surface water are handled, then you have a genuine groundwater or hydrostatic problem, and that is what interior drain tile and exterior systems are actually for. Fifth, manage the air. Dehumidification is the finishing move, not the opening one, because a dehumidifier running against an active leak is an expensive way to make electricity into noise.
The reason this order matters financially is that each step reduces the load on the next. A system sized for a wall that is still receiving four downspouts of concentrated roof water is a system sized for a problem you could have deleted.
Downspouts and roof water, the cheapest fix there is
A roof is a very large water collector and every square foot of it drains through a handful of downspouts. When one of those discharges at the foundation, it delivers a concentrated volume into the soil against the wall precisely where you least want it, and it does so every time it rains. This is not a marginal contributor. On many houses it is the whole problem.
The fix is unglamorous. Extend each downspout so it discharges several feet from the wall, onto a surface that slopes away, or into a buried line that daylights somewhere sensible. Clear the gutters so they stop overflowing at one corner and correct any section that has come loose or lost its slope. Illustratively, this whole category runs somewhere around $150 to $1,200 for a house, depending on how many downspouts need extending and whether any buried line is involved.
Our gutter installation cost file prices the replacement version of this work per linear foot, and our gutter cleaning cost file prices the maintenance rhythm that keeps it working. Both are a fraction of any system in this article, which is exactly why they belong first. A homeowner who does nothing else in this cost file but extend four downspouts has already made the most cost effective waterproofing decision available.
Grading and the first ten feet of soil
Ground settles. Backfill placed against a foundation during construction compacts over years, and the soil that once sloped away eventually slopes back. Patios and walkways settle the same way and can end up delivering their entire surface area toward the house. The correction is to restore a fall away from the wall over the first several feet, using soil rather than mulch, and to make sure hardscape drains outward.
Illustratively, surface correction runs somewhere around $5 to $25 per linear foot of affected wall, which on a 60 foot run is roughly $300 to $1,500. The low end is a straightforward soil job on an open lawn. The high end involves lifting or re-setting pavers, working around plantings that have to be moved and replaced, or bringing in fill where the drop is significant.
Two cautions belong here. Piling soil higher against the wall to create a slope can raise the grade above the siding line or against untreated material, which trades a water problem for a rot problem. And a surface correction on a lot that slopes toward the house from a neighbouring property is managing a fraction of the water rather than the source of it. Where the whole lot works against you, surface work buys improvement rather than a cure, and the honest quote will say so.
Window wells and the water that arrives through them
A basement window well is a hole in the ground next to the wall with a window at the bottom of it, and when it fills faster than it drains, water goes in the only direction available. Wells are a common and often overlooked entry point precisely because the water does not touch the wall on its way in.
The cheap version of the fix is a clear cover that keeps rain and debris out, illustratively somewhere around $150 to $600 supplied and fitted per well. The next step is clearing and rebuilding the well drain, which is a gravel column or a pipe that lets the bottom of the well shed water rather than hold it. Rebuilding a well with a functioning drain illustratively runs somewhere around $1,200 to $3,000 per well depending on depth, access, and whether the drain has to be connected to an existing system.
Ask where the well drain goes. A well drain that terminates in a gravel pocket sitting in clay is a bucket, not a drain, and it will hold water against the window until it evaporates. A well drain tied into a functioning footing drain or into an interior system works, which is one of the few places where the expensive system genuinely earns a place in a small repair.
Interior wall coatings, and what paint can and cannot do
Coatings are the most heavily marketed and most frequently misunderstood product in this category. A cementitious or masonry coating rolled or brushed onto the inside face of a wall is genuinely useful for one job: reducing dampness and the musty smell on a wall that is not under real water pressure. Illustratively it runs somewhere around $2 to $6 per square foot of wall face, which on a standard basement wall height works out near $15 to $40 per linear foot.
What a coating cannot do is hold back water arriving under hydrostatic pressure from saturated soil. Pressure does not care about the finish on the inside of the wall, and a coating applied over an active leak commonly relocates the water rather than removing it, usually to the floor joint, occasionally to the next unsealed section, sometimes behind the coating where it sits until the coating fails.
The honest place for a coating is after the water load has been reduced, as a finish rather than as a fix. Sold as a standalone cure for a wall with water running down it, it is the least defensible product in this cost file. If a proposal offers coating as the entire solution to standing water, ask what is being done about the water arriving, and treat a vague answer as the answer.
Crack injection, sealing water out of a poured wall
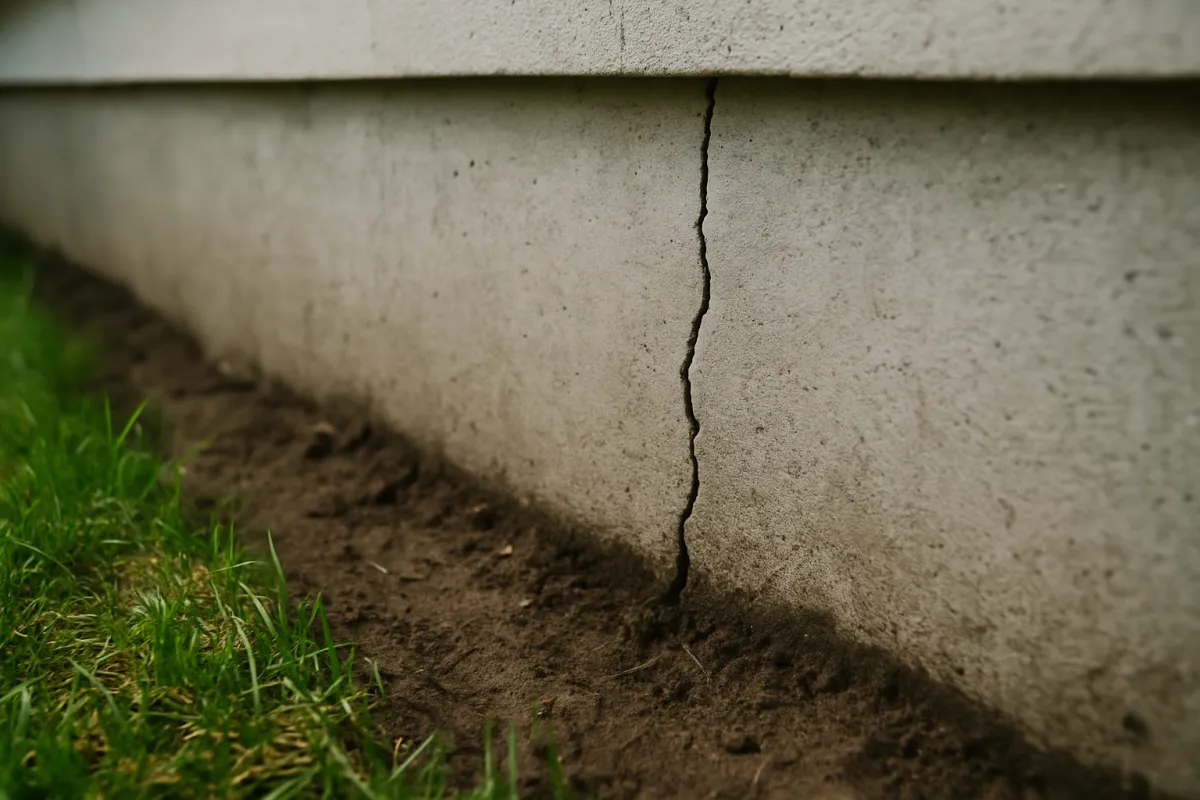
Poured concrete walls crack as they cure, and a fine vertical crack in a poured wall is frequently a shrinkage artefact rather than a fault. It can still leak, because a crack that runs the thickness of the wall is a path, and saturated soil outside will use it. Injection fills that path through the full thickness with epoxy or polyurethane, delivered under pressure through ports set along the crack.
Illustratively, a single injected crack commonly runs somewhere around $400 to $900, and additional cracks injected on the same visit typically cost less each because the trip and setup are already covered. That makes injecting three known leaking cracks in one visit far better value than three separate calls, and it is worth walking the whole wall with a flashlight before booking.
Two things to establish in writing. First, is the seal being sold as a water repair or a structural one, because the honest answer for a shrinkage crack is the former, and a crack that is actually moving will simply reopen the repair. Second, does injection suit your wall at all, since block and masonry walls are not solid through their thickness and are generally not candidates for the same treatment. Our foundation repair cost file covers what happens when the crack turns out to be the symptom rather than the problem.
Interior drain tile and a sump system, priced per linear foot
This is the workhorse of the category and the method most homeowners eventually meet. A strip of the basement floor slab is broken out along the inside of the wall, a perforated pipe is laid in gravel below the slab level, the run is routed to a sump basin, the slab is patched, and a pump lifts collected water out and away. It does not stop water reaching the wall. It gives that water a managed route to a pump before it reaches your floor.
Illustratively, interior drain tile commonly runs somewhere around $80 to $200 per linear foot of wall treated. On a 60 foot run that is roughly $4,800 to $12,000, and a full perimeter on a typical basement lands near $6,000 to $15,000. Inside that band the variables are the slab thickness, whether there are footings or interior walls to work around, how far spoil has to be carried out of the basement, and whether a wall membrane or dimple board is included to route wall seepage down into the trench.
The per foot rate is the easy part to compare. The length is the part to interrogate, because it is where two honest contractors diverge most. Ask each of them to mark the run on a sketch, state the footage, and explain why that footage rather than more or less. Price your own footage in the job cost estimator so those conversations start with a number in your head.
Sump pumps, discharge lines, and backup power
The pump is the component that makes an interior system work, and it is the component most often quoted vaguely. A sump pump installation on its own, where a basin and a discharge route already exist or are simple to create, commonly runs somewhere around $1,000 to $2,500 illustratively. Cutting a new basin into the slab and trenching a discharge line out to daylight sits at the upper end or above it.
Three details deserve written answers. Where does the discharge terminate? It needs to be far enough from the house that the water does not simply return, and it must not be tied into a sanitary sewer, which is prohibited in many jurisdictions. What happens in winter? A discharge line that freezes shut turns a working system into a basin with a running pump. What happens in a power cut? Storms take out power, and a pump without power is a hole in the floor.
A battery backup pump illustratively adds somewhere around $800 to $2,000, and in any house where a summer storm reliably knocks out the supply it is a genuine addition rather than an accessory. A water powered backup exists in some municipal supply areas as an alternative. Ask what the contractor recommends and why, and get the pump capacity and the backup runtime stated in the proposal rather than described on the doorstep.
Exterior excavation, membrane, and a footing drain
This is the most complete approach and the most expensive one, and it is the only method that keeps water away from the outside of the wall rather than managing it after it arrives. The work means excavating down to the footing along the treated wall, cleaning and repairing the exterior face, applying a waterproofing membrane, usually adding a drainage board, installing a footing drain in gravel that carries water to somewhere lower or to a pump, then backfilling and restoring everything that was removed.
Illustratively, exterior work commonly runs somewhere around $150 to $400 per linear foot, which on a 60 foot wall is roughly $9,000 to $24,000 and on a full perimeter can pass $30,000. The band is wide because the job is mostly earth moving, and earth moving is priced by access. A wall with open lawn behind it and room for a machine is the cheap end. A wall against a driveway, a patio, a deck, mature planting, a utility run, or a property line is the expensive end, and sometimes it is simply not possible.
Restoration is the line that gets underestimated. Lawn, plants, paving, steps, and any hardscape removed to reach the wall have to be put back, and that work is real money. Ask whether restoration is included, excluded, or allowanced, because an allowance is a guess that will be trued up later.
Vapor barriers and encapsulation below the slab line
Not all basement moisture arrives as liquid water. Soil under and around a below grade space is a continuous source of vapor, and concrete is not a vapor barrier. In a basement with an exposed dirt floor section, a crawl area attached to it, or a sump left uncovered, that vapor is a meaningful humidity load that shows up as damp air, condensation on cold surfaces, and a smell rather than as a puddle.
Sealing that source means covering exposed soil with a heavy liner, running it up the walls, sealing the seams, and covering the sump basin. Where the space is a genuine crawl area, the full version of this work is encapsulation, illustratively somewhere around $3 to $8 per square foot, and our crawl space encapsulation cost file prices that job phase by phase.
The boundary to understand is the same one that applies to coatings. A liner over soil that is actively wet traps water under plastic, which is worse than the condition you started with. Vapor control is for vapor. Liquid water gets a drain first, and only then does the liner make sense. A proposal that offers encapsulation as the answer to standing water is answering the wrong question, and the cost of finding that out later is doing the job twice.
Dehumidification and the humidity number nobody quotes
Once liquid water is handled, air is what remains, and a below grade room in a humid climate will sit at an uncomfortable humidity without help. A portable unit from a hardware store handles a small dry basement. A dedicated unit sized for the space, installed with a condensate drain or a pump and its own circuit, is the version that appears in contractor proposals, illustratively somewhere around $1,300 to $2,500 installed.
The question worth asking is the one that rarely appears on a quote: what relative humidity is this unit sized to hold, and at what temperature. A unit that is undersized runs continuously and never reaches target. A unit that is oversized costs more than the space needs and short cycles. Both outcomes are avoidable by asking for the capacity and the target in writing before the unit is chosen.
Sequencing matters here as much as anywhere. A dehumidifier running against an active leak is converting electricity into noise, and it also masks the leak by keeping the floor dry enough that nobody investigates. Put it last, after the water has a drain, and it becomes the piece that makes a dry basement feel like part of the house instead of a cellar.
Egress windows and wells, where waterproofing meets code
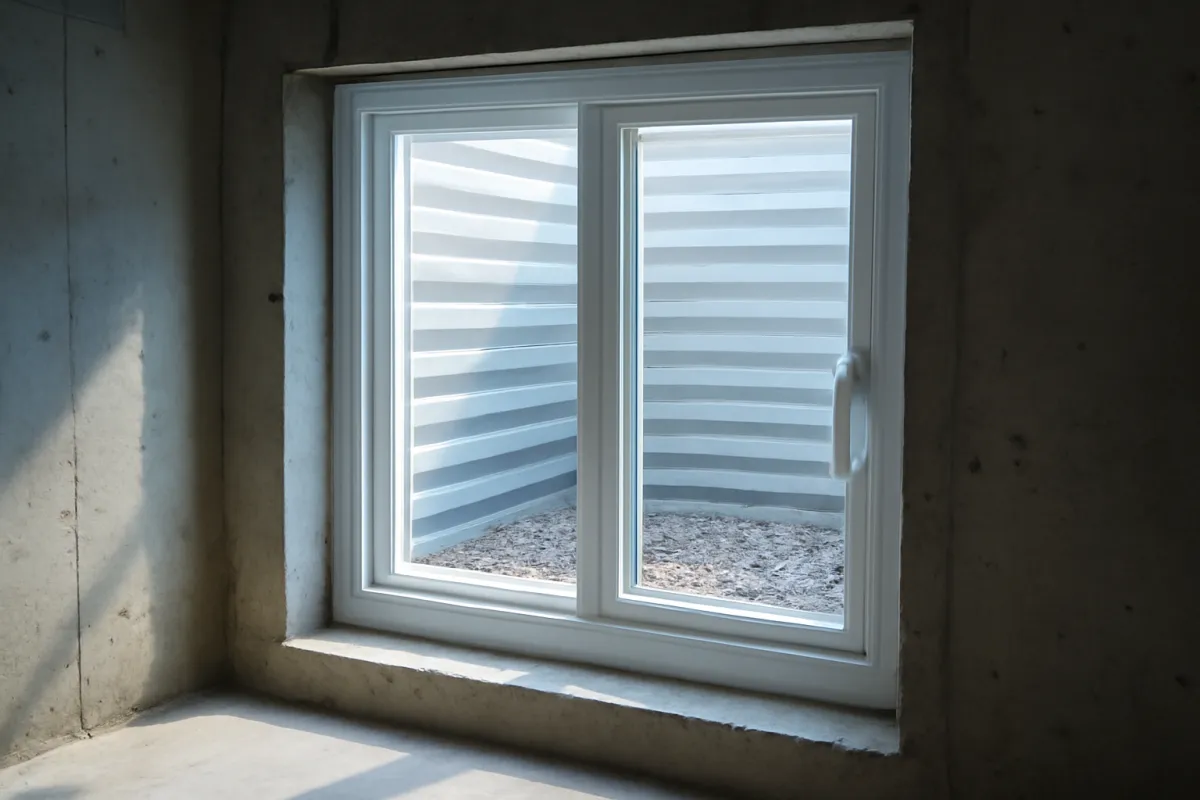
Egress work is not waterproofing, but it shares a wall, a well, and a trench with it, and the two decisions belong in one conversation. If the basement will ever hold a bedroom, most jurisdictions require a window large enough for a person to climb out of and a firefighter to climb in, with a well sized to match if it sits below grade. Cutting that opening into a poured or block foundation is a real job with real structural implications.
Our basement finishing cost file treats egress as a required budget line for anyone finishing the space, and the point that belongs here is one of sequence. Cutting a new opening and building a new well creates a new water entry path that has to be drained correctly. Doing that work after a waterproofing system is installed means cutting back into finished work and tying the new well drain into a system that was designed without it.
If a finished basement is anywhere in your plans, price the egress opening and the waterproofing together and have one contractor coordinate both. Confirm the size and sill height requirements with your building department rather than with any contractor, because they are local rules and they vary.
Illustrative cost by method, cheapest to most invasive
Laid side by side, the ladder is easier to see than it is to describe. The chart below prices each method as a midpoint on an illustrative 60 linear foot run of wet wall, which is roughly one long side of a typical basement, so that per foot methods and per job methods can be compared on the same axis.
Two patterns are worth taking from it. The first is that the gap between the cheap rungs and the expensive ones is roughly two orders of magnitude, which is why the diagnosis is worth more than the negotiation. The second is that the cheapest three rungs together still cost less than the entry price of an interior system, so trying them first is rarely a wasted spend even when a system turns out to be necessary anyway.
Illustrative basement waterproofing cost by method, on a 60 foot run
Midpoint totals for each method applied to an illustrative 60 linear feet of wet wall. Per job items are shown at their own midpoint. Your figure moves with length, access, wall type, and what has to be put back.
Illustrative midpoints, not quotes. Bar widths are drawn from each value against the $16,500 top of the range. Interior demolition and rebuild, landscaping restoration, and permits sit outside these figures.
What actually drives the price: linear feet, wall type, and access
Inside every band above, four variables do most of the work. Linear feet is the first and the largest. Interior and exterior methods are both priced by the foot, so the treated length multiplies everything, and a decision to treat one wall or four walls changes the total by a factor of three or four before anyone discusses rates.
Wall type is the second. Poured concrete, concrete block, stone, and brick behave differently. Poured walls are solid through their thickness and are candidates for injection. Block walls are hollow and can hold water inside the cores, which is why some interior systems include weep holes drilled into the bottom course to release that water into the drain. Stone and rubble walls are irregular, hard to seal, and generally push a job toward drainage rather than sealing.
Access is the third and it decides exterior work entirely. A machine that can reach the wall is the difference between an efficient excavation and hand digging. Slab thickness and interior obstructions are the fourth. A thick slab, a heavily reinforced one, or a run interrupted by interior footings, a furnace, or a finished bathroom all slow the trench and raise the per foot rate that a contractor is willing to quote.
Slab breakout, and why concrete is priced separately
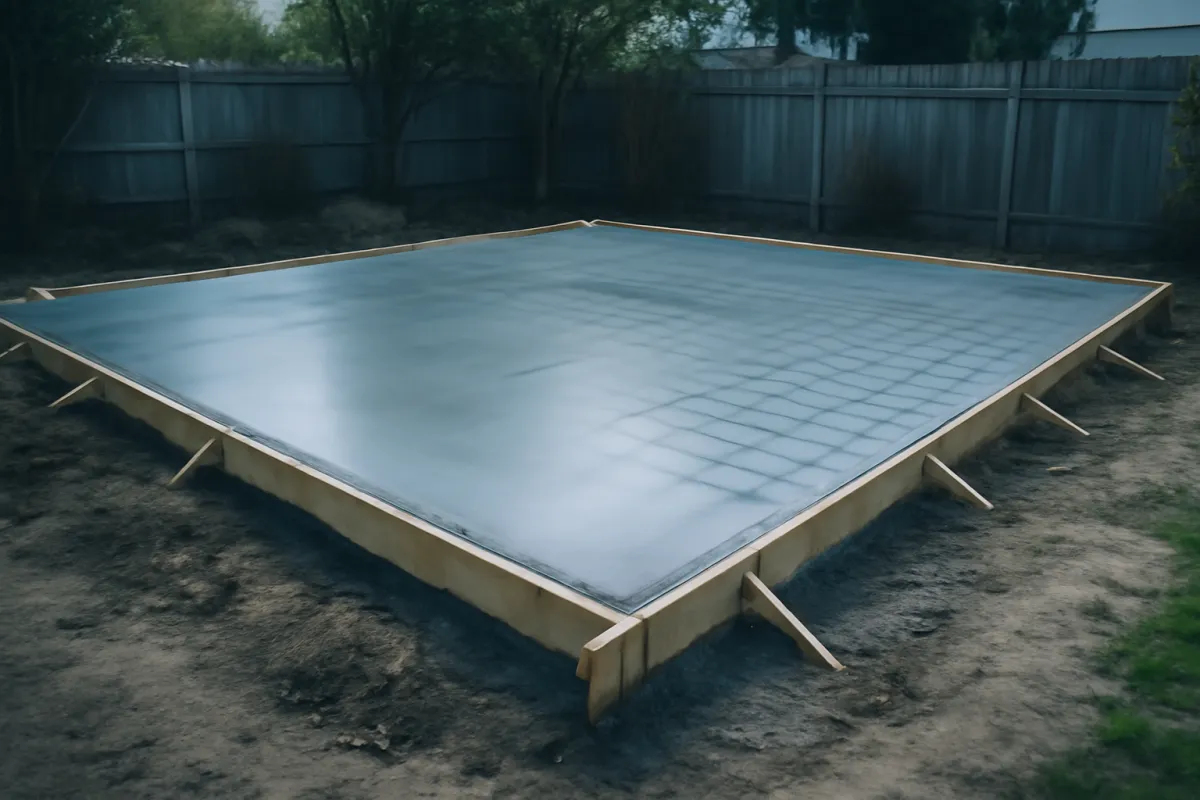
Interior drainage begins with breaking concrete and ends with replacing it, and both halves are labor that has nothing to do with drainage. A strip of slab along the wall is cut and broken out, the rubble is carried up and out of the basement by hand or by conveyor, and after the pipe and gravel are in, a fresh strip of concrete is placed and finished.
Two questions decide how much of that shows up on your bill. What is the slab actually like? Thickness varies, older basements are unpredictable, and reinforcement changes cutting from a fast job into a slow one. Nobody knows until the first cut, which is why some proposals carry a clause for unexpected conditions, and reading that clause carefully is worth the five minutes.
What finish is the patch? A rough patch flush with the floor is standard. A patch smooth enough to receive tile or a floating floor is a different specification and belongs in writing if the room will be finished. Our concrete slab cost file explains how slabs are specified and why the base under them decides so much of their future. On a basement being waterproofed and then finished, agreeing the patch finish now is far cheaper than grinding it later.
Demolition and rebuild in a finished basement
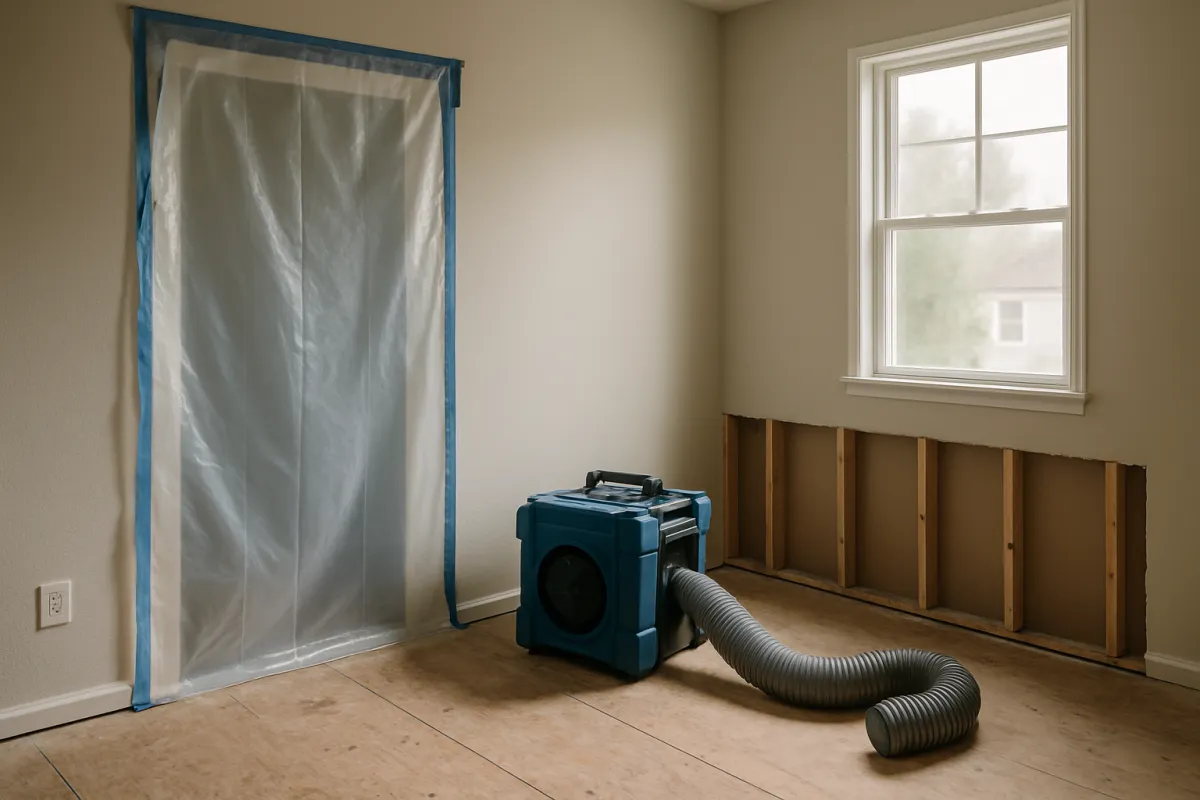
Here is the line that surprises the most homeowners. An interior system needs the bottom of the wall open, and on a finished basement that means removing baseboard, flooring along the run, drywall to a height above the trench, insulation behind it, and sometimes the framing itself. Then it all goes back.
Illustratively, demolition and rebuild of a finished strip runs somewhere around $50 to $150 per linear foot, depending on what is there and how well it has to match. On a 60 foot run that is roughly $3,000 to $9,000, which can be a third of the project total and is very frequently absent from the proposal that won the job on price. Built in cabinetry, a finished bathroom on the wall, or a floor that is no longer available to match all push it higher.
Read every proposal for three words: demolition, restoration, and finish. If a proposal is silent on all three, it is quoting the drainage and leaving the room to you, which may be perfectly acceptable if you know it. Ask in writing who is responsible for the wall afterwards and to what standard. Our estimate reading walkthrough covers how to spot what a bid has quietly left out.
The water table, the soil, and the lot you cannot change
Some basements are wet because of something correctable and some are wet because of where they are. A high seasonal water table means the ground itself is saturated to above the floor level for part of the year, and no amount of surface work changes that. Clay soils hold water against a wall and drain slowly. A house at the bottom of a slope receives water from everything above it. A basement dug below the level of the nearest storm drain has no gravity route out and depends on a pump.
None of that is a reason to despair, and all of it is a reason to price honestly. Where the water table is the driver, an interior system with a reliable pump and a backup is usually the appropriate answer, because you are managing an inflow rather than eliminating a source. Where a slope is the driver, an interceptor drain uphill of the house can be better value than treating the wall.
The practical move is to ask each contractor what they think the source is and to listen for whether the answer describes your lot or describes their product. Somebody who talks about your slope, your soil, and where the water goes after it leaves your house is thinking about the problem. Somebody who describes the same system on every house is describing a catalogue.
Where the money goes on an interior system
Understanding the split helps you judge whether a quote is high because it includes more or high because it costs more. On an interior drain tile job, the largest share is labor, and most of that labor is breaking, carrying, and replacing concrete rather than installing drainage. The materials are comparatively modest, which is why a job that sounds like plumbing is priced like excavation.
Where an interior drain tile budget goes
Illustrative share of an interior drainage total, summing to 100. Concrete work and hauling dominate, because most of this project is moving heavy material out of a room with one narrow exit.
Shares are illustrative and move with slab thickness, how far spoil has to travel, and whether wall membrane and a backup pump are included. Interior demolition and rebuild sit outside this split entirely.
What a waterproofing quote should itemize
A proposal you can compare has six things on it, and most of them are not prices. The diagnosis, meaning what the contractor believes is happening and on what evidence. The method, named specifically rather than as a brand. The length, in linear feet, marked on a sketch of the basement. The components, meaning pipe type and size, gravel, wall membrane if any, basin, pump capacity, discharge route and termination point, and any backup.
The concrete, meaning what is removed, what is replaced, to what finish, and who hauls the spoil. The exclusions, meaning what is explicitly not included: interior demolition and rebuild, landscaping restoration, electrical for a pump circuit, permits, and mold or moisture damage discovered once a wall is opened.
That last category is where disputes come from. A proposal that says nothing about mold behind the wall is not promising to handle it, and a wet wall in a finished basement has a reasonable chance of hiding some. Our mold remediation cost file prices that as its own scope, which is exactly how it should appear if it becomes relevant. Ask for the exclusions list before you sign, not after the drywall comes off.
Warranties, and what to ask instead of what to assume
Waterproofing is sold with warranties more aggressively than almost any other home trade, and warranty language is where a lot of the perceived value of an expensive bid lives. This cost file will not tell you what any warranty covers, because the terms are written by each company and they differ enormously. What it can tell you is which questions turn a warranty from a marketing line into something you can evaluate.
Ask what the warranty actually promises. A promise about the installed system performing is a different thing from a promise that the basement will never be wet from any cause. Ask what the remedy is: a return visit, a repair, a refund, or a credit. Ask what voids it, since sump maintenance, discharge line care, and grading changes commonly appear in exclusions. Ask whether it transfers to a buyer and on what terms, because that matters at sale.
Then ask the question that decides all of the above: how long has this company existed under this name, and who honours the paperwork if it stops existing. A long warranty from a company with a short history is a document, not a guarantee. Verify licensing and insurance directly with the issuing bodies rather than from the brochure.
Permits, discharge rules, and who signs off
Permit requirements for waterproofing work vary widely and are genuinely local, so this is a call to your building department rather than a fact you can read anywhere. As a general shape, interior drainage that involves breaking and replacing a slab and adding a pump often requires a permit, an electrical circuit for a pump generally does, and exterior excavation near property lines or utilities usually involves at least a utility locate before anyone digs.
The rule most likely to cause a real problem later is where the sump discharges. Many jurisdictions prohibit connecting a sump to the sanitary sewer, some regulate discharge to the storm system, and some specify how far from a property line water may be released. A contractor who shrugs at that question is transferring a compliance problem to you. Get the termination point named in the proposal.
Call before anyone digs, every time, regardless of what the contractor says. Utility locates are free in most areas and a struck line is not. If the contractor is pulling the permit, ask to see it. If you are pulling it, ask the department what inspections apply and at what stages, because an inspection that has to happen before the trench is backfilled cannot be arranged afterwards.
How to compare basement waterproofing quotes
Comparing waterproofing bids is a scope exercise before it is a price exercise. Lay the three proposals side by side and, before looking at a single total, write down the method and the linear footage from each. If those two fields differ, the totals are not comparable and no amount of staring will make them so.
Then normalise. Divide each total by its stated footage to get a per foot figure, and see whether the expensive bid is expensive per foot or simply longer. A bid that is $18,000 for 90 feet and a bid that is $9,000 for 45 feet are the same price. That comparison alone resolves a surprising share of what looks like wild variance, and it takes two minutes with the job cost estimator open beside them.
Finally, compare the exclusions, not the inclusions. The cheapest bid is frequently the one that excludes the most, and once demolition, restoration, the pump circuit and the permit are added back it can finish last. If one contractor proposes a fundamentally different diagnosis from the other two, that is worth an independent opinion from someone selling nothing before you decide which story about your house is true.
Pressure selling, and how to slow it down
A wet basement is a good environment for a hard close, and the pattern is recognisable once you know it. A long free inspection that ends with an alarming description and a price that expires today. A discount contingent on signing during the visit. A financing application produced before a written scope. A refusal to leave a proposal behind for consideration. Our contractor scam warning file covers the wider version of these tactics.
The counter is procedural rather than confrontational. Ask for everything in writing and say you will review it. Take photographs of whatever you were shown. Ask what happens if you do nothing for six months, and listen to whether the answer is specific or theatrical. Water damage is real and worth addressing, and it is very rarely an emergency measured in hours.
The one legitimate urgency is active flooding, and even then the emergency response is extraction and drying rather than signing for a system. Handle the water, dry the space, then buy the permanent fix on a normal timetable with three written scopes in front of you.
A worked example: 60 feet of wet wall in a half finished basement
Take a house with 120 feet of basement perimeter and seepage along one 60 foot wall, appearing after heavy rain at the floor and wall joint and from one vertical crack. The wall is poured concrete. The basement is half finished, with drywall and trim along the wet wall but no built ins. The downspouts have already been extended and the grading corrected, and the wall is still wet through a full spring.
Start with the main method. Interior drain tile at an illustrative $80 to $200 per linear foot across 60 feet gives $4,800 to $12,000. Add the crack. One injected crack at an illustrative midpoint of about $650. Add the demolition and rebuild. A partly finished wall at an illustrative $45 per linear foot midpoint across 60 feet adds about $2,700. Add moisture control. A dedicated dehumidifier at an illustrative midpoint of about $1,900.
The add ons total about $5,250 at midpoint. Carried against the main method band, the project lands near $9,300 to $18,300 all in, which is roughly $154 to $305 per linear foot of treated wall once everything is counted. Change any assumption and the total moves: treat the full perimeter instead of one wall and the main line doubles, choose exterior excavation and it triples, or find that a downspout was the whole problem and none of it happens. That is exactly the sketch the companion below lets you rebuild with your own footage, method, and finish level.
The honest DIY boundary
Some of this work is genuinely homeowner work and some of it is not, and the line is clearer here than in most trades. Downspout extensions, gutter clearing, well covers, and modest regrading are all reasonable weekend projects for a capable homeowner with a shovel, and they are the highest value rungs on the ladder. Doing them yourself costs materials and a Saturday.
Crack injection kits exist and can work on a suitable shrinkage crack in a poured wall, with the caveat that a failed injection makes a professional repair harder rather than easier because the crack is now partly filled. A portable dehumidifier is obviously homeowner territory. Monitoring is free and valuable: photograph the wall, note the date and the weather, and build a record of when water appears and where.
Breaking a slab, installing drain tile, cutting a sump basin, running a pump circuit, and any excavation against a foundation are not homeowner projects. The first is heavy and the outcome is buried where you cannot inspect it. The pump circuit is electrical work in a wet location. Excavation next to a foundation removes lateral support from a wall that is holding back soil, which is a safety question rather than a skill question.
What waterproofing does and does not do for resale
A dry basement is not a feature buyers pay a premium for, and a wet one is a problem they discount heavily or walk away from. That asymmetry is the honest frame. Waterproofing spend is best understood as protecting the value the house already has rather than as an improvement that returns a multiple, in the same category as a roof.
Two things do carry value at sale. Documentation is the first: the proposal, the invoice, photographs of the work in progress, the pump specification, and any inspection sign off. A buyer’s inspector who finds a sump and a patched slab strip will ask what happened, and a folder answers the question better than a homeowner’s memory. A transferable warranty, where one exists and where the company still exists, is the second, and the transfer terms are worth reading before you need them.
What does not help is an undocumented repair. A fresh coat of paint on a basement wall and a strip of new concrete with no paperwork reads to an experienced inspector as something being covered up, and it invites a harder look at everything else. Disclose what you know, keep the record, and let the work speak.
The bottom line
Basement waterproofing cost is a ladder from a few hundred dollars to well past thirty thousand, and where you land on it is decided by the diagnosis rather than by negotiation. Illustratively, surface correction sits near $5 to $25 per linear foot, crack injection near $400 to $900 per crack, interior drain tile with a sump near $80 to $200 per linear foot, and exterior excavation with a membrane near $150 to $400 per linear foot, with demolition and rebuild adding an illustrative $50 to $150 per linear foot wherever a finished wall is in the way.
The sequence that saves the most money is unglamorous and free to start: fix the roof water, correct the ground, watch a wet season, and only then buy a system for whatever is left. When you do buy one, compare scopes before prices, normalise every bid to a cost per linear foot, read the exclusions harder than the inclusions, and treat urgency as a reason to slow down. A homeowner who does those four things ends up with the right method at a fair number, which is the whole objective.
ProsNook publishes this cost file to explain how basement water problems are diagnosed, scoped and priced in general terms, and it is educational material rather than engineering, structural, environmental, insurance or legal advice. Nothing written here assesses your basement: seepage, dampness, cracking and odour can point to anything from a misdirected downspout to active structural movement or a hidden plumbing leak, and only a qualified professional who has inspected the property in person can tell those apart. Every dollar figure, per linear foot rate, per square foot band, share and scenario total above is illustration only, and your real cost will move with treated length, wall construction, slab thickness, soil and water table conditions, machine access, restoration extent and local labor rates. Warranty terms are written by each company and differ substantially, so read the document itself rather than relying on any summary. Permit requirements, utility locate obligations and rules governing where a sump may discharge are set locally and vary widely, so confirm what applies at your address with your building department before work begins. Obtain several detailed written scopes on one defined length and method, verify licensing and insurance directly with the issuing bodies, and treat alarm, urgency and same day pricing as reasons to pause rather than reasons to sign.
Frequently asked questions
How much does basement waterproofing cost?
There is no single basement waterproofing price, because the phrase covers everything from extending a downspout to excavating around a house. As an illustrative framework, correcting downspouts and grading commonly lands somewhere near $5 to $25 per linear foot of affected wall, injecting a single crack near $400 to $900, an interior drain tile system with a sump near $80 to $200 per linear foot, and exterior excavation with a membrane and footing drain near $150 to $400 per linear foot. On an illustrative 60 foot run of wet wall that is roughly $300 to $1,500 at the cheap end and $9,000 to $24,000 at the invasive end. The right number for your basement depends on what is actually letting water in, which is a question to settle before anybody quotes a system.
Is interior or exterior basement waterproofing better?
They solve the problem at different points and neither is universally correct. Exterior work keeps water away from the outside face of the wall by excavating, sealing the wall, and giving the water a drained path to somewhere else, which is thorough and expensive because it means digging around the house and putting the yard back. Interior drain tile accepts that water reaches the wall and gives it a managed route to a sump before it reaches the floor, which is far cheaper and far more disruptive inside. Access usually decides it: a house with an open yard and no hardscape against the wall can be quoted either way, while a house with a driveway, a patio, or a neighbouring property against the wet wall often has only the interior option.
What does a sump pump cost to install?
A sump pump installation on its own, where a basin and a discharge route already exist or are simple to create, commonly runs somewhere around $1,000 to $2,500 as an illustrative figure. When the basin has to be cut into the slab and a discharge line trenched out to daylight, the same work sits at the upper end or above it. A battery backup pump commonly adds another $800 to $2,000 illustratively, and it is a genuine addition rather than an upsell in any house where a power cut during a storm would mean a flooded floor. Ask where the discharge terminates and whether that destination is permitted where you live, because tying a sump into a sanitary sewer is prohibited in many places.
How much does it cost to fix a crack in a basement wall?
Injecting a single crack in a poured concrete wall commonly runs somewhere around $400 to $900 as an illustrative figure, and additional cracks injected on the same visit typically cost less each because the trip and setup are already paid for. That price buys a seal against water moving through the crack, not a structural repair, and an honest contractor will say so in writing. If the crack is displaced, widening over time, or accompanied by sticking doors or sloping floors, the sealing conversation is premature and an independent assessment comes first. Our foundation cost file covers what happens when a crack turns out to be structural rather than a leak.
Why are basement waterproofing quotes so different from each other?
Three reasons, and only one of them is pricing. The first is that companies sell different systems, so a drainage contractor proposes drainage, a coatings company proposes coatings, and a foundation company proposes structural work, each reaching for the tool they own. The second is that the scope is genuinely open to interpretation, since one contractor may treat one wet wall and another may treat the whole perimeter on the same house. The third is that a wet basement is frightening and fear closes sales, so some of the spread is simply what the market bears from an alarmed homeowner. Compare the scopes first, in linear feet and in method, and the prices become comparable afterwards.
Do interior waterproofing coatings work?
Cementitious and masonry coatings applied to the inside face of a wall are useful for a narrow job, which is reducing dampness and the musty smell that comes with it on a wall that is not under real water pressure. They do not stop water arriving under hydrostatic pressure from saturated soil, and applying one over an active leak commonly relocates the water rather than removing it, often to the floor joint. Illustratively, coating a wall runs somewhere around $2 to $6 per square foot of wall face, which on a standard basement wall height is roughly $15 to $40 per linear foot. Treat it as a finish that follows a working drainage plan, not as a substitute for one.
Does waterproofing a basement include fixing the finished walls afterwards?
Often not, and this is the single most common gap between what a homeowner expects and what a proposal contains. An interior drainage system needs the bottom of the wall opened, which on a finished basement means removing drywall, insulation, trim, and flooring along the run, then putting it all back. Illustratively, demolition and rebuild of a finished strip runs somewhere around $50 to $150 per linear foot depending on what is there, and it can be a third of the project on a fully finished wall. Read the proposal for the words demolition, restoration, and finish, and if they are absent, ask in writing who is responsible for the room afterwards.
Can a wet basement be fixed cheaply?
Sometimes, and it is worth spending an afternoon finding out before anybody quotes a system. A surprising share of basement water arrives because roof water is being concentrated next to the wall by a blocked gutter or a downspout that discharges at the foundation, or because the soil in the first several feet has settled and now slopes toward the house. Correcting both is inexpensive relative to any system, commonly a few hundred to a few thousand dollars illustratively, and it removes the load that every interior system is then asked to manage. If the basement stays dry through a full wet season afterwards, the expensive conversation was never necessary.