What's on this page
- What roof repair actually costs
- Why the trip charge is most of a small repair
- Start with the symptom, not the shingle
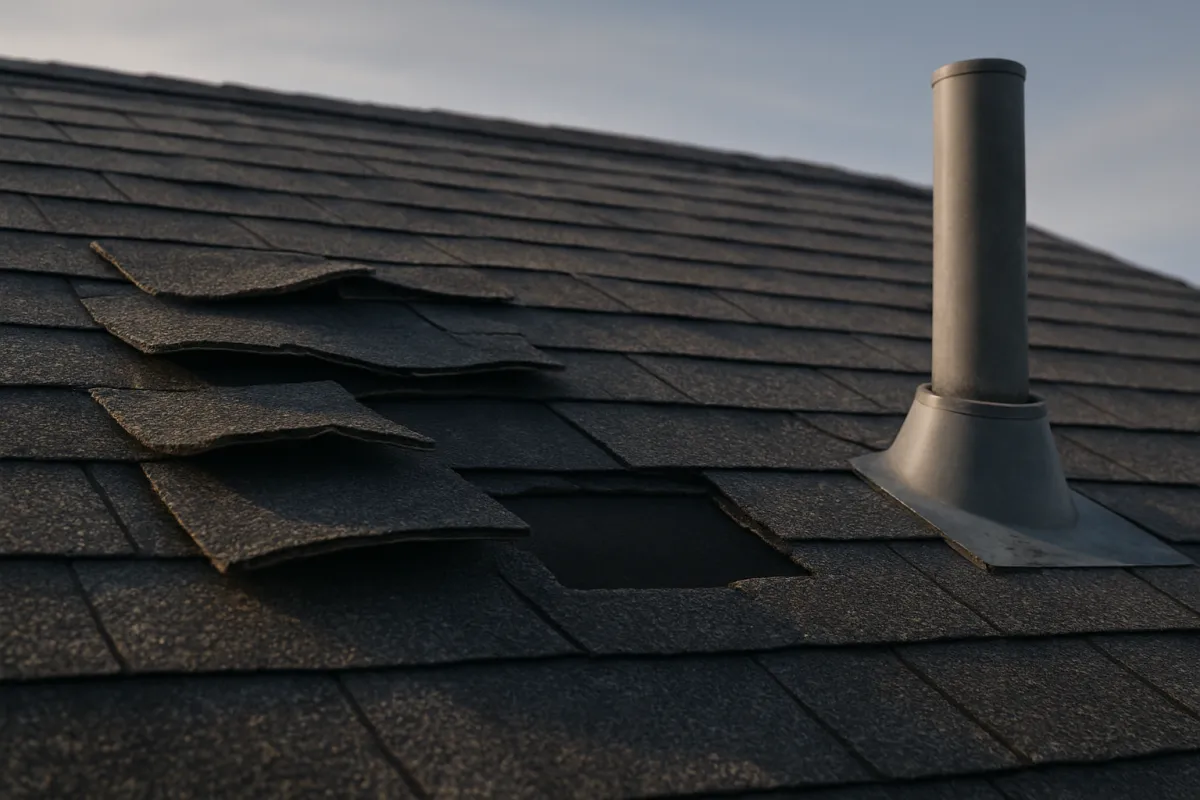
- A few missing or lifted shingles
- Cracked, curled, and bald shingles are a different conversation
- The leak around a penetration is usually the flashing
- Pipe boots and vent seals
- Valley flashing and why valleys fail first
- Chimney flashing: step, counter, and cricket
- Ridge, hip, and ridge vent work
- Skylight leaks and why they get blamed unfairly
- Ice dam damage and what clearing one costs
- Sagging or spongy decking, where repair becomes structural
- Gutter driven damage that is not a roof problem at all
- Emergency tarping and what it should cost
- Telling a repair from a roof at the end of its life
- The repair or replace arithmetic
- Why matching shingles on an older roof is hard
- What a roof repair estimate should actually list
- How to compare roof repair quotes without guessing
- Insurance: sudden damage versus wear
- Warranties and who is allowed on your roof
- Safety: what a homeowner should and should not do
- Cost by scenario: how the pieces add up
- A worked example: a leak traced to the chimney
- Maintenance that prevents most of these bills
- Choosing who to call, and in what order
- The bottom line
Short answer: Roof repair is priced by the problem. Illustratively, a small shingle repair sits near $250 to $700, a penetration leak near $500 to $1,500, chimney flashing near $1,200 to $3,500, and decking work from $2,500 upward, with a minimum service charge of commonly $150 to $400 buried in every small job. Most leaks start at a penetration or transition rather than in the open field of shingles, so most repairs are flashing work.
Roof repair cost is the question most homeowners actually have, even though the internet is full of answers about roof replacement. A ceiling stain appeared after a storm, or a neighbour mentioned that shingles were lying in your yard, and the real question is whether this is a few hundred dollars, a few thousand, or the opening move in a conversation about a whole new roof. The answers you find range from a suspiciously cheap flat figure to a replacement quote, and neither describes the situation in front of you.
This cost file prices roof work by the problem you can see rather than by the product a company sells. Missing shingles, a stain under a vent pipe, a wet chimney chase, a valley that runs, ice damage along an eave, and a spot on the roof that feels soft underfoot are six different jobs with six different price shapes. Our roof replacement cost file covers the other side of the decision, and our roofing contractor checks cover who should be up there. Build a rough figure for your own situation in the job cost estimator as you read.
Key takeaways
- Most roof leaks start at a penetration or transition, not in the open field of shingles, so the repair is usually flashing work rather than shingle work.
- Illustratively, a small shingle repair sits near $250 to $700, a penetration leak near $500 to $1,500, chimney flashing near $1,200 to $3,500, and decking work from $2,500 upward.
- A minimum service charge, commonly around $150 to $400, is buried in every small repair, which is why bundling several small items into one visit is far cheaper than three visits.
- Repairing a roof with years left is usually right; repairing one at the end of its life usually buys a season and then vanishes under a replacement.
- Steep, wet, high, or damaged roofs are a genuine fall hazard, and anything past a ground level look with binoculars belongs to a professional.
What roof repair actually costs
The honest answer is a table rather than a number, because roof repair is a family of unrelated jobs that share a word. At the small end, a roofer arrives, replaces a cracked vent collar, and leaves inside an hour, and the invoice is barely above the company’s minimum. At the large end, a leak that ran unnoticed for two winters has soaked the decking and the framing below it, and the repair turns into carpentry that costs more than some full replacements on small houses.
As an illustrative framework for this article, treat these bands as the shape of the market: replacing a cracked pipe boot near $250 to $600, replacing a few missing or lifted shingles near $250 to $700, a ridge or hip cap section near $400 to $1,100, a leak diagnosed and reflashed at a penetration near $500 to $1,500, valley flashing near $700 to $2,000, ice dam damage near $800 to $3,000, chimney reflashing near $1,200 to $3,500, and a sagging decking section replaced with framing repairs from $2,500 to $8,000.
None of those figures is a quote. They exist so that when a roofer says a number out loud, you can tell whether it belongs to the problem you have or to a much bigger one. A $6,000 proposal for what turns out to be one split vent collar is not expensive, it is the wrong scope, and scope before price is the whole discipline here.
Why the trip charge is most of a small repair
Homeowners are frequently surprised that a twenty minute repair costs several hundred dollars, and the explanation is worth understanding because it changes how you buy this work. Almost everything in a small roof repair happens before a single shingle is lifted. A crew drives to your address, unloads and sets ladders, rigs whatever fall protection the pitch and height require, climbs, walks the roof to find the actual source rather than the reported symptom, and then goes back down for materials. That sequence takes roughly the same time whether the repair itself is one collar or six.
Most roofing companies therefore set a minimum service or trip charge, commonly somewhere around $150 to $400 as an illustrative range, and a great many small repairs are priced at or just above it. That is not padding. It is the honest cost of putting a qualified person safely on a roof for any reason at all.
The practical consequence is the most useful piece of buying advice in this cost file: bundle. If a roofer is coming out for a leak, ask them to look at every boot, every exposed nail head, the ridge caps, and the flashing at every transition while they are up there, and to price the whole list. Three items on one visit commonly cost far less than the same three items on three visits, because you pay for the setup once instead of three times.
Start with the symptom, not the shingle
Almost every roof search begins with something visible from inside or from the ground: a brown ring on a ceiling, drips during a specific kind of rain, shingle pieces in the yard after wind, granules collecting at the bottom of a downspout, or a patch of roof that looks darker than the rest. The instinct is to look up what that symptom costs, and it leads you astray, because the symptom and the source are frequently in different places.
Water does not fall straight down inside a roof. It enters at a defect, runs along the top of the underlayment or down a rafter, and appears at the first place gravity lets it drop, which can be several feet away and on the other side of a wall. A ceiling stain in the middle of a bedroom is not evidence of a hole directly above it. This is why leak tracing is a real skill and why a competent roofer spends the first part of the visit looking rather than fixing.
The mechanisms behind roof problems are few and worth naming. Age hardens and shrinks the materials until they crack and let go. Impact from hail or a falling branch breaks the surface locally. Wind lifts and peels shingles from the edges and ridges inward. Sealant failure at flashings and collars opens the joints that were never watertight on their own. Ice forces water backward up the slope. Ventilation and moisture from inside cook the roof from below and rot the decking without any external damage at all. Everything priced below follows from one of those.
A few missing or lifted shingles
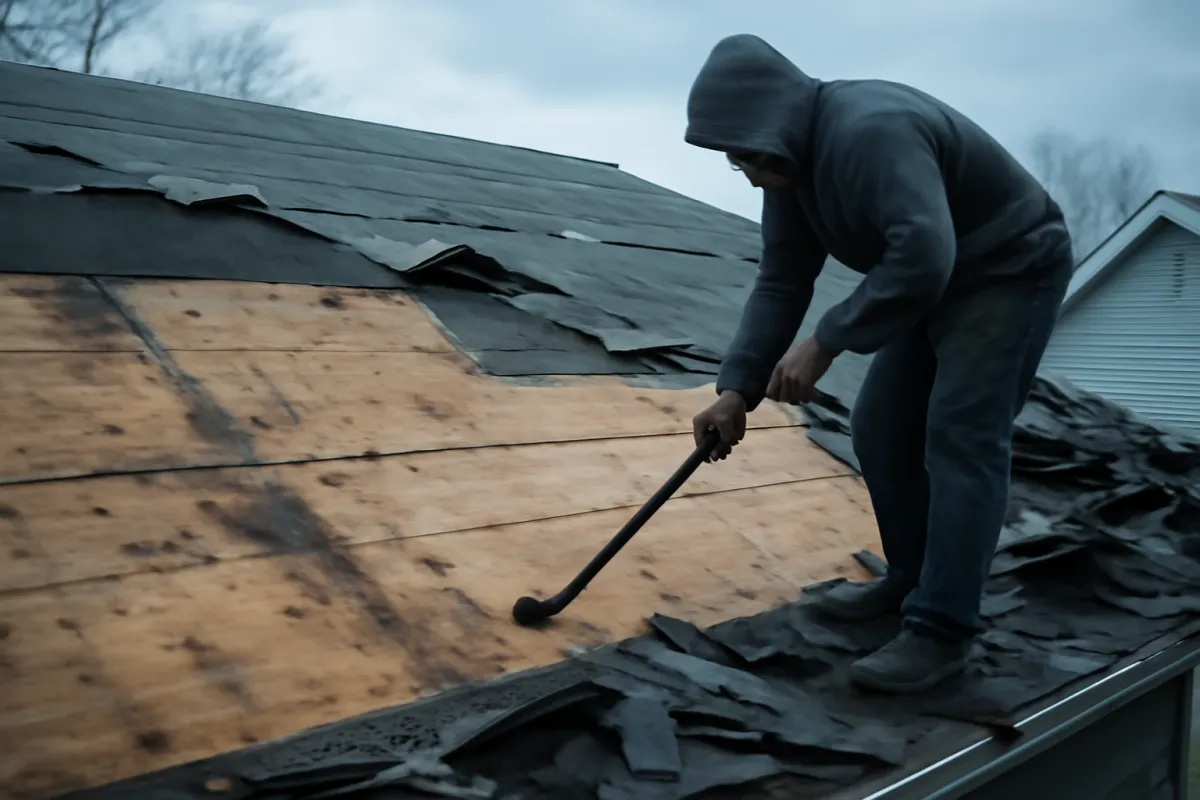
This is the most common call after a windy night, and it is usually the cheapest real repair available. Shingles are held by their fasteners and by a sealant strip that bonds each course to the one below it. Wind gets under an edge that never sealed, or under one whose seal has aged out, and peels shingles back or removes them entirely. What is left behind is either bare underlayment, which will hold water out for a while, or bare decking, which will not.
Illustratively, replacing a handful of shingles in one area commonly runs somewhere around $250 to $700 including the trip, with the low end typical when it is genuinely a few tabs in an accessible spot and the high end when several courses have to be lifted and rewoven, or when the area sits high on a steep slope. Replacing shingles is not simply nailing new ones down: the courses above have to be released and resealed so water sheds over the repair rather than into it.
Two questions decide whether this stays cheap. Is the surrounding roof still flexible enough to lift without cracking, which is the age test described later in this article? And is there a matching shingle available, which is the appearance question that has its own section below. When the answer to both is yes, this is a straightforward and satisfying repair. When the answer to either is no, the conversation widens.
Cracked, curled, and bald shingles are a different conversation
There is a critical distinction between damage and wear, and it decides whether you are buying a repair or delaying a replacement. Damage is local: a branch came down, hail struck a section, wind took an edge. Wear is general: shingles across the whole roof have curled at the corners, cracked along their length, lost the granule surface that protects the asphalt underneath, or gone brittle enough that walking on them breaks them.
The tell for wear is that it appears everywhere the sun does rather than in one patch. If the south and west slopes look bald and the shingle edges are lifting all along the roof rather than in one place, no repair changes that trajectory. You can absolutely still repair a specific failure on such a roof, and sometimes that is exactly the right call while you save for a replacement, but do it with your eyes open about what you are buying.
Granules in the gutters and at the bottom of downspouts are the classic evidence. A modest amount is normal, especially in the first year of a new roof as loose granules wash off. Steady accumulation years later, paired with shingles that look thin and shiny where the granules have gone, is the roof telling you its clock is running down. Our gutter cleaning cost file explains what comes out of a gutter and why it is worth looking at rather than just hosing away.
The leak around a penetration is usually the flashing
If this cost file is useful for exactly one thing, make it this. Leaks cluster overwhelmingly at penetrations and transitions rather than in the open field of shingles, and understanding that changes both what you expect to pay and what you should be suspicious of.
A field of shingles is a simple thing: overlapping courses shedding water downhill. It generally does its job until the shingles themselves fail. Every place something interrupts that field, though, depends on flashing, which is the metal or membrane detailing that carries water back onto the shingles instead of letting it into the joint. Chimneys, plumbing vent pipes, exhaust vents, skylights, dormer walls, roof to wall junctions, and valleys are all flashing details, and flashing depends on correct layering and on sealants that age.
So when a homeowner reports a leak, the experienced answer is a question: what is closest, uphill, to where the water shows inside? Illustratively, diagnosing a leak and reflashing a single penetration commonly runs somewhere around $500 to $1,500 depending on the detail involved and what has to be opened up to reach it. That range is also the honest reason to be sceptical when a large area of shingle replacement is proposed for a single stain without any inspection of the nearest penetration. Ask what was checked and what was ruled out, in writing.
Pipe boots and vent seals
The single most common flashing failure on an ordinary house is the collar that seals around a plumbing vent pipe. It is typically a flexible rubber or synthetic sleeve set into a metal flange, and it lives in direct sun for its whole life. Sun hardens it, it shrinks and splits around the pipe, and water walks straight down the outside of the pipe into the attic. The shingles around it may have fifteen good years left.
Illustratively, replacing one boot commonly runs somewhere around $250 to $600 installed, and a very large share of that is the trip and setup rather than the component. Additional boots done during the same visit typically cost far less each, frequently in the low hundreds, which is exactly the bundling logic described earlier. Most houses have two to four of these, they all age at the same rate, and replacing them together is the cheapest they will ever be.
Two things are worth asking about the replacement. First, is the roofer replacing the whole boot assembly by lifting the shingles above it and setting a new flange into the courses, or are they applying sealant over the split? Sealant over a split boot is a temporary measure that will fail again, and it should be priced and described as temporary. Second, are the exhaust vents, satellite mount penetrations, and any old abandoned penetrations being checked at the same time, because those fail the same way.
Valley flashing and why valleys fail first
A valley is where two roof slopes meet and drain into each other, which means it carries far more water than any other part of the roof and carries it fast. Valleys are also where debris collects, where ice sits longest, and where two planes of shingles have to be terminated neatly against each other. It is unsurprising that they are a frequent source of leaks on older roofs.
Valleys are detailed in more than one way. An open valley runs a metal channel down the centre with shingles cut back on both sides, and the metal does the work. A closed valley weaves or laps the shingles across the valley so the shingles themselves carry the water, sometimes over a membrane. Both work when done correctly, both fail when the shingles wear, when the metal corrodes, or when nails were driven too close to the centre line.
Illustratively, repairing or replacing a section of valley flashing commonly runs somewhere around $700 to $2,000 depending on the length involved, whether the metal is being replaced or just the shingles alongside it, and how much shingle work is needed on either side to reintegrate the repair. Valley work is more invasive than it looks from the ground, because getting at the valley means removing courses of shingles on both slopes and putting them back so they shed correctly.
Chimney flashing: step, counter, and cricket
A chimney is a masonry box passing through a sloped water shedding surface, and it is the leak source homeowners most consistently underestimate. Getting it right requires several separate pieces of metal working together, and any one of them failing produces water inside.
Step flashing is a series of individual L shaped pieces woven into the shingle courses along the sides of the chimney, each lapping the one below. Counterflashing is set into or onto the masonry above the step flashing so water running down the chimney face is directed out over it rather than behind it. A cricket or saddle is a small peaked structure built on the uphill side of a wide chimney to split water around it instead of letting it pond against the masonry. On many older houses one or more of these was never installed properly, or was replaced with a bead of sealant that has since cracked.
Illustratively, reflashing a chimney commonly runs somewhere around $1,200 to $3,500 as an illustrative range, with the low end reflecting one side of a small chimney and the high end a full reflash of a wide chimney with a cricket added and shingles rewoven all around it. A quick alternative you will sometimes be offered is a heavy sealant or coating applied over the existing joint, illustratively a few hundred dollars, and it is honest to describe that as buying time rather than fixing the detail. Note that masonry problems and flashing problems are different specialties: our chimney sweep cost file covers what happens inside the flue.
Ridge, hip, and ridge vent work
The ridge is the peak line, the hips are the sloping edges where two planes meet outward, and both are covered by cap shingles bent over the joint. Caps take more weather than anything else on the roof, they are bent, which stresses the material, and they are usually the first thing wind lifts. A ridge vent, where fitted, sits under those caps along the peak and lets warm attic air out.
Because caps are exposed and bent, they age faster than the field. It is common on a middle aged roof to find the field still sound and the caps cracked, lifted, or missing along a stretch. Illustratively, replacing a section of ridge or hip cap commonly runs somewhere around $400 to $1,100 depending on length and access, and running a full ridge on a larger house sits at the top of that band or above it.
Ridge vent problems are worth a separate look because they can produce leaks that seem to have no source. A vent installed without the right end caps, or with fasteners that missed, or with the slot cut wrong underneath, can let wind driven rain and blowing snow into the attic while looking completely intact from the ground. If your leak appears near the peak during driving rain rather than steady rain, that pattern is a clue worth mentioning to whoever inspects it.
Skylight leaks and why they get blamed unfairly
Skylights are penetrations with a hole cut through both the roof and the ceiling, so a leak around one is both immediately visible and immediately alarming. They are also blamed for a lot of water that is not their fault, because condensation on cold glass drips exactly like a leak and appears in exactly the same place.
When it is a genuine leak, the failure is usually the flashing kit around the unit rather than the unit itself: the head flashing at the top, the step flashing along the sides, or the apron at the bottom, plus whatever sealant somebody applied at some point instead of correcting the layering. Illustratively, reflashing a skylight commonly runs somewhere around $500 to $1,500 including reintegrating the shingles around it, and replacing the unit itself is a substantially larger job that belongs in a different conversation.
Before you spend anything, it is worth ruling out condensation. Condensation typically appears in cold weather, worsens on the coldest nights regardless of rain, shows up as drops on the frame and glass rather than staining outward into the ceiling, and improves when the room’s humidity drops. A leak follows the weather instead. Telling one from the other before the roofer arrives can save you an entire visit.
Ice dam damage and what clearing one costs
In cold climates, ice dams cause a specific and expensive category of roof damage that is not really a roof defect at all. Heat escaping into the attic melts snow on the upper part of the roof, that water runs down to the cold overhang beyond the heated space, refreezes there, and builds a ridge of ice. Water then backs up behind the ridge and sits on the roof, and standing water gets under shingles that were only ever designed to shed water downhill.
Two costs follow. The first is removal, and the honest advice is that this is not homeowner work: chipping ice with tools damages shingles and gutters, and standing on a snow covered roof is genuinely dangerous. Professional steam removal commonly runs somewhere around $400 to $1,500 as an illustrative range depending on the length of eave treated and how thick the ice is. The second is repair of what the water did, illustratively somewhere around $800 to $3,000 for shingle and underlayment work along an eave, plus whatever interior repair the water caused inside the wall or ceiling.
The permanent answer lives in the attic rather than on the roof. Sealing air leaks from the heated space, correcting insulation, and making sure the soffit and ridge ventilation actually work keeps the roof deck cold enough that snow stops melting where it should not. A roofer who reshingles an eave and says nothing about attic heat has fixed the damage and left the cause running. Our fall maintenance checklist covers the pre winter version of this work.
Illustrative repair total by problem, not by product
Midpoint totals for the whole visit on a typical single family house, trip charge included. Your figure moves with pitch, height, access, region, and what is found once shingles come up.
Illustrative midpoints, not quotes. Bar widths are drawn from each value against the $5,000 top of the range. Interior repairs, attic work, and permits sit outside most of these figures.
Sagging or spongy decking, where repair becomes structural
Everything above this point is roofing. This section is where roofing turns into carpentry, and where the price stops behaving like a repair. The decking is the sheet of plywood, oriented strand board, or older plank boards that the roof material is fastened to, and it is the thing that has been quietly absorbing whatever water got past the surface.
The signs are recognisable. From the ground or across the street, a slope that dips or waves rather than reading as a flat plane. From inside the attic, dark staining, delaminated plywood that looks like it is peeling into layers, daylight visible at a seam, or a musty smell. From the roof itself, a spot that feels soft or springy underfoot, which is exactly why nobody should be walking on a roof they suspect of this in the first place.
Illustratively, replacing a compromised section of decking runs somewhere around $2,500 to $8,000 once framing repairs, the shingle work above it, and the disposal are counted, and a job at the top of that band is competing with the cost of a portion of a full replacement. Sheet replacement on its own is often quoted per sheet plus labor, which is worth asking for as a line item because nobody can count the bad sheets until the old material is off. If rafters or trusses are affected rather than just the sheathing, that is structural work and it belongs to somebody qualified to assess it, in the same way that movement below grade belongs to the process our foundation repair cost file sets out.
Gutter driven damage that is not a roof problem at all
A meaningful share of what gets reported as a roof leak is a gutter problem wearing a roof costume, and this is genuinely good news because gutters are far cheaper to fix. When a gutter is blocked, water backs up over the inner edge and runs behind the fascia, soaking the roof edge, the fascia board, and sometimes the wall below. When a gutter is pitched wrong or has pulled away from the fascia, the same thing happens at one end. When downspouts discharge against the house, the damage moves down to the foundation.
The symptoms overlap with roof leaks in confusing ways: staining at the top of an exterior wall, water appearing along the edge of a ceiling near an outside wall, peeling paint on soffits and fascia, and drips at the eave during heavy rain. What separates them is where the water shows relative to the roof edge and whether it appears only when the gutters are running full.
Illustratively, gutter repairs land far below roof repairs: resecuring, resealing joints, correcting pitch, and clearing blockages commonly runs somewhere around $150 to $600, and our gutter cleaning cost file and gutter installation cost file cover the maintenance and replacement ends of it. Before authorising any roof work for symptoms near the eaves, have somebody confirm the gutters are clear and correctly pitched, because that is a cheap thing to rule out and an expensive thing to ignore.
Emergency tarping and what it should cost
When water is coming in now, the sequence is different. The first job is not repair, it is stopping the water, and that is what tarping is for. A tarp is a temporary cover fastened over the damaged area so the interior stops getting wet while a proper repair is scheduled, materials are ordered, or the weather clears enough to work.
Illustratively, installed emergency tarping commonly runs somewhere around $400 to $1,200 depending on the area covered, the pitch and height, and whether it is being done after hours or in bad weather. It is normally a separate line from the repair that follows. A tarp should be fastened properly rather than weighted with whatever was in the truck, it should extend over the ridge or well above the damage so water cannot run under it, and it should be photographed with dates for any insurance conversation later.
Inside the house, do the unglamorous things immediately. Move what can be moved out from under the water, put containers down, and if a ceiling is bulging with trapped water, understand that it will eventually let go, so a controlled small hole made carefully from below with a container underneath is generally better than a collapse. Then stop. Do not climb onto a wet, damaged roof in weather to place a tarp yourself, because the situation that makes the tarp urgent is exactly the situation that makes the roof dangerous.
Telling a repair from a roof at the end of its life
This is the judgement the whole decision turns on, and it is the one a homeowner can partly make from the ground with a pair of binoculars. You are not trying to diagnose the roof. You are trying to work out whether the problem in front of you is local damage on a sound roof or one visible symptom of a surface that is finishing everywhere at once.
The signals that point toward end of life are consistent. Curling or clawing at the shingle edges across whole slopes rather than in one patch. Bald areas where the granule surface has worn through, especially on the slopes that get the most sun. Cracking that follows no impact pattern. Shingles that break rather than flex when lifted, which a roofer will notice immediately. Multiple leaks appearing in unrelated places over a short period. And plain age: the illustrative service life commonly cited for standard three tab asphalt is roughly fifteen to twenty years and for architectural shingles roughly twenty five to thirty, though real lifespans move with climate, ventilation, and installation quality.
The signals that point toward a repair are equally consistent. Damage confined to one area with an obvious cause. A surrounding roof whose shingles are still flexible and still fully surfaced. A leak that traces cleanly to one flashing detail. A roof still comfortably inside its expected life. When those describe your roof, a repair is not a delaying tactic, it is simply the right work.
The repair or replace arithmetic
Once you know roughly where the roof sits in its life, the arithmetic is straightforward and it is worth doing on paper before anyone quotes you. Take the repair cost, take an illustrative replacement cost for your roof, and take the years you expect the roof to keep working after the repair.
Work out what the repair costs per year of life it buys. An illustrative $900 flashing repair on a roof with ten years left is about $90 per year purchased. The same $900 on a roof with two years left is $450 per year, and at the end of those two years you still buy the replacement. Compare either figure against a replacement spread over its own life: an illustrative $12,000 asphalt replacement lasting twenty five years is about $480 per year. The first repair is excellent value. The second is roughly the cost of just replacing the roof, without the new roof.
That comparison is why the honest general rule holds. Repair a roof with real life left in it, almost regardless of the repair. Be very reluctant to spend a large share of a replacement price on a roof that is nearly finished, because you are buying a short extension at replacement level cost. The uncomfortable middle case, a roof with perhaps five to eight years left and a repair costing a meaningful slice of replacement, is where a second opinion from someone with nothing to sell earns its fee. Run your own version of this comparison in the job cost estimator before the sales conversation, so the numbers are not landing on you cold.
Where the money goes on an illustrative small roof repair
Illustrative share of a single visit repair invoice, summing to 100. Getting a person safely onto the roof and finding the actual source dominates, which is why the parts are rarely the story.
Shares are illustrative and shift with pitch, height, and how hard the leak is to find. On a larger repair the labor and materials slices grow and the trip charge stops dominating.
Why matching shingles on an older roof is hard
Nobody warns homeowners about this and it produces genuine disappointment, so it belongs in any honest pricing article. A repair on an older roof frequently will not disappear. It will be watertight, it will be correctly done, and it will still be visible from the street as a patch that does not match.
There are three reasons, and they compound. First, product lines change. The exact shingle on your roof may no longer be manufactured, in which case the roofer is matching as closely as available rather than exactly. Second, colour blends drift between production runs even within the same product name, because the granule blend is not a paint colour. Third and most importantly, your existing roof has been weathering in the sun for years. It has faded, and it has lost some surface granules, so even a genuinely identical new shingle will read as darker and cleaner than its neighbours.
There is one thing you can do about it, and it happens years earlier: when a roof is installed, ask the installer to leave a bundle or two of leftover shingles in the garage or attic. Stored shingles from the original run are the single best answer to the matching problem, and they cost nothing extra at the time. Failing that, some roofers will pull shingles from a less visible slope to repair a highly visible one and patch the hidden slope with the new material, which is more labor and a better looking result. Ask whether that is an option and what it adds.
What a roof repair estimate should actually list
An estimate that reads “repair roof leak, $1,850” is not an estimate, it is a price tag. The document you want states what the roofer found, what they propose to do about it, and what is excluded, in enough detail that a second company could bid the identical work. Anything vaguer makes comparison impossible, which is occasionally the point.
Look for these lines. The diagnosis, meaning where the water is entering and how that was determined, not just where the stain is. The scope, naming the specific detail being repaired and the method, such as replacing step and counterflashing at a chimney rather than “seal chimney”. The quantity, meaning how many boots, how many linear feet of valley or ridge, how many squares of shingle disturbed. The decking allowance, stating a per sheet rate for wood that cannot be seen until material comes off. The materials, named generically but specifically enough to compare. The access provisions, if staging or lifts are needed. Cleanup and disposal. The warranty on the repair, in a document rather than a sentence.
Then read the exclusions, where the surprises live. Interior drywall, insulation, paint, attic work, gutter repairs, and anything found once the shingles come up are commonly excluded and commonly meaningful. Our estimate reading walkthrough covers working through a document like this line by line without skipping the quiet paragraphs.

How to compare roof repair quotes without guessing
Comparing repair bids is harder than comparing replacement bids, because on a replacement everyone is pricing the same roof and on a repair they may be pricing different diagnoses. Two quotes that differ by a factor of four usually disagree about what is wrong, and that disagreement has to be resolved before price means anything.
Start by sorting the quotes by what they propose rather than by price. Two chimney reflashing quotes compare with each other. A chimney reflashing quote and a full replacement quote do not compare at all, they are answers to different questions, and you need to know which question is the right one. If one company found a source and another did not look, that is the most important line in either document.
Within a group, normalise the scope. Write out the diagnosis, the specific work, the quantity, the decking rate, and the exclusions for each bid in a row, and very often the apparent gap collapses once you notice that one includes attic inspection and reintegrating shingles and another does not. Then apply the ordinary hiring disciplines: verified licensing and insurance, written scope, payment tied to completion rather than a large deposit for a small repair, and references. Our quote comparison walkthrough sets out the full method, and our roofing contractor checks cover the roofing specific verification.
Insurance: sudden damage versus wear
This section says less than you might want, deliberately, because coverage depends on your policy and nothing written here can tell you what yours does. What can be said honestly is how the distinction generally works and what questions to ask.
Homeowners policies commonly respond to sudden damage from a covered event and commonly exclude deterioration, age, and long term wear. A branch through the roof in a storm and a roof that has simply worn out are treated very differently, and the whole conversation with an adjuster tends to turn on cause. That is why documentation matters so much: dated photographs from before and after, a written report from a roofer describing what they found and what it is consistent with, and prompt reporting rather than a claim filed a season later.
Several practical cautions apply. Your deductible may exceed a modest repair, in which case filing achieves nothing and adds a claim to your record. Some policies settle roof claims on a depreciated basis, which changes the arithmetic on an older roof. And a contractor who tells you what your policy covers, offers to handle the claim, or suggests structuring an invoice around your deductible is a contractor to walk away from, a pattern our contractor scam red flags covers directly. Read your own declarations page, ask your insurer in writing, and treat the answer you get from them as the only one that counts.
Warranties and who is allowed on your roof
There are two warranties on most roofs and homeowners routinely merge them into one, which causes real problems at exactly the wrong moment. Sorting them out before you hire anybody is a five minute job that occasionally saves thousands.
The manufacturer warranty covers the roofing material against defects for a stated period, and it generally assumes the material was installed according to the manufacturer’s instructions. Some manufacturers offer enhanced or system warranties that additionally cover workmanship, and those are typically tied to installation by a credentialed contractor using a specified set of components. The workmanship warranty comes from the company that installed your roof and covers their labor for a stated period, commonly a few years but sometimes much longer.
The practical rule is simple. If your roof is still inside its original installer’s workmanship period, call that installer first about any defect, even if you would prefer to use somebody else, because many workmanship warranties exclude anything a third party has altered. If you are hiring a different company anyway, ask them in writing whether the work affects either warranty and get the answer before they start. And when the repair is done, ask what warranty covers the repair itself, for how long, and whether it covers only the repaired area or the surrounding work they disturbed.
Safety: what a homeowner should and should not do
This needs saying plainly rather than as a footnote. Falls from roofs and ladders cause serious and permanent injuries every year, and a roof that needs repair is more dangerous than a sound one, because the reason it needs repair is often that part of it will not hold weight.
The homeowner’s limit is a ground level inspection. Walk the perimeter and look at the roof with binoculars or a camera zoom. Look for lifted or missing shingles, a dipping line along a slope, damaged flashing at the chimney, debris in valleys, and gutters that have pulled away. Go into the attic with a torch on a dry day and again during rain if you can do it safely, and look for staining, daylight, and damp insulation. Photograph everything with dates. That information makes the professional visit far more productive and costs you nothing.
What belongs to a professional is everything else. Steep pitches, anything above a single storey, wet or icy surfaces, any roof with suspected soft decking, snow covered roofs, and any work requiring you to carry materials up a ladder. Professionals do this with fall protection, staging, and the muscle memory of doing it daily, and the money you would save doing it yourself is not remotely proportionate to the risk. If the roof is actively leaking in a storm, manage the water inside and wait, because there is no repair worth attempting on a wet roof in weather.
Cost by scenario: how the pieces add up
Price lists are less useful than scenarios, so here are four illustrative shapes of job, each written as scope first and price second.
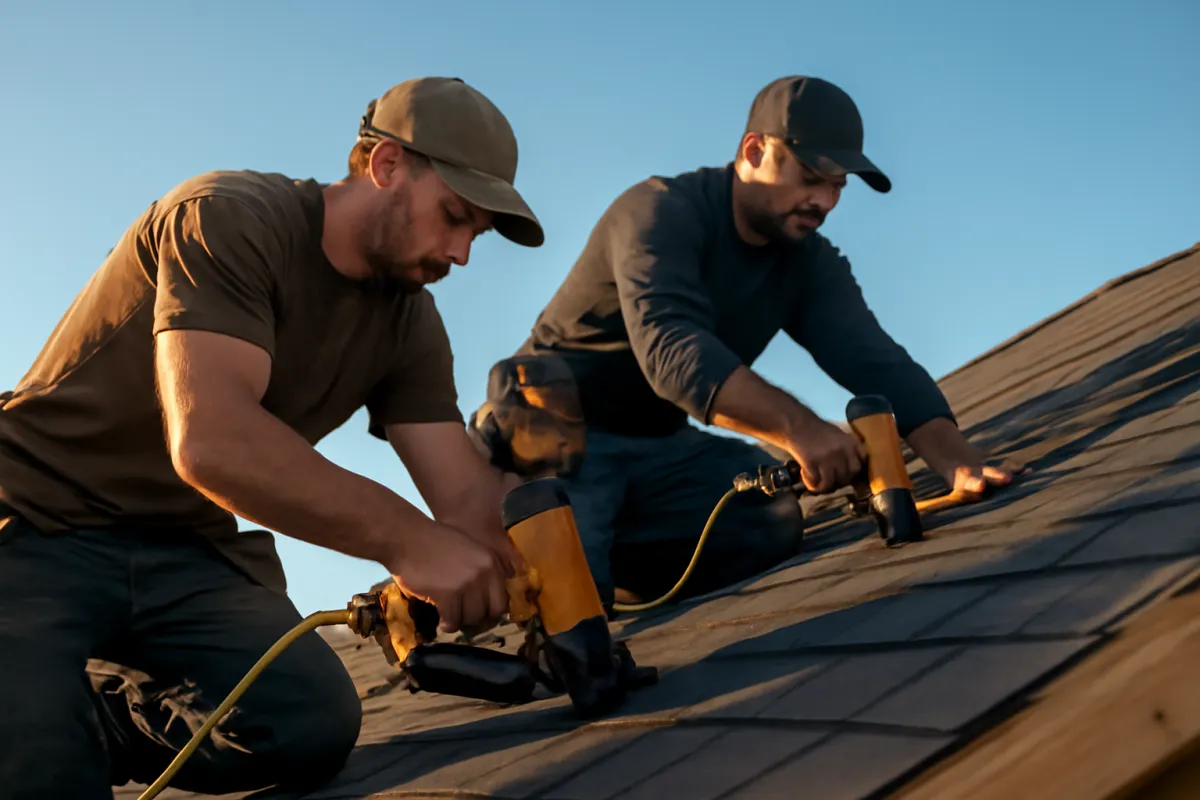
The wind night. A gust removes six shingles from one slope and lifts several more. The roof is nine years old and the surrounding shingles are still flexible. A roofer replaces the missing tabs, reseals the lifted ones, and checks the ridge caps while up there. Illustrative total near $600.
The mystery stain. A brown ring appears on a bedroom ceiling after heavy rain. The roofer traces it in the attic to a split pipe boot roughly four feet uphill and replaces it, plus a second boot showing the same cracking. Illustrative total near $700, of which a large share is the visit itself.
The chimney. Water shows on the wall beside a chimney chase during driven rain. Step flashing was never woven correctly and has been sealed over twice. The roofer strips the sides, installs new step and counterflashing, and reweaves the shingles. Illustrative total near $2,300, which is the worked example below.
The soft spot. A roofer walking a fifteen year old roof to price a small leak finds a soft area near a valley and staining in the attic below it. Two sheets of decking are replaced, the valley is reflashed, and shingles are reintegrated. Illustrative total near $4,200, and the conversation about full replacement begins in earnest.
A worked example: a leak traced to the chimney
Take the third scenario and build the number the way the invoice does. The roofer’s diagnostic visit, including the attic inspection, the roof walk, and a written description of what was found, is an illustrative $250. The scope is to remove shingles along both sides of the chimney, install new step flashing woven into the courses, install new counterflashing into the masonry joint, and reweave the shingles. That line is an illustrative $1,800.
While up there, two cracked pipe boots are replaced at an illustrative $125 each rather than the $375 each would cost as a standalone visit, because the setup is already paid for. That is $250. The running total is $2,300.
Now the lines people forget. Interior repair of the stained drywall beside the chase is excluded and might add an illustrative $300 to $700 afterward. The shingles used to reweave the chimney will not match the fourteen year old surrounding roof exactly, and the homeowner should be told that before work starts rather than after. If the decking under the flashing turns out to be soft, an illustrative $400 to $900 covers two sheets and the extra labor.
Change one input and watch it move. A wide chimney needing a cricket built on the uphill side adds meaningfully to the scope. A two storey house with a steep pitch requiring staging pushes the labor line up by roughly a third. Doing this as a standalone job in December rather than bundled with anything else keeps the full trip charge on the invoice. Those variables, not the brand of flashing metal, explain almost every gap between two honest repair bids.
Maintenance that prevents most of these bills
Almost everything priced in this cost file is cheaper as prevention than as repair, and the prevention work is unglamorous and mostly happens from the ground or from inside.
Keep the gutters and downspouts clear so water leaves the roof edge instead of backing up behind it. Clear debris out of valleys and from behind chimneys, where wet leaf litter holds moisture against the roof indefinitely. Cut back branches that overhang the roof, because they drop debris, hold moisture, abrade the surface in wind, and give animals a route onto the roof. Look at the boots and flashings with binoculars once a year and note anything that has changed. Check the attic for staining and damp insulation twice a year and after any severe weather.
The one you cannot see from outside matters most in cold climates: attic air sealing, insulation, and ventilation. A roof deck kept cold by proper ventilation does not create ice dams, and a dry ventilated attic does not rot decking from below. This is invisible work with no curb appeal that quietly prevents the two most expensive items in this article. A periodic professional inspection, illustratively somewhere around $150 to $400 and often credited against work if repairs follow, is the paid version of the same discipline and is money well spent on a roof past its first decade.
Choosing who to call, and in what order
Sequence matters here more than most homeowners expect. If the roof is still under an installer’s workmanship warranty, that installer is the first call regardless of how you feel about them, because using anyone else may end the coverage. If it is not, and the damage looks like it could be storm related, photograph everything with dates before anything is touched and check your policy before you commit to work.
Then get a roofer who will diagnose rather than quote. The most valuable thing a roofing company can do on a first visit is find and describe the source of the water, and a company that produces a large number without inspecting the nearest penetration has skipped the only part that matters. Two or three written scopes on the same defined problem is the goal, and on a small repair that is sometimes unrealistic, in which case verifying the company thoroughly matters even more.
Watch for the pattern that shows up after storms: an unfamiliar company knocking with a same day discount and a story about damage they can see that you cannot. It is not always dishonest, and it is always a reason to slow down, verify licensing and insurance directly, and refuse to sign anything that afternoon. If you are also weighing a full replacement, our metal roofing cost file covers the premium end of that decision and the asphalt file covers the common one.
The bottom line
Roof repair cost is unanswerable as a single number and very answerable once the problem is named. A split pipe boot, a section of lifted shingles, a valley, a chimney, an eave chewed by ice, and a soft patch of decking are six different jobs with illustrative totals running from a couple of hundred dollars to several thousand, and the distance between them is diagnosis rather than price. Ask what is leaking and how that was determined before you ask what it costs.
The habits that protect you are simple. Assume the leak is at a penetration until somebody demonstrates otherwise. Bundle small items into one visit so you pay the setup once. Weigh the repair against the years of life it actually buys before spending a big share of a replacement on a roof that is nearly done. Expect a patch on an older roof to be visible and be told so in advance. Read the warranty position before you let a second company on the roof. And stay on the ground, because no repair in this article is worth a fall. Every figure here is illustrative and shifts with your pitch, height, region, and what is found once the shingles come up, so let the written estimates on your own defined scope be the numbers you act on. Sketch your own version in the job cost estimator first, then go get them.
ProsNook publishes this cost file so homeowners can understand how roof problems are diagnosed, scoped, and priced, and it is educational material rather than roofing, structural, safety, or insurance advice. Nothing here diagnoses any roof: a stain, a drip, or a missing shingle can indicate anything from a five minute sealant failure to decking that has been quietly rotting for years, and only a qualified roofing professional who has inspected your property in person can tell one from the other. Every dollar amount, band, share, and scenario total on this page is illustration only, and your real cost will move with roof pitch, height, access, material availability, regional labor rates, and whatever is found once shingles come up. Insurance outcomes are set by your own policy language, deductible, and the assessed cause of damage, so confirm coverage with your insurer directly and never with a contractor. Roof work carries a genuine risk of serious falls: keep homeowner inspection to ground level and the attic, leave steep, high, wet, snow covered, or structurally suspect roofs to insured professionals, and verify licensing and insurance with the issuing bodies before anyone climbs.
Frequently asked questions
How much does roof repair cost?
There is no single roof repair price, because the phrase covers everything from resealing one pipe boot to rebuilding a rotted section of decking. As an illustrative framework, a small shingle repair commonly lands somewhere around $250 to $700, a leak traced to a penetration around $500 to $1,500, valley or chimney flashing work around $700 to $3,500, and structural decking work from $2,500 upward. Most homeowners who call a roofer for a single visible problem end up in the low four figures rather than at either tail. The only number that matters for your house is the one on written estimates from roofers who have actually been on the roof.
Why is there a minimum charge for a small roof repair?
Because almost everything a roofer does for a small repair happens before any shingle is touched. The crew drives out, sets ladders, rigs fall protection, walks the roof to find the source, and then carries materials up, and none of that scales down when the repair itself takes twenty minutes. Most roofing companies therefore set a minimum service or trip charge, commonly somewhere around $150 to $400 as an illustrative range, and small repairs are frequently priced at or just above it. This is also why bundling several small items into one visit costs far less than three separate visits: you pay the setup once.
Is a roof leak usually the shingles or the flashing?
Leaks concentrate at penetrations and transitions far more often than in the open field of shingles, which is the single most useful thing to know before you call anyone. Water finds its way in around chimneys, plumbing vent boots, skylights, dormer walls, valleys, and roof to wall junctions, because those are the places where the roof stops being a simple sloped plane and depends on flashing to keep it watertight. A field of shingles with nothing sticking through it rarely leaks until the shingles themselves fail from age or impact. When a roofer immediately proposes a large area of shingle replacement for a single ceiling stain without inspecting the nearest penetration, ask what was ruled out and how.
How much does it cost to replace a pipe boot on a roof?
The rubber or synthetic collar that seals around a plumbing vent pipe is a common leak source because the collar hardens and splits with sun exposure long before the shingles around it wear out. Replacing one commonly runs somewhere around $250 to $600 installed as an illustrative range, and much of that is the trip and setup rather than the part. Additional boots done on the same visit typically cost far less each, often in the low hundreds, because the ladders are already up. If a roofer is on your roof for anything else and your boots are cracked, replacing them all at once is usually the cheapest they will ever be.
Should I repair or replace a roof that is near the end of its life?
The honest rule of thumb is that repairing a roof with several good years left is usually right and repairing one that is nearly finished is usually throwing money away. A repair on a roof with a decade of service remaining buys that decade. The same repair on a roof that is failing across its whole surface buys a season or two, and then the money disappears under a full replacement. A common illustrative test is to compare the repair cost against the replacement cost and the years remaining: spending a meaningful share of a replacement to extend a roof by two years rarely makes sense, while spending a small share to extend it by ten almost always does. No formula replaces a roofer or an independent inspector actually looking at the whole surface.
Will insurance pay for a roof repair?
Coverage in this category usually turns on cause rather than on cost, and nothing on this page can tell you what your own policy does. Homeowners policies commonly respond to sudden damage from a covered event such as wind or hail and commonly exclude deterioration, age, and long term wear, which is exactly the category most repair calls fall into. Whether a specific claim is paid depends on your policy language, your deductible, your state, and the adjuster's assessment of cause, and the same physical damage can be treated differently under two different policies. Document the damage with dated photographs, report promptly if you believe a covered event caused it, read your own declarations page and exclusions, and ask your insurer the question in writing rather than accepting a contractor's assurance about your coverage.
Can a repair void my roof warranty?
It can affect two separate warranties, and homeowners routinely confuse them. The manufacturer warranty covers the material itself and can be affected when work is done in a way that departs from the installation instructions, and some enhanced manufacturer warranties are tied to installation by a credentialed contractor. The workmanship warranty comes from the company that installed the roof, and it is the one most likely to be an issue, because many workmanship warranties exclude anything a third party altered. If your roof is still inside its original installer's workmanship period, call that installer first even if you would rather use someone else, and get any exclusion or transfer question answered in writing before another company sets foot on the roof.
What should an emergency roof tarp cost?
A tarp is a temporary measure that stops water entering while a real repair is scheduled, and it should be priced and described as exactly that. Installed emergency tarping commonly runs somewhere around $400 to $1,200 as an illustrative range depending on the area covered, the pitch, and whether it is done outside normal hours. It should be fastened properly rather than weighted down, it should be documented with photographs for any insurance conversation, and the cost of it is usually separate from the repair that follows. Treat a tarp quote that approaches the price of the underlying repair as a reason to ask what the tarp actually involves.