What's on this page
- What removing a load bearing wall actually costs
- Why the demolition is the cheap part
- How to tell whether a wall is load bearing
- Why the rules of thumb get this wrong
- What a structural engineer does and what the report costs
- Why this article will not give you a beam size
- Dropped beam or flush beam and what the difference costs
- Beam options and how each one drives the price
- How the opening width drives the price
- The load path below the wall
- New posts and new footings in a basement or crawl space
- Crawl spaces, slabs and the awkward cases
- What is inside the wall and what moving it costs
- Why services are discovered rather than planned
- Temporary shoring and why this is not a homeowner project
- Permits and inspections
- Asbestos, lead and what an older wall can hide
- Finishing the ceiling the floor and the old wall line
- A worked example of a 12 foot flush beam opening
- Cost by scenario and where budgets actually break
- What a good estimate for this work should list
- How to compare bids on a structural opening
- How long the work takes and what living through it costs
- What the finished opening does and does not do for the house
- Questions to ask before you sign
- The bottom line
Short answer: Load bearing wall removal is priced by what the wall was doing, not by the demolition. Illustrative all-in midpoints run from roughly $2,200 for a partition to about $26,900 for a wide opening carrying two storeys with steel and rerouted services, with the engineer's report, the beam, the footings below and the patching after as the main lines. A flush beam costs around 1.6 times a dropped beam's beam and installation portion.
Load bearing wall removal cost is one of the few home renovation questions where the obvious part of the job is the cheap part. Knocking a wall down takes a strong person, a reciprocating saw and an afternoon. What the money buys is everything that wall was quietly doing before the saw came out: carrying the floor above, carrying the roof above that, holding a run of electrical cable, sometimes a drain, sometimes a duct, and standing on something solid all the way down to the ground.
This cost file prices the job the way it actually behaves. It covers how you tell whether a wall bears load and why the confident shortcuts get it wrong, what a structural engineer does and why the report is required before a permit, the beam options and why a flush beam costs so much more than a dropped one, the load path below the wall where budgets most often break, the services hidden in the cavity, temporary shoring and why this is not a homeowner project, and the finishing along the old wall line that nobody photographs but everybody notices. Put your own opening width and load path into the job cost estimator as you read, and it will keep a running range next to each section.
Key takeaways
- You are not paying to remove a wall, you are paying to replace what it was doing, so the price is set by how far the load has to travel to the ground and what is inside the cavity.
- The reliable ways to tell whether a wall is load bearing are joist direction, what sits directly above and directly below it, and a structural engineer's confirmation. The rules of thumb circulating online get this wrong often enough to be dangerous.
- A flush beam hidden in the ceiling plane costs substantially more than a dropped beam, illustratively around 1.6 times the beam and installation portion, because every joist has to be cut back and hung.
- New posts need something under them, and a new footing cut into a basement slab or dug in a crawl space is the single most common reason these budgets break.
- Illustrative all in midpoints run from roughly $2,200 for a partition to about $26,900 for a wide opening carrying two storeys with steel and rerouted services, but no article can give you a beam size and this one does not try.
What removing a load bearing wall actually costs
Priced honestly, this is a stack of separate jobs that happen to share a schedule, and the total depends on which of them your wall triggers. As illustrative all in midpoints on a typical single family house: a non load bearing partition removed and patched lands near $2,200, an eight foot opening under a single storey with a dropped beam near $5,800, a twelve foot opening with a flush beam hidden in the ceiling near $11,000, an eighteen foot opening that also needs new footings near $19,500, and a twenty foot opening carrying two storeys or a roof, with steel and rerouted services, near $26,900.
The spread between the first and the last of those is more than tenfold, and none of it is explained by the size of the wall. It is explained by load. A partition carries nothing but its own weight and a picture hook. A wall under two storeys is carrying floors, furniture, people, a roof and whatever snow sits on it, and all of that has to be gathered onto a beam, walked out to two posts, and delivered to something in the ground that can take it.
That is the whole logic of this cost file. Every dollar figure on this page is illustration for planning, not a quote, and the number that governs your project is a written estimate priced against a beam design from a structural engineer who has stood in your house.
Why the demolition is the cheap part
Homeowners consistently over weight the demolition in their mental budget and under weight everything else. Taking out a stud wall, bagging the drywall and hauling the debris is real work, but it is unskilled work with a low material content, and on the numbers above it is usually the smallest line on the invoice. As an illustrative rate, demolition and disposal on an interior wall runs somewhere around $400 plus roughly $35 per foot of opening, so a twelve foot wall prices near $820 for that portion.
What actually consumes the budget is the replacement structure and its consequences. Carpentry labor to shore the ceiling, install a beam and transfer the load can be four to six times the demolition line on the same job. The engineering, the permit, the posts, the footing, the rerouted circuits and the finishing all sit outside the demolition entirely.
This matters practically because it changes what you should ask for. A quote that leads with a demolition price and treats the beam as an afterthought is describing a fraction of the project. Our walkthrough on reading a contractor estimate covers how to insist on separated lines, and separation is the single most useful thing you can demand on this particular job.
How to tell whether a wall is load bearing
There are three methods worth relying on, and a great many that are not. The first is joist direction. Floor and ceiling joists run in one direction across a house, and a wall that runs perpendicular to them, across the joists, is far more likely to be carrying them than a wall running parallel between two joists. You can often read joist direction from an unfinished basement ceiling or an attic, and sometimes from the direction of squeaks and nail lines in an old floor.
The second is what sits directly above and directly below the wall. Load travels downward in a stack. A wall with another wall directly over it on the storey above, and a beam, a girder or a foundation wall directly under it in the basement, is sitting in a load path that somebody built deliberately. A wall with nothing above it and a plain slab below is a much weaker candidate.
The third is having a structural engineer confirm it. That is not a formality tacked onto the first two, it is the method that actually settles the question, because the first two produce a strong suspicion rather than an answer.
Why the rules of thumb get this wrong
The shortcuts that circulate are appealing because they are simple, and they fail for the same reason. “Exterior walls bear, interior walls do not” is wrong in almost every house with a second storey, because something has to carry the middle of the floor span. “If it runs the length of the house it bears” is a coin flip that depends entirely on which way the joists run. “Thick walls bear and thin ones do not” confuses plumbing chases and old plaster with structure.
Two further complications defeat visual inspection. Load can be transferred sideways through headers, trimmers and blocking, so a wall may be carrying a point load handed to it by something several feet away that you cannot see. And houses get altered. A wall added during a previous renovation may have been quietly recruited to carry something when a beam above it was cut, and a wall that originally bore nothing may now be propping a sagging joist run.
The honest position is that a homeowner can gather evidence and cannot render a verdict. Treat every ambiguous wall as load bearing until an engineer says otherwise, and price it that way in the job cost estimator so a bad surprise is a saving rather than a crisis.
What a structural engineer does and what the report costs
The engineer’s job on a wall removal has four parts: confirm whether the wall carries load, work out how much and from where, specify a beam and its supports that can carry it, and produce a stamped document your building department will accept. That last part is why the visit is usually not optional. Most jurisdictions want a stamped design before they issue a permit for a structural alteration.
Illustratively, this commonly runs somewhere around $500 to $1,200 for a single wall on a straightforward house, with the midpoint used throughout this cost file at $850. More complex situations sit higher: long spans, several walls at once, unusual framing, a house that has been altered repeatedly, or a request for a full drawing set rather than a letter.
Measured against the rest of the project, that fee is trivial. It is roughly eight percent of an illustrative $11,000 job, and it is the only line that reduces the risk of every other line being wrong. Our note on foundation repair costs makes the same argument about independent assessment in a different setting: the person who defines the scope should not be the person who profits from its size.
Why this article will not give you a beam size
There are pages on the internet that will hand you a span table and a beam size for a given opening. This one will not, and the refusal is deliberate rather than coy.
Beam sizing depends on the tributary width of floor feeding into it, the number of storeys above, the roof load including local snow and wind assumptions, whether any point loads land on the beam, the species and grade of the members, the deflection limit that keeps the ceiling from cracking, the bearing capacity at each end, and the connection detail at the posts. Change any one of those and the answer changes. A number that is correct for one twelve foot opening can be badly undersized for the twelve foot opening next door.
An undersized beam does not fail dramatically on day one. It sags, cracks the ceiling, sticks the doors and gets worse over years, and in the bad cases it does fail. Publishing a size that somebody builds to would be genuinely dangerous, so sizing stays where it belongs, with a structural engineer looking at your house. What this cost file can honestly do is tell you what the sizing exercise costs and what the resulting beam costs to buy and install.
Dropped beam or flush beam and what the difference costs
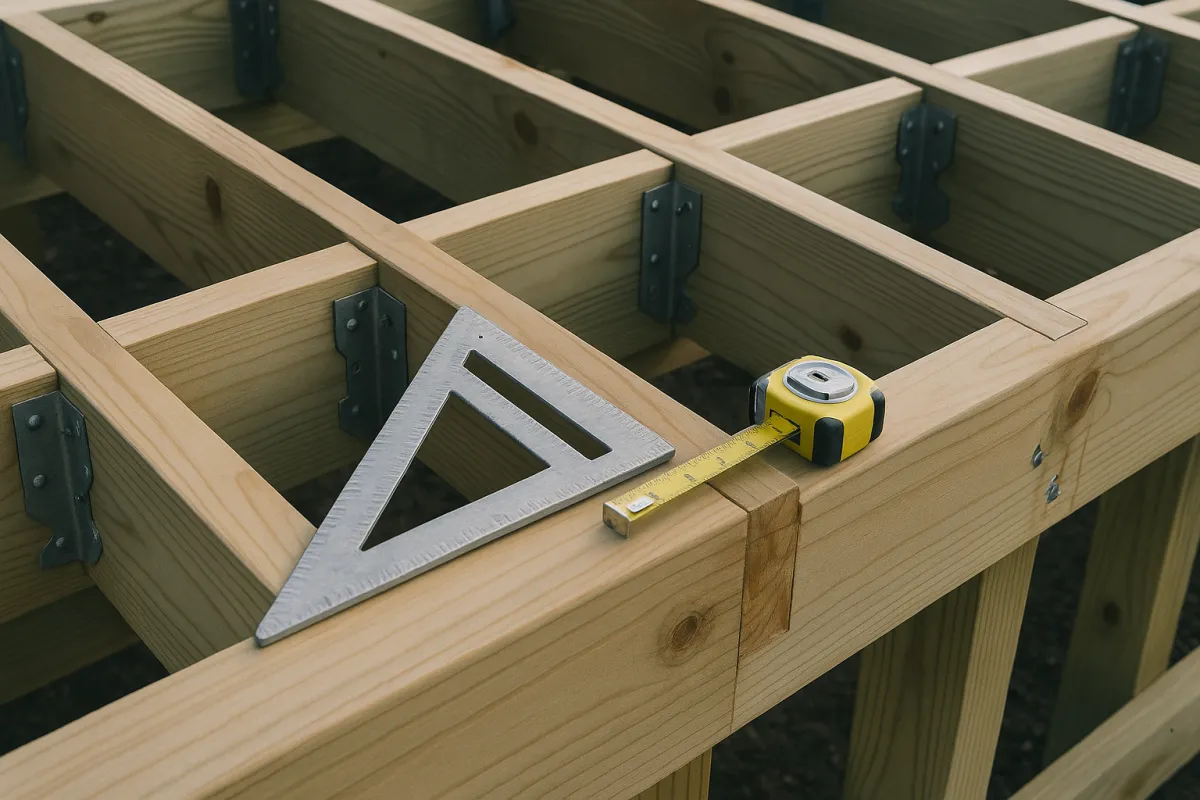
This is the single biggest design decision in the project, and most homeowners meet it late. A dropped beam sits below the ceiling plane. The joists keep bearing on top of it exactly as they bore on the wall, the carpentry is comparatively direct, and you end up with a visible beam crossing the room, often boxed and painted.
A flush beam is hidden inside the ceiling, so the finished ceiling runs unbroken from room to room. Achieving that means cutting every joist back, lifting the beam into the pocket where the joist ends used to be, and hanging each joist off the beam with metal hangers, all while the floor above is held on temporary supports. It is substantially more labor, more shoring and more sequencing.
As an illustrative planning assumption, budget roughly 1.6 times the dropped beam figure for the beam and installation portion when you go flush. Beam and installation together illustratively run around $250 to $470 per foot of opening under a single storey with a dropped beam, so a twelve foot opening prices near $3,000 to $5,640 dropped and near $4,800 to $9,024 flush. Multiply again by roughly 1.4 where two storeys or a significant roof load are involved.
Beam options and how each one drives the price
Four families of beam turn up in residential wall removals, and they price very differently.
Doubled or tripled dimensional lumber is the cheapest, illustratively $150 to $500 in material for a modest opening. It suits short spans and light loads and it is what many older houses already use over openings.
Engineered laminated veneer lumber, usually called LVL, is the workhorse of modern residential openings. It is manufactured in long consistent lengths, it is dimensionally stable, and it carries more than sawn lumber of the same depth. Material illustratively runs $600 to $2,500 depending on depth, ply count and length.
Flitch beams sandwich a steel plate between lumber members bolted together, which buys capacity without the full weight and handling of a steel section. Material illustratively runs $1,500 to $4,000, and the assembly labor is significant because it is built in place.
Structural steel is the answer for the longest spans and the heaviest loads. Material illustratively runs $2,500 to $7,000 and upward, and the real cost driver is getting a heavy section into a finished house, which can mean extra crew, rigging, a temporary opening in an exterior wall, or a crane.
How the opening width drives the price
Width punishes you twice. The beam has to be deeper and stronger to span further, which moves it up the material families described above, and the labor to handle and place a longer, heavier member rises with it. That is why the per foot framing built into this cost file is a rate rather than a fixed fee, and why the jump from a twelve foot opening to an eighteen foot opening is not a fifty percent increase in the framing line.
There is also a threshold effect that catches people. Somewhere past the comfortable range of engineered lumber, the design crosses into flitch or steel, and the price does not rise smoothly, it steps. Two openings a couple of feet apart in width can sit on opposite sides of that step and quote thousands of dollars apart.
The practical move is to ask the engineer what happens at a narrower opening. Often a modest reduction, keeping a short return of wall at one end, or accepting a post in a position you can live with, drops the design back into a cheaper family and takes a large bite out of the total. That conversation is free before the design is issued and expensive afterwards.
Illustrative all in cost by what the wall is carrying
Midpoint totals for the whole job including engineering, beam, labor, services and finishing. Your figure moves with span, load path, access and what is found in the cavity.
Illustrative midpoints, not quotes. Bar widths are drawn from each value against the $26,900 top of the range. Beam sizes are not published here because sizing belongs to a structural engineer looking at your house.
The load path below the wall
Here is the idea that explains most of the expensive surprises in this work. A wall spreads its load along its whole length, so whatever is underneath it only ever has to take a little at any one point. Replace the wall with a beam and two posts and you have concentrated that same load into two spots. Those two spots now need something under them that can take a concentrated load, and the floor structure below was never asked to do that before.
So the question after “what carries the opening” is immediately “what carries the posts”. If the wall sat over a basement beam, a girder, a bearing wall or a foundation wall, the load path may already exist and the cost stops there. If the posts land in the middle of a basement floor with nothing but a four inch slab beneath them, the path has to be built.
This is the part that is invisible from the room you are remodelling, and it is the part homeowners almost never budget. When somebody tells you a wall removal came in at triple the quote, the answer is usually below the floor rather than above the ceiling.
New posts and new footings in a basement or crawl space
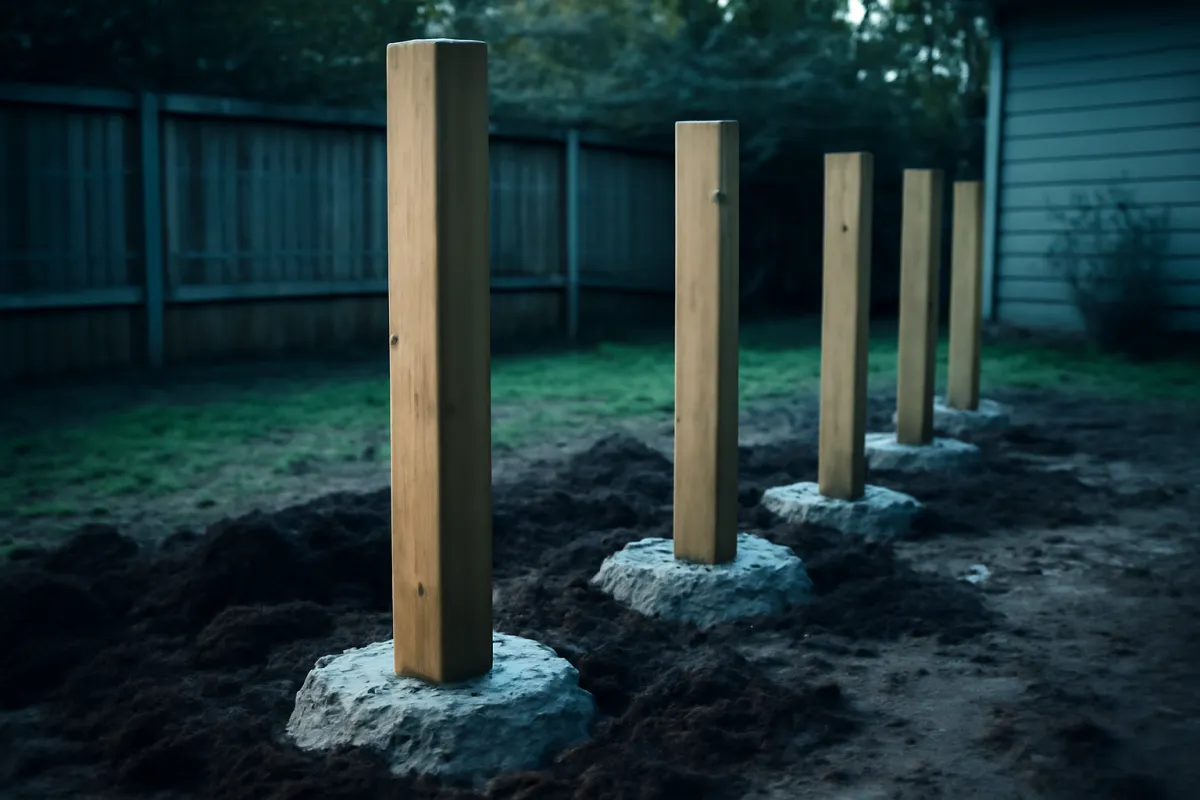
A residential post is not usually the expensive item. Steel columns and engineered posts illustratively run a few hundred dollars each installed, and the hardware to connect them top and bottom is modest. The footing under the post is the cost.
Building one in a basement means cutting and breaking out a section of slab, excavating below it to the depth and dimension the engineer specifies, forming and pouring concrete, waiting for it to cure enough to load, and then patching the slab back. Illustratively that runs around $1,500 for a single accessible footing in a basement with room to work, and around $3,600 for a pair, or for one footing where access is genuinely difficult.
Access is the variable that runs away from you. A crawl space with a small hatch means every bucket of spoil and every bag of mix goes through that hatch by hand, and a crew working on their knees costs more per hour of progress than a crew standing up. Our basement finishing cost file is worth reading alongside this if the space below is also on your list, because doing the structural work first and the finishing second saves cutting a finished floor open twice.
Crawl spaces, slabs and the awkward cases
Three situations deserve naming because they behave differently from a normal basement.
A crawl space brings the access penalty described above, and it often brings poor existing bearing as well: piers spaced for a light floor, sometimes on shallow pads. The engineer’s answer may be a new pier and footing directly under each post, and the cost is dominated by working in a confined space.
A house on a slab with no basement can be the easy case or the hard one. If the new post lands over a thickened section or an existing footing, the job is simple. If it lands mid slab, you are cutting concrete inside the finished house, with the dust, the noise and the flooring implications that come with it.
A second storey wall with no obvious support below is the case that most often produces a redesign rather than a footing. The load has to reach the ground somehow, and if there is nothing beneath, the engineer may have to specify a beam on the storey below as well, which turns one wall removal into two. This is exactly why the assessment happens before the demolition rather than during it.
What is inside the wall and what moving it costs
Wall cavities are where a house hides its services, and the cavity you cannot see is priced by guesswork until the drywall comes off. Three systems turn up regularly.
Electrical is the most common and the least alarming. Cable runs vertically to switches and outlets and horizontally between them, and rerouting a couple of circuits is ordinary work for a licensed electrician. Illustratively, budget around $800 as an allowance when electrical is all you have.
Plumbing is more serious. A supply pipe can usually take another route without much drama. A drain and its vent cannot, because waste needs continuous fall to work and the vent has to reach the roof, so a stack in the wall you are removing may force a rework that runs through the floor below and up through the storey above.
HVAC sits in between. Flexible branch runs can often be re routed, while a main trunk or a return air path built into the cavity is a redesign of the air distribution rather than a detour.
Illustratively, use around $800 for electrical only, $1,800 for electrical plus a supply pipe or a small duct, and $3,200 or well beyond for a drain and vent stack or a main trunk.
Why services are discovered rather than planned
The awkward truth about the previous section is timing. Nobody can inventory a closed wall with certainty. A careful contractor will look at what is on the wall surface, look at the basement ceiling below and the storey above for pipes and cables entering the cavity, and form a good estimate. Then the drywall comes off and the wall tells the truth.
That is an argument for allowances rather than for hoping. An allowance is a named line in the estimate with a stated dollar figure and a stated basis, so that when reality differs, the change is a documented adjustment rather than an argument. Our note on comparing contractor quotes explains why two bids with different allowance structures are not comparable on price at all.
It is also an argument for a contingency you actually ring fence. On structural work where the cavity is unknown, a contingency of a meaningful fraction of the project total is not pessimism, it is arithmetic. If it goes unspent, you have a fund for the finishing you were going to compromise on.
Temporary shoring and why this is not a homeowner project
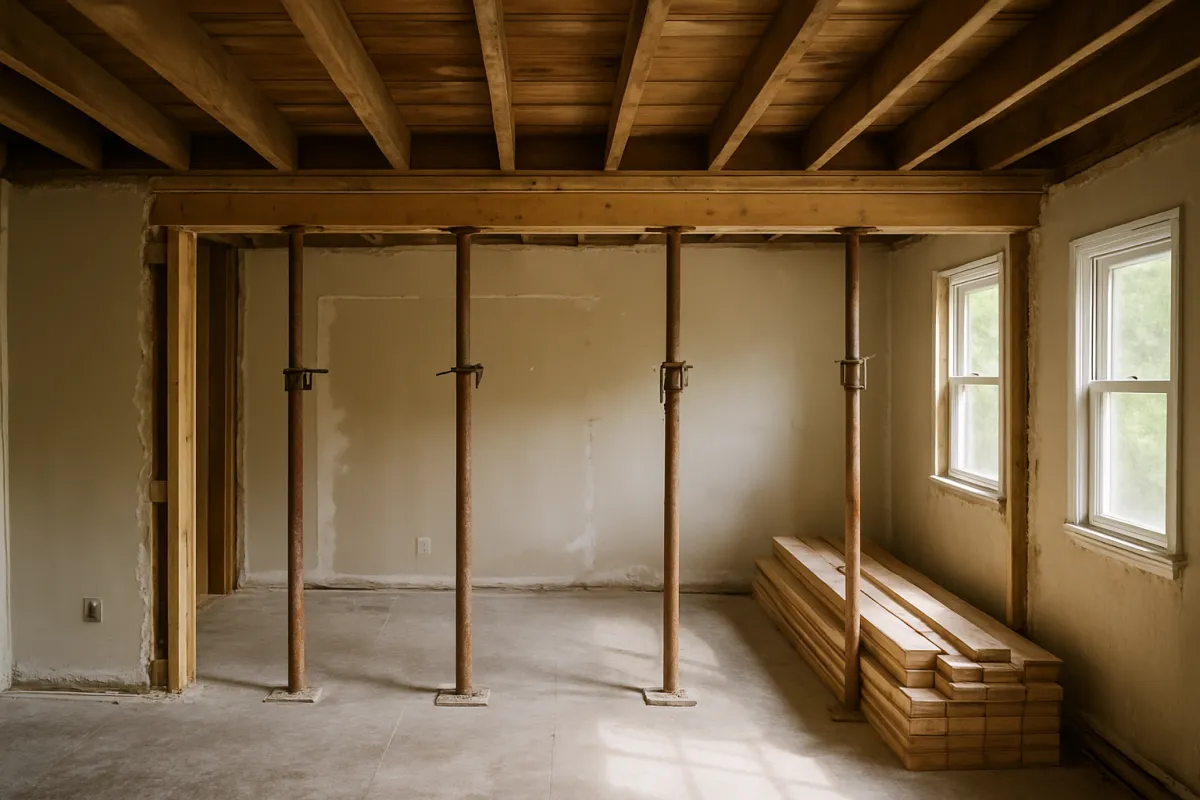
Between the moment the wall comes out and the moment the beam is carrying, the floor or roof above is held up by temporary supports and nothing else. That interval is the whole safety story of this job.
Shoring means building temporary walls or setting adjustable posts on both sides of the wall being removed, close enough to pick up the joists, bearing on something solid below rather than on an unsupported floor, plumb, tight, and left in place until the permanent load path is complete. It has to carry the same load the wall was carrying, and it has to do it while people work underneath it.
A shoring failure is not a cost overrun. It is a partial collapse with a crew and possibly a family in the building, and it happens fast enough that nobody gets out of the way. That is the reason this cost file treats load bearing wall removal as licensed trade work carried out against an engineer’s design, full stop. Our DIY or hire decision walkthrough draws the line at consequences rather than at difficulty, and this job sits firmly on the hire side of it.
Permits and inspections
Removing a wall that carries load is a structural alteration, and structural alterations are permitted work in most places. Assume you need a permit until your own building department tells you otherwise, because the cost of assuming the opposite is discovered years later.
What varies from one jurisdiction to another is nearly everything else: the fee schedule, whether a stamped engineer’s design must accompany the application, whether drawings are required beyond that, how many inspections are scheduled, and at what stages. Some departments inspect the temporary shoring, most inspect the beam and its connections before the ceiling is closed, and closing a wall before that inspection can mean opening it again.
Because fee schedules are published locally and differ widely, this cost file does not quote a permit figure. Look yours up before you budget. Our building permit walkthrough covers how to find the schedule, what an application usually contains, and how to sequence the inspections so the trades are not standing around waiting.
The related risk is doing it unpermitted. Unpermitted structural work follows the house, turns up in a sale disclosure or an appraisal, and is far more expensive to legitimise after the fact than to permit at the time.

Asbestos, lead and what an older wall can hide
Opening walls in an older house raises a question that has nothing to do with structure. Materials used in mid century construction can include asbestos containing products, and painted surfaces from that era can carry lead. Neither is identifiable by looking, and both change the cost and the procedure if present.
The practical rule is that testing before demolition is cheap and testing after disturbance is a cleanup. Our asbestos removal cost file covers what testing costs, why sampling belongs with a licensed inspector, and why intact material is often managed rather than removed. If your house is old enough for the question to be live, ask it before the reciprocating saw, not while the dust is settling.
Lead paint has its own rules about who may disturb it and how the work area is contained, and those rules are set at federal, state and local level. Ask your contractor how they handle it and what certification they hold, and ask your local authority what applies at your address rather than relying on any general statement.
None of this is a reason to abandon the project. It is a reason for a small budget line and a short delay early, instead of a stopped project and an emergency abatement contractor later.
Finishing the ceiling the floor and the old wall line
This is the section homeowners skip and then regret. When a wall goes, it leaves a scar in three planes.
The ceiling has a strip where the wall’s top plate was, and if the beam is flush, a pocket where the joists were cut. Patching that strip so it disappears under a raking light is skilled drywall work, and if the ceiling is textured, matching the texture across the patch is its own small art.
The floor has a gap along the old wall line, typically the width of the plate. With carpet or a floating floor, this is minor. With existing hardwood, the fix is weaving new boards into the old, which means matching species, width and finish, and it very often means sanding and refinishing the whole run so the repair is not a stripe across the room.
The walls at each end have raw edges where the removed wall met them, plus the beam or its boxing to blend in. Illustratively, finishing runs around $700 plus roughly $35 per foot at the low end and $1,200 plus roughly $70 per foot at the high end, which puts a twelve foot opening near $1,120 to $2,040. If the wall removal is part of a kitchen project, our kitchen remodel cost file shows how that finishing folds into the larger scope.
Where the money goes on an illustrative $11,000 flush beam opening
Illustrative share of a twelve foot opening under a single storey, with the load path already in place below and two electrical circuits to move. Shares sum to 100.
Shares are illustrative. Add a new post and footing below and the labor and materials slices both grow while the percentages shift, which is why the load path is priced as its own line in this cost file.
A worked example of a 12 foot flush beam opening
Take the most common version of this project: a twelve foot opening between a kitchen and a living room, one storey above, the wall sitting over an existing basement beam so the load path below is already sound, and two electrical circuits found in the cavity. The homeowner wants a flush beam so the ceiling reads as one room.
The lines, all illustrative, land like this. Structural engineer assessment, beam design and the permit together at $880. Demolition of the wall and disposal at $820. Engineered beam, two posts, hangers and hardware at $2,090. Carpentry labor, covering temporary shoring, cutting the joists back, lifting the beam into the pocket and hanging every joist off it, at $4,840. Rerouting the two circuits at $770. Ceiling patch along the old wall line, floor infill, drywall and paint at $1,540. That totals just under $11,000.
Now change one thing. Give the wall nothing solid beneath it, so one new post needs a new footing cut into the basement slab, and the total moves to roughly $12,500. Make it two footings and it moves to about $14,600. Nothing about the room changed. The load path did.
Cost by scenario and where budgets actually break
Set the scenarios side by side and a pattern appears. Between the partition and the eight foot dropped beam, the increase is the beam and the engineering. Between the eight foot dropped beam and the twelve foot flush beam, the increase is almost entirely labor for the flush detail. Between the twelve foot flush beam and the eighteen foot version, the increase is the footings and the heavier beam together. Between that and the widest scenario, the increase is steel, rigging and services.
So the breaks are predictable even though the totals are not. In rough order of how often they wreck a budget: the load path below the wall, the services in the cavity, the flush versus dropped decision made after pricing rather than before, and the finishing that was assumed to be “a bit of patching”.
Run your own version through the job cost estimator with the worst plausible answer on each of those four, then with the best. The gap between the two runs is the size of the contingency this project deserves, and knowing that number before you sign is worth more than shaving a few hundred dollars off a bid.
What a good estimate for this work should list
A comparable estimate on a structural opening separates the scope into lines you can price independently. Look for the engineer’s fee and whose responsibility it is to obtain the design, the permit fee and who files, demolition and disposal with the debris volume assumed, temporary shoring described as its own operation, the beam type and the connection hardware, the number of posts and what each bears on, the footing work stated as included or excluded with a per footing rate, allowances for electrical, plumbing and HVAC discovery, and the finishing scope broken into ceiling, floor and paint.
Two lines matter more than the rest. The first is the footing line, because “if required, priced separately” and “one footing included” are thousands of dollars apart and both look reasonable on a page. The second is the services allowance, because an estimate with no allowance at all is not cheaper, it is simply silent about a cost you will pay later.
If a bid is a single number with a one sentence description, it is not an estimate, it is a hope. Ask for the breakdown before you compare anything.
How to compare bids on a structural opening
Comparing bids here is harder than on most jobs because the contractors may be pricing different designs. One may be assuming a dropped beam, another a flush one. One may include a footing, another may exclude it. One may have allowed for a plumbing surprise and another may not.
The fix is to define the scope yourself first, using the engineer’s design as the specification, and then send that same specification to everyone. Once the beam type, the flush or dropped decision, the post positions and the footing assumption are fixed on paper, the bids finally describe the same project and the price difference means something.
Then read the exclusions rather than the inclusions. On structural work the exclusions carry the risk. Ask what happens if the cavity contains a drain, what happens if the slab has to be cut, what happens if the engineer revises the design after demolition exposes something unexpected, and get those answers in writing before you choose. Verify licensing and insurance directly with the issuing bodies for whoever you hire, because a structural failure is exactly the claim that tests a policy.
How long the work takes and what living through it costs
Schedule is a cost even when it is not on the invoice. A straightforward dropped beam opening with the load path already in place is often a few days of framing plus finishing, while a flush beam with a new footing stretches to a couple of weeks or more once concrete cure time, inspections and trades scheduling are included. Waiting for a footing to reach strength is not negotiable and it sits in the middle of the schedule.
During that window the affected rooms are unusable, dust travels further than anyone expects, and if the wall is in a kitchen the appliances are usually disconnected. Some households absorb that easily and some pay for a hotel or eat out for a fortnight, and those costs are real even though no contractor invoices them.
Two things shorten the disruption. Sequencing so that the engineer’s design, the permit and the material order are all complete before demolition starts, and agreeing what happens on the day the cavity is opened, so that a surprise triggers a prepared response rather than a stopped site and a week of phone calls.
What the finished opening does and does not do for the house
Open plan layouts are popular, and a well executed opening between a cramped kitchen and a dark living room genuinely changes how a house feels. That is the honest case for spending the money: you use the space every day.
The case that deserves more caution is doing it purely as an investment. Structural work is expensive and largely invisible when finished, which means the visible result is a room without a wall rather than a new kitchen. Whether a buyer pays more for that depends on the house, the market and what was on the other side of the wall.
There is also a functional cost to consider before you commit. Walls carry sound, hide mess, hold cabinets and radiators, and separate a cooking smell from a sofa. Removing one is not reversible in any practical sense. Sit in both rooms and picture the noise, the sightlines from the front door and where the furniture goes, then decide, because that decision is much cheaper before the engineer is engaged than after the beam is in.
Questions to ask before you sign
Six questions do most of the work of protecting you on this project.
Has a structural engineer confirmed the wall carries load, and is the beam design stamped? Does the estimate include a footing, and what is the rate for each additional one? Is the beam flush or dropped in this price, and what does the alternative cost? What allowance is carried for electrical, plumbing and HVAC found in the cavity, and what happens if it is exceeded? Who obtains the permit, who schedules the inspections, and at what stages? And what is the shoring plan while the wall is out?
A contractor who answers all six comfortably, in writing, is showing you they have done this work before. Vagueness on the footing question and the shoring question in particular is the signal to keep looking, because those are the two answers that separate people who remove walls from people who demolish them.
The bottom line
Load bearing wall removal cost is unanswerable as one number and very answerable once you know what the wall was doing. The demolition is trivial. The price is set by how far the load has to travel to the ground, whether you want the beam hidden or visible, what is living inside the cavity, and how much finishing the old wall line demands. Illustrative all in midpoints run from roughly $2,200 for a partition to about $26,900 for a wide opening carrying two storeys, and the biggest single swing inside that range is usually invisible from the room you are standing in.
The sequence that protects you is short. Establish whether the wall bears load using joist direction and what stacks above and below it, then have a structural engineer settle the question and produce a stamped design. Fix the flush or dropped decision and the footing assumption on paper. Send that one specification to several contractors and compare the exclusions rather than the totals. Permit it properly, insist that shoring is described as its own operation, and hold a real contingency for what the open cavity reveals. No article can give you a beam size, and any that offers one should be closed. Your engineer’s design and your written estimates are the only numbers worth acting on.
ProsNook publishes this cost file so homeowners can understand how a structural opening is assessed, designed and priced, and it is educational material rather than engineering, construction, safety or legal advice. Nothing on this page identifies whether a particular wall in a particular house carries load, and no beam size, span, post spacing, footing dimension or connection detail is published here, because that specification is the work of a licensed structural engineer who has inspected the building. Every dollar amount, per foot rate, allowance and share shown is illustration for planning only, and your real figure will move with span, load, load path, access, region and whatever the open cavity turns out to contain. Temporary shoring failure during this work is a life safety event rather than a budget problem, which is why removal of a load bearing wall is presented here as licensed trade work performed against a stamped design and inspected under permit, and never as a homeowner project. Permit requirements, inspection stages, fee schedules and rules covering asbestos and lead disturbance are set locally and vary widely, so treat your own building department and your state or local authority as the only reliable sources for your address, and act on written estimates prepared against your engineer’s design rather than on anything in this cost file.
Frequently asked questions
How much does it cost to remove a load bearing wall?
There is no single number, because you are not paying to remove a wall, you are paying to replace what the wall was doing. As illustrative midpoints, a non load bearing partition taken out and patched often lands near $2,200, an eight foot opening under one storey with a dropped beam near $5,800, a twelve foot opening with a flush beam hidden in the ceiling near $11,000, an eighteen foot opening that also needs new footings near $19,500, and a twenty foot opening carrying two storeys with steel and rerouted services near $26,900. Those figures are illustration only and every one of them moves with your span, your load path and what is found inside the wall. The only number that means anything is a written estimate against a beam design produced by a structural engineer who has been in your house.
How can I tell if a wall is load bearing?
The reliable methods are checking which way the floor or ceiling joists run, because a wall that runs across the joists is far more likely to be carrying them, looking at what sits directly above the wall on the storey above and directly below it in the basement or crawl space, and having a structural engineer confirm it. Walls that stack over a beam, a girder or a foundation wall are the ones most often carrying load. Popular shortcuts, like assuming every exterior wall bears and no interior wall does, or judging by wall thickness or whether the wall runs the length of the house, get this wrong often enough that they are not worth relying on. Load also travels sideways through the framing in ways that are not visible from the room, which is why confirmation belongs with someone qualified rather than with a flashlight and an opinion.
How much does a structural engineer cost for a wall removal?
Illustratively, a residential structural engineer commonly charges somewhere around $500 to $1,200 for a site visit, an assessment of the wall and the load path, and a stamped beam design or letter for the permit application. Complex houses, long spans, multiple walls or a full set of drawings sit higher. Measured against the cost of the work itself and against the consequence of getting the beam wrong, that fee is one of the cheapest lines in the whole project. Most building departments require the stamped design before they will issue a permit, so it is usually not optional anyway.
Why is a flush beam more expensive than a dropped beam?
A dropped beam sits below the ceiling, so the joists keep resting on top of it and the carpentry is comparatively straightforward. A flush beam is hidden inside the ceiling plane, which means every joist has to be cut back, the beam has to be lifted into the pocket, and each joist has to be hung off the beam with metal hangers while the floor above stays supported the whole time. That is far more labor, more shoring, and more that can go wrong. As an illustration, budgeting roughly 1.6 times the dropped beam figure for the beam and installation portion is a reasonable planning assumption, and on a twelve foot opening that difference alone commonly runs into the low thousands.
Do I need a permit to remove a load bearing wall?
Structural alterations are permitted work in most jurisdictions, and removing a wall that carries load is a structural alteration by definition, so assume a permit is required until your own building department tells you otherwise. What varies is the fee, the drawings required, whether a stamped engineer's design must be submitted, and how many inspections are scheduled. Fee schedules are published locally and differ widely, so no article can quote yours. Doing this work without the permit tends to surface later at sale or at insurance claim time, when an unpermitted structural change is expensive to unwind.
Can I remove a load bearing wall myself?
This cost file does not treat load bearing wall removal as a homeowner project, and the reason is temporary shoring rather than the demolition. While the wall is gone and before the beam is carrying, the floor or roof above is held entirely by temporary supports, and a shoring failure at that moment is a collapse with people underneath it, not a repair bill. Sizing and placing that shoring, keeping it plumb and tight, and sequencing the transfer onto the permanent beam are the parts that require experience. Add that the permit will require a stamped design and inspections, and that an unpermitted structural change follows the house, and the honest answer is that this one belongs to licensed trades working from an engineer's drawing.
What does it cost to move electrical, plumbing and HVAC out of the wall?
It depends entirely on what is in the cavity, and the common surprise is that nobody knows for certain until the drywall is off. As illustrative allowances, a couple of electrical circuits to reroute might run around $800, electrical plus a supply pipe or a small duct around $1,800, and a drain and vent stack or a main duct trunk around $3,200 or well beyond. Drain and vent work is the expensive case because waste piping needs continuous fall and the vent has to go up through the roof, so it cannot simply take a different path across a ceiling. Ask for these as separate allowance lines in the estimate rather than letting them arrive as change orders.
What gets missed most often in a wall removal budget?
Three things, in this order. The load path below, because new posts need something solid under them and cutting the basement slab for a new footing is where budgets most often break. The services inside the wall, because they are usually discovered rather than planned for. And the finishing, because a ceiling patched along the old wall line and a floor filled in across it are more visible than people expect, particularly with existing hardwood that has to be woven in and refinished across the whole room. Illustratively the finishing alone can run from several hundred dollars on a painted ceiling to a few thousand once flooring is involved.