What's on this page
- What radon mitigation costs, honestly
- Testing comes first, and what a test costs
- Short term testing versus long term testing
- The action level is a published number, and it is not ours to state
- Sub slab depressurisation, the standard system
- What drives a sub slab price: the slab itself
- Suction points, and why one house needs three
- Interior routing versus exterior routing
- Fan sizing, and the number that should be on your quote
- The electrical work nobody quotes up front
- Sealing, and what it does and does not buy
- The discharge stack, the roofline, and the neighbour problem
- Sub membrane systems for crawl spaces
- Drain tile and sump integrated systems
- Block wall depressurisation
- Passive systems in new construction
- What it costs to activate a passive system
- Multi slab houses, additions, and combination systems
- Post mitigation retesting, and who pays for it
- What the fan costs to run every year
- Fan replacement and the true ten year cost
- A worked example: a basement ranch with one suction point
- What a radon mitigation quote should itemize
- Certification, licensing, and why it matters more here
- Why one house costs twice another
- Radon at the point of sale
- DIY, and where the line honestly sits
- Red flags in a radon proposal
- Living with the system after it is installed
- What radon work does and does not do for resale
- The bottom line
Short answer: Radon mitigation is priced by system type. Illustratively, activating an existing passive stack runs near $500 to $1,500, a sub slab depressurisation system near $1,200 to $2,500, a drain tile or sump system near $1,500 to $3,500, a crawl space sub membrane system near $2,000 to $5,000, and block wall depressurisation near $2,500 to $6,000. Extra suction points add $300 to $800 each, and no system should be bought without a measured test.
Radon mitigation cost is one of the more predictable numbers in home repair, right up to the moment it is not. Most houses that need a system get a single pipe through the basement floor, a fan, and a discharge above the roof, and the invoice lands in a band that a homeowner can anticipate before anybody visits. Then there is the house with an addition poured against the original slab, a crawl space under half of it, a finished basement with nowhere to hide a pipe, and tight clay under everything, and the same conversation produces a number three times larger.
This cost file prices the work by system type, which is how it is actually sold and how it should be compared. It covers what sub slab depressurisation costs and what moves that price, how suction points are decided, what interior and exterior routing each cost, how crawl space, drain tile and block wall systems differ, what testing and retesting cost on either side of the work, and what the fan costs to run for as long as you own the house. Our basement waterproofing cost file covers the water half of the same below grade problem, and our crawl space encapsulation cost file covers the sealed crawl space that a sub membrane system is built on top of. Sketch your own version in the job cost estimator as you read.
Key takeaways
- Illustratively, activating an existing passive stack runs near $500 to $1,500, a sub slab depressurisation system near $1,200 to $2,500, a drain tile or sump system near $1,500 to $3,500, a crawl space sub membrane system near $2,000 to $5,000, and block wall depressurisation near $2,500 to $6,000.
- Suction point count, not house size, is the single biggest lever inside the sub slab band, at an illustrative $300 to $800 per additional point.
- Testing costs a fraction of mitigation, and no system should ever be bought without a measured result to buy it against.
- The action level that mitigation targets is published by public health authorities and can change, so confirm the current guidance and your state's certification rules rather than relying on a number quoted in an article.
- The fan runs continuously, which is an illustrative $40 to $120 a year in electricity, and it is a consumable that will need replacing at an illustrative $300 to $700 installed.
What radon mitigation costs, honestly
The honest shape of this market is narrower than most home repair categories and it still has a long tail. The middle of the distribution is a house with a basement or a slab on grade floor, one suction point, a pipe routed to a discharge above the roofline, a fan on a dedicated circuit, and a follow up measurement a few weeks later. That job is a day of work for a two person crew and it prices accordingly.
As an illustrative framework, treat these bands as the shape of the market: activating an existing passive stack near $500 to $1,500, a sub slab depressurisation system near $1,200 to $2,500 for a straightforward single point installation, a drain tile or sump integrated system near $1,500 to $3,500, a crawl space sub membrane system near $2,000 to $5,000, block wall depressurisation near $2,500 to $6,000, and a combination system covering a slab and a crawl space together near $3,000 to $8,000.
Every one of those figures is illustration rather than a quote. They exist so that when a number is said out loud in your basement, you can tell which system it belongs to and whether that system is the one your floor construction actually calls for.
Testing comes first, and what a test costs
Nothing in the rest of this cost file matters without a measurement. Radon is a soil gas that varies enormously between neighbouring houses, between seasons, and between floors of the same building, which means neither the age of the house nor the map of the county nor a neighbour’s result tells you what is in your own living space. The only thing that does is a test in your house.
As an illustrative framework, a short term do it yourself kit including the laboratory fee runs near $15 to $50, a long term kit near $25 to $80, a consumer continuous monitor near $150 to $300 as a one off purchase, and a professional short term measurement with a calibrated continuous monitor near $150 to $300 per test. A measurement performed as part of a property transaction sits at the upper end because of the documentation and chain of custody involved.
Testing protocols matter as much as the device. Closed house conditions, placement height, distance from exterior walls and drafts, and minimum exposure times are all specified by public health authorities and by state radon programs, and following them is what makes the number mean anything. Read the current instructions that come with your device rather than a summary.
Short term testing versus long term testing
The two measurement types answer different questions and the price difference between them is trivial, which makes running both a reasonable plan for most owners. A short term test, typically a few days, gives you a fast snapshot. It is the right tool when you need an answer inside a transaction timeline or when you are screening a house you just bought.
A long term test, typically several months, gives you an average across changing weather, changing occupancy and changing heating patterns. Radon levels swing with all three, so a long term average is closer to what a household is actually exposed to over a year. It is the better basis for a decision when there is no deadline forcing your hand.
The practical sequence that costs the least is to screen with a short term test, and if the result is anywhere near the published action level, follow it with either a long term test or a second short term test before spending on a system. A single elevated snapshot taken during a storm is not the same as a persistent condition, and the difference between them is worth confirming for the price of a second kit.
The action level is a published number, and it is not ours to state
Radon mitigation targets a threshold published by public health authorities, and the whole industry is organised around it. Contractors design systems to get a house below that level, testing labs report against it, and disclosure practices in real estate reference it. It is a genuine number with a genuine basis.
It is also not a number this cost file will assert, and that is deliberate. Action levels, recommended actions in the band below them, testing protocols and the health risk figures behind them are set by public health agencies, revised as evidence accumulates, and sometimes differ between a national authority and a state program. Any figure printed in an article ages, and an aged figure quoted confidently is worse than no figure at all.
What that means practically is straightforward. Get the current action level and the current testing guidance from your state radon program or your national public health authority before you interpret a result. Ask your contractor what level the system is designed to achieve and get it written into the proposal as a performance target. And treat any salesperson who quotes a threshold from memory without pointing you at the source as somebody guessing on your behalf.
Sub slab depressurisation, the standard system
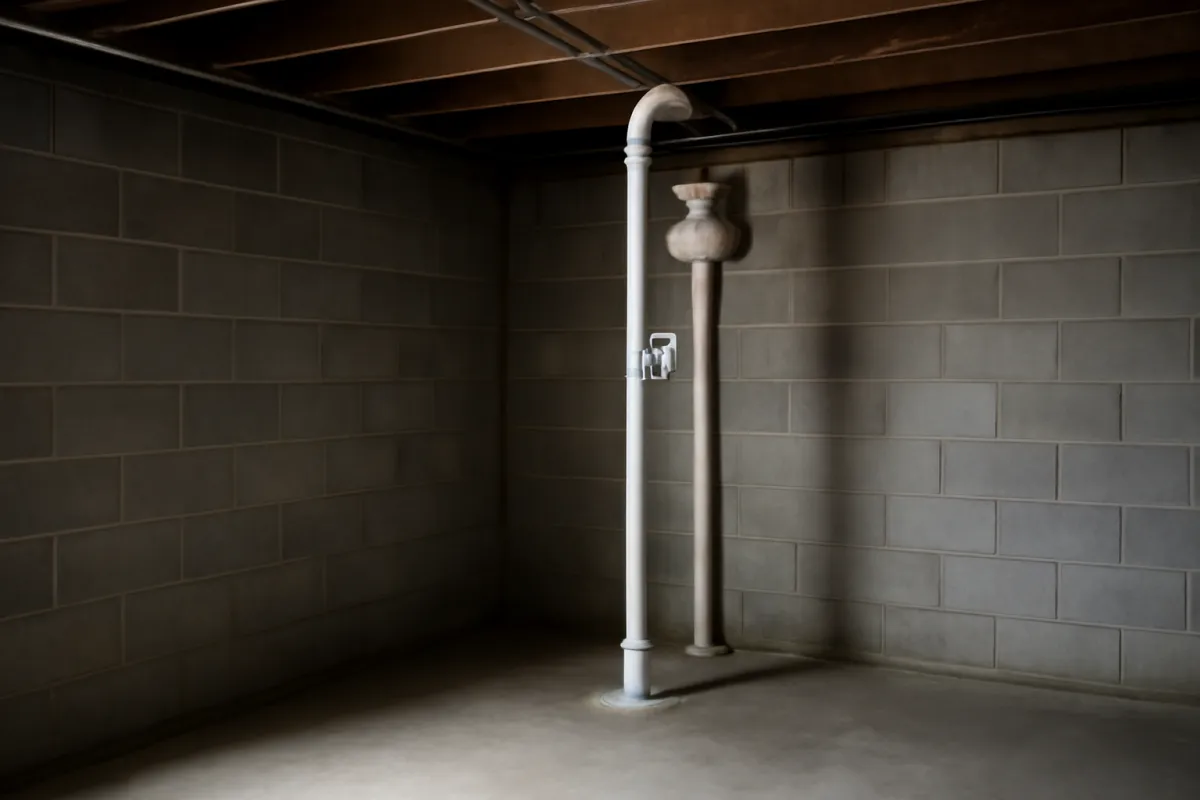
Sub slab depressurisation, written as depressurization in most American technical documents, is the system almost every quote will describe, and understanding it makes every other price on this page legible. A hole is cored through the concrete floor, a pit is excavated in the material underneath, a sealed pipe is set into that pit, and the pipe is run to a fan and then to a discharge point above the roofline. The fan runs continuously and holds the space under the slab at slightly lower pressure than the room.
The physics is the entire point. Soil gas moves from higher pressure to lower pressure, so once the space under the floor is the low pressure side, gas that would have seeped up through the floor to wall joint, the slab cracks, the sump and the plumbing penetrations goes into the pipe instead. The system is not filtering the room. It is intercepting the source.
That design has three consequences for cost. First, the number of pipes is set by how far the low pressure zone spreads under the slab, not by the floor area of the house. Second, the fan has to run forever, which puts a small permanent operating cost on the ledger. Third, the work is verifiable, because a follow up measurement either shows the reduction or does not.
What drives a sub slab price: the slab itself
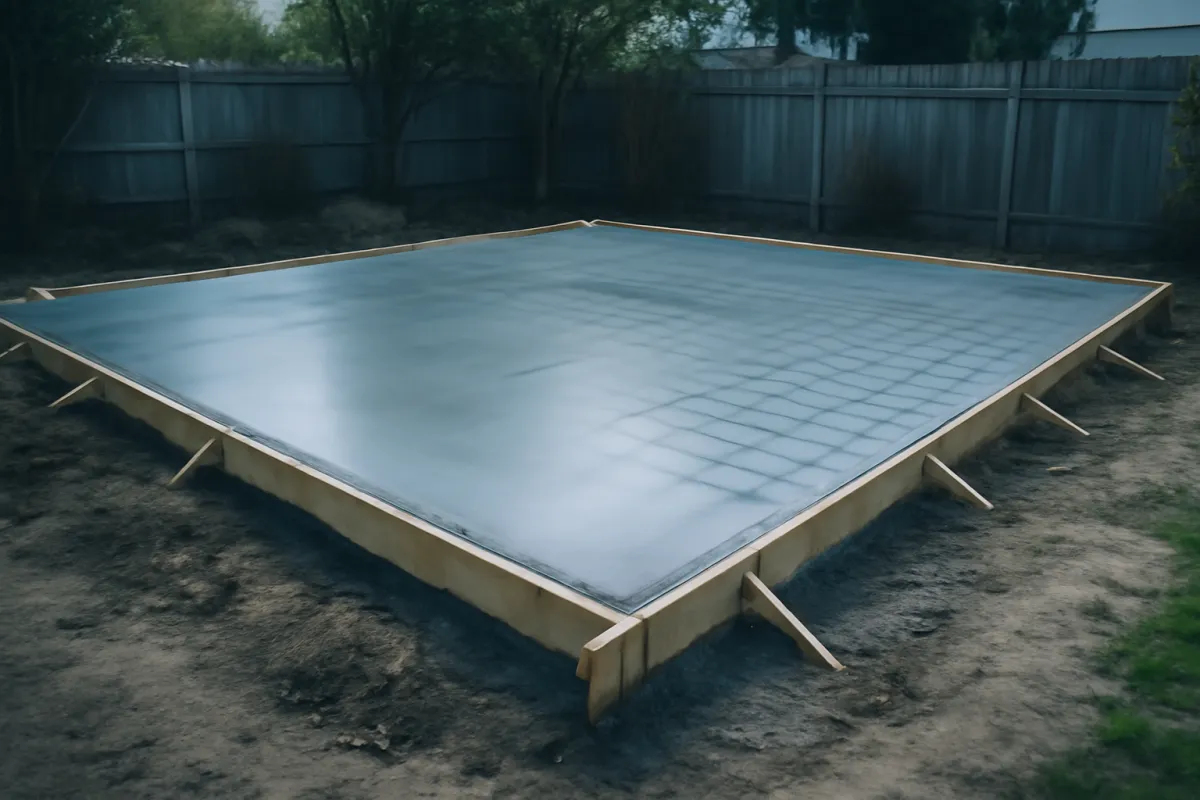
Inside the sub slab band, four variables do most of the work, and the slab is the first and largest. What sits under the concrete decides how far suction travels. Clean, uniform gravel is close to ideal because air moves through it freely, so one suction point can influence a large area. Compacted clay, silt, sand fill or construction debris resists that movement, and the same fan reaches a much smaller radius.
The condition of the slab is second. An intact pour holds the pressure difference. A slab with an open floor to wall joint around the whole perimeter, wide shrinkage cracks, an uncovered sump, a floor drain that opens to soil, or a plumbing chase that was never sealed leaks the pressure difference back into the room, which forces either more sealing or a larger fan.
Slab thickness and reinforcement are third, because coring is priced by time and a thick or heavily reinforced slab is slower. Interior obstructions are fourth. A run that crosses a finished ceiling, a furnace room, a bathroom or a stairwell is more pipe, more fittings and more careful work than the same run through an open basement, and our cost to finish a basement file explains why an already finished space makes every below grade intervention dearer.
Suction points, and why one house needs three
This is the line item that separates a $1,500 job from a $3,500 job on houses of the same size. A suction point is one pipe through the slab, and how many the house needs is a technical question with a measurable answer. The measurement is called pressure field extension, and it is performed by drilling small test holes at a distance from a proposed point, applying suction, and checking whether the pressure difference actually reaches them.
Houses that commonly need more than one point include those with an addition poured against the original slab, since the joint between two pours often blocks air movement completely. Also houses with interior footings that act as underground walls, houses built in stages, houses on poorly drained fill, and houses where part of the floor is a slab and part is a crawl space.
Illustratively, each additional suction point adds around $300 to $800, covering the coring, the pit, the extra pipe, the fittings and the tie in to the common run. A house needing three points instead of one therefore carries an illustrative $600 to $1,600 more before anything else changes. Ask how the number was decided. Diagnostic testing is a real answer and an experienced guess is a weaker one.
Interior routing versus exterior routing
Where the pipe travels between the slab and the sky is a genuine fork in the quote and it changes both the price and how the house looks afterwards. Interior routing takes the pipe up through the building, commonly through a closet, a utility chase, the garage or a corner of the basement, then through the attic and out through the roof. Exterior routing brings the pipe out through the rim joist near the floor and runs it up an outside wall to above the eaves.
Interior routing carries a roof penetration and flashing, an attic run, and usually some boxing in or a chase to hide the pipe, which illustratively adds around $400 at the midpoint of a typical job. It keeps the fan in the attic and the pipe out of sight, and it keeps the whole pipe inside the heated envelope so condensation is less of an issue in cold climates.
Exterior routing avoids the roof penetration and the interior carpentry but adds an exterior stack running up the side of the house, a wall penetration to seal, and often paint to match the siding, illustratively adding around $250 at the midpoint. The pipe is visible, which some owners mind a great deal and some do not notice. In cold climates an exterior run can also collect condensation, which is a detailing question your contractor should answer before the pipe goes up.
Fan sizing, and the number that should be on your quote
A mitigation fan is specified by the airflow and static pressure it can deliver, not by horsepower or by a marketing tier, and the correct one is decided by what is under the slab. Loose gravel moves a lot of air at low resistance, which suits a high flow, low pressure fan. Tight soil moves very little air at high resistance, which suits a low flow, high pressure fan. Fitting the wrong one in either direction produces a system that runs and does not work.
That is why the diagnostic step matters more here than in most trades. A contractor who measures before choosing has a reason for the fan on your pipe. A contractor who fits the same fan on every house is playing the averages and will be wrong on the houses that are not average, which are precisely the houses that needed a professional.
What belongs in the proposal is the fan model and its performance data, the target pressure difference under the slab, and the expected sound level, along with the manometer that lets you see at a glance that the system is running. Ask what happens if the follow up measurement comes back high. A proposal that includes a fan upgrade or an additional suction point at a stated price if the target is not met is a proposal written by somebody planning to succeed.
Illustrative radon mitigation cost by system type
Midpoint installed totals for each system on a straightforward house, including the fan, the pipe run, basic sealing and a follow up measurement. Your figure moves with suction point count, routing, slab condition and access.
Illustrative midpoints, not quotes. Bar widths are drawn from each value against the $5,500 top of the range. Electrical work beyond a simple connection, extensive sealing, finished space repair and permits sit outside these figures.
The electrical work nobody quotes up front
The fan needs power and it needs it in a location that often has none. This is the line most likely to be missing from the cheapest proposal and most likely to appear as an extra once work begins, so it is worth settling in writing beforehand.
The simplest case is a fan mounted in a garage or on an exterior wall within reach of an existing circuit, where a licensed electrician adds an outlet and a switched disconnect for an illustrative $200 to $400. The middle case is a fan in an attic with no nearby circuit, where a run has to be pulled from the panel, illustratively $350 to $600. The expensive case is a panel with no spare capacity, which turns a small addition into a service conversation of its own.
Two details matter beyond the price. A mitigation fan should be on a circuit that will not be switched off casually, because a fan that has been off for a month is a system that has not been working for a month. And in most jurisdictions this is permitted electrical work rather than a plug in appliance connection. Our electrician cost file prices this category on its own so you can check whether the allowance in a mitigation quote is realistic.
Sealing, and what it does and does not buy
Sealing is the supporting act to depressurisation and it is frequently oversold as the main event. Closing the floor to wall joint, filling open slab cracks, capping an unused floor drain correctly, fitting a gasketed lid on a sump and sealing plumbing penetrations all reduce the amount of house air the fan pulls down through the floor, which lets the system hold a stronger pressure difference on less energy.
Illustratively, a sealing allowance on a typical basement runs around $150 to $600 depending on how much joint there is and what has to be worked around. On a house with an open perimeter joint or a large uncovered sump it can be more, and it is money well spent because every one of those openings is a leak in the pressure boundary you are paying a fan to maintain.
What sealing does not do is substitute for a system. Sealing alone rarely produces a durable reduction, because concrete keeps cracking, the joints reopen, and the pressure difference driving gas into the house has not changed. A proposal that offers sealing as the whole solution at a low price is offering something that is unlikely to hold, and the follow up measurement is what will tell you.
The discharge stack, the roofline, and the neighbour problem
Where the pipe ends is a code and courtesy question rolled together, and it produces more disagreements than any other part of the job. The discharge has to be above the roofline, away from windows, doors and other openings, and clear of any air intake, with the specific distances set by the standard your state or municipality adopts. Those clearances are not negotiable and they are what makes some routes impossible.
The aesthetic consequences are real. An exterior stack on the front elevation of a house is visible from the street, and while it can be painted to match the siding, it is still a pipe. Owners frequently pay more for interior routing purely so the exterior stays clean, and that is a legitimate reason to spend the money as long as everyone is honest that it is an appearance decision.
Two practical asks. Have the contractor mark the proposed route and discharge point before the crew arrives, because a homeowner who sees the line on the wall in advance never has the argument afterwards. And on a tight urban lot, ask how the discharge clearances work relative to the neighbouring house, since the answer occasionally rules out the cheapest route entirely.
Sub membrane systems for crawl spaces
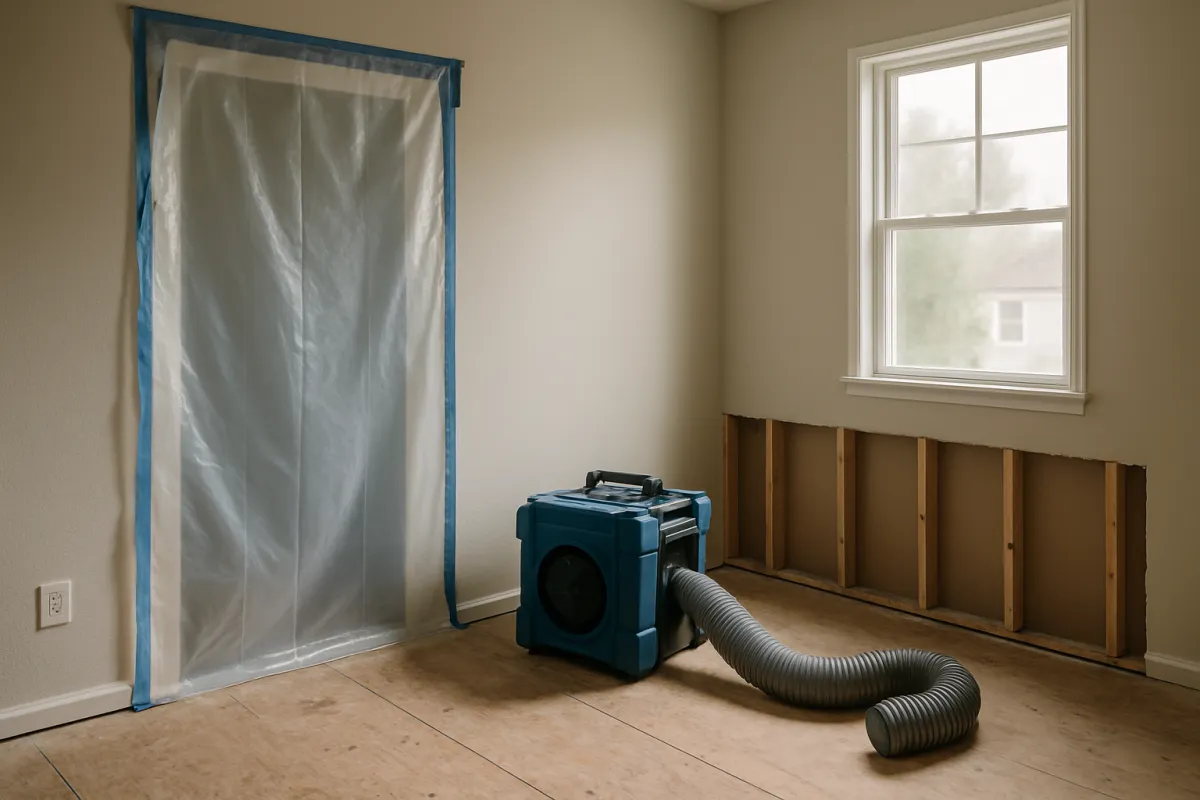
A crawl space has no slab to depressurise, so the system creates one out of plastic. A heavy membrane is laid over the entire floor of the crawl space, run up the walls and piers, sealed at the seams and at the perimeter, and a suction pipe is set beneath it. The fan then holds the space between the soil and the membrane at lower pressure than the crawl space above it.
Illustratively, a crawl space sub membrane system runs near $2,000 to $5,000, and the driver is area and access rather than anything about the fan. The membrane portion alone commonly prices near $1.50 to $3.50 per square foot installed, which on a 900 square foot crawl space is roughly $1,350 to $3,150 before the pipe, the fan and the electrical. Headroom, debris, standing water, pier count and how far material has to be dragged through a small hatch all move that rate.
There is a large overlap here with sealed crawl space work bought for moisture reasons, which our crawl space encapsulation cost file prices in full. If you are considering both, buy them together. Two crews laying two membranes over the same soil in the same year is money spent twice, and the specifications are close enough that a single scope usually satisfies both objectives.
Drain tile and sump integrated systems
Where a house already has an interior perimeter drain and a sump, the drainage system is an existing network of pipe and gravel running around the whole footprint, and that network is often the best suction path available. A system built on it seals the sump with a gasketed lid, takes suction from inside the sealed basin or from the drain line, and runs the discharge in the usual way.
Illustratively, this approach runs near $1,500 to $3,500, and it is frequently at the lower end of that band because the hard part, the distribution network under the floor, already exists. A sealed sump lid with a pass through for the pump discharge and cord commonly runs an illustrative $300 to $800 on its own and is often the single most effective component in the job.
Two cautions apply. A drain system that discharges to daylight rather than to a sealed basin opens the pipe to outside air and can defeat the suction, so the termination has to be handled. And a sealed sump lid changes how the pump is serviced, so ask how the lid comes off. Our basement waterproofing cost file covers what installing that drainage costs from scratch if the house does not already have it.
Block wall depressurisation
A hollow concrete block foundation wall is a network of vertical cores connected to the cavity of the wall, and in some houses that cavity is the main pathway carrying soil gas into the living space. Where that is the case, taking suction from the wall itself is the effective answer even though it is harder and dearer than treating the slab.
The work involves sealing the top of the wall where the cores open, sealing openings such as beam pockets, brick ledges and utility penetrations, and inserting suction points into the cavity itself. Illustratively the system runs near $2,500 to $6,000, and the range is wide because the number of openings that have to be found and closed varies enormously between houses.
Block wall systems are also the ones most likely to be combined with a sub slab system rather than used alone, because a house with a leaking wall cavity usually has a permeable slab underneath as well. That combination is the honest reason some radon quotes land at the top of the range on a modest house. Our foundation repair cost file covers what to do when the same block wall turns out to have a structural problem rather than only a gas pathway.
Passive systems in new construction
Many jurisdictions now require or encourage radon resistant construction in new houses, and the passive system is what that produces. During the build, a gas permeable layer of gravel goes under the slab, a sheet of plastic goes over it, the slab is poured, a vertical pipe is stubbed from the gravel through the building to above the roof, and the joints and penetrations are sealed as the work proceeds.
Illustratively the incremental cost of doing this during construction is around $350 to $1,000, and it is genuinely cheap at that point because the gravel, the plastic and the chase are all being installed anyway. Retrofitting the same features into a finished house costs several times as much, which is the entire argument for the rough in.
A passive system is not a guarantee. It relies on the stack effect, meaning warm air rising in the pipe, to draw gas out without a fan, and that works well in some houses and weakly in others. A new house with a passive system still needs a measurement, and the builder’s paperwork should tell you where the pipe is and where the electrical junction for a future fan was left.
What it costs to activate a passive system
If a measurement in a house with a passive stack comes back at a level that calls for action, activating the system is the cheapest job in this cost file. A fan is cut into the existing pipe, usually in the attic or garage, an electrical connection is made, a manometer is fitted, and the system is retested.
Illustratively this runs near $500 to $1,500, with the spread driven almost entirely by the electrical. Where the builder left a junction box next to the pipe, the low end is realistic. Where power has to be pulled across an attic from a panel two floors down, the high end is. The pipe itself is already paid for, which is why this number is a third of a retrofit.
Two things to verify before booking the work. Confirm that the existing stub is genuinely connected to a gravel layer under the slab rather than terminating in a sealed void, because not every rough in was executed as designed. And confirm the pipe is in a location where a fan may legally be installed, since fans generally may not be sited inside the conditioned space or below the level being treated. Both are questions a mitigation contractor can answer on a first visit.
Multi slab houses, additions, and combination systems
The houses that produce surprising quotes are almost always the ones with more than one floor construction. A ranch with a basement under the original footprint and a crawl space under a later family room. A split level with a slab on grade garage tucked under a bedroom. A house where a porch was enclosed and a new slab poured against the old.
Each separate floor area is, from the system’s point of view, a separate problem, because suction does not cross a cold joint or a foundation wall. That means separate suction points and sometimes separate fans and separate stacks, which is how an illustrative $2,000 job becomes an illustrative $5,500 one. Nothing has been padded. The house simply contains two or three buildings.
The way to control this cost is to have the whole footprint assessed before anyone quotes a system, and to have the proposal state, area by area, what is being treated and what is not. A quote that covers the basement and stays silent about the crawl space under the family room is not a cheaper quote. It is a smaller one, and the difference shows up in the follow up measurement.
Where a sub slab mitigation budget goes
Illustrative share of a single point sub slab total, summing to 100. Labor dominates because most of this job is careful, awkward work in a basement rather than expensive material.
Shares are illustrative and move with suction point count, whether a new circuit is required, how much sealing the slab needs and whether finished space has to be opened and repaired.
Post mitigation retesting, and who pays for it
A radon system is one of the few home improvements whose success can be measured, which makes skipping the measurement close to unforgivable. A follow up test is run after the system has been operating for a period specified by the applicable protocol, and it either shows the reduction or it does not.
Illustratively, a post mitigation test costs $0 to $200, and the zero is common because many contractors include it. What varies is who places the device, who reads it and who receives the report. A test placed and interpreted by the company that installed the system is the normal arrangement and it is generally fine, but an owner who wants independence can run their own kit alongside it for the price of a kit.
What matters more than who pays is what the contract says happens next. Ask, before signing, what the company does if the follow up result is above the target: whether an additional suction point, a larger fan or further sealing is included, at what price, and for how long that commitment lasts. A guarantee tied to a measured level is worth substantially more than a warranty on parts, and it is the clause that separates the serious companies from the rest.
What the fan costs to run every year
The fan runs every hour of every day, which is exactly why the system works and exactly why it has an operating cost. Mitigation fans used on residential systems commonly draw somewhere in the region of 30 to 90 watts depending on the flow and pressure they are built to deliver.
The arithmetic is simple enough to do on your own bill. A fan drawing 50 watts continuously uses 50 times 8,760 hours, which is 438 kilowatt hours a year. At an illustrative 15 cents per kilowatt hour that is about $66 a year. Run the same calculation across the range and you get roughly $40 to $120 a year at that rate, which scales directly with whatever you actually pay per kilowatt hour.
There is a second cost that never appears on a quote. The system pulls a small amount of conditioned air out of the house through whatever openings remain in the slab, and that air has to be heated or cooled again. It is modest in a well sealed basement and less modest in a leaky one, which is the practical argument for paying for the sealing line rather than trimming it. Our attic insulation cost file makes the same point from the other end of the house.
Fan replacement and the true ten year cost
The pipe will outlast the house. The fan will not, because it is a motor with bearings running continuously in an unheated space. Treat it as a consumable with a service life measured in years rather than decades, and budget for it the way you budget for a water heater.
Illustratively, fan replacement runs $300 to $700 installed, made up of the fan itself and an hour or two of work, with the higher end reflecting an awkward attic location or a fan that has to be upgraded rather than matched. It is a small job and it does not require the system to be redesigned, assuming the replacement matches the original performance specification.
Put those pieces together and a ten year picture emerges. Take an illustrative installed cost of about $3,200 for a typical single point system with a sealed sump and a new circuit, add an illustrative $66 a year of electricity, and add one fan replacement at an illustrative $500. That is roughly $4,360 over ten years, or about $436 a year. Framed that way it sits alongside a service plan rather than alongside a renovation, which is the honest comparison.
A worked example: a basement ranch with one suction point
Take an illustrative 1,500 square foot ranch on a poured basement slab, built in one phase, with a sump in the corner and a straightforward closet running from the basement to the attic. A short term test comes back above the published action level, a long term test confirms it, and two certified contractors quote.
The scope both agree on: one suction point cored through the slab with a pit excavated below it, interior routing up through the closet and out through the roof, a fan in the attic, a manometer at eye level in the basement, a gasketed sump lid, sealing of the floor to wall joint along two walls and two visible cracks, and a follow up measurement.
The illustrative arithmetic: $1,850 for the base sub slab installation with interior routing, $450 for the sealed sump lid, $350 for a dedicated circuit run by an electrician, $300 for the sealing allowance, and $150 for the post mitigation test. That totals roughly $3,100, and a sensible band around it is $2,650 to $3,700. The second quote comes in at $2,400 and excludes the electrical and the sump lid, which is not a cheaper job. It is a different one.

What a radon mitigation quote should itemize
A proposal you can actually compare has seven things on it, and most of them are not prices. The measured result the system is being designed against, with the date and the device. The number and location of suction points, ideally marked on a sketch. The routing, stated as interior or exterior with the discharge location described.
The fan, named with its performance data, and the target pressure difference it is being selected to achieve. The sealing scope, listing the joint, the cracks, the sump, the drains and the penetrations being addressed. The electrical, stating who does it, whether a permit is involved and whether a new circuit is included. The follow up test, stating who performs it, when, and what happens if the target is not met.
Then the exclusions, which is where disputes live. Finished space that has to be opened and repaired, drywall and trim, painting the exterior stack, permits, disposal of debris from a crawl space, and any moisture or mold discovered once a membrane or a wall is opened. Our contractor estimate walkthrough covers how to read those clauses generally, and our quote comparison walkthrough covers forcing three proposals onto one scope so price becomes the only variable.
Certification, licensing, and why it matters more here
Radon mitigation is one of the trades where credentials carry real information, because the work is invisible once it is done and the result is only knowable through measurement. Many states operate a radon program that certifies measurement professionals and mitigation professionals separately, and some require certification or licensing to perform the work for hire at all.
The requirements are set at state level and they change, so the useful move is to look up your own state radon program’s current rules and its list of certified professionals before you call anybody. That takes a few minutes and it removes the entire category of contractor who has added radon to a list of services without training.
There is also a conflict of interest worth naming. The person who measures and the person who mitigates are sometimes the same company, and while that is common and legal, it means the party recommending a system is the party selling it. It is not a reason to refuse the arrangement, and it is a reason to have the follow up measurement documented, and to consider running an independent long term test of your own afterwards. Our contractor vetting walkthrough covers verifying credentials with the issuing body rather than accepting a logo on a van.
Why one house costs twice another
Stack the variables and the spread stops being mysterious. Start with an illustrative $1,850 single point interior system. Add a second suction point because the addition is on its own slab, at an illustrative $550. Add a third because the garage slab is under a bedroom, at another $550.
Add a dedicated circuit because the attic has no power, at an illustrative $350. Add a sealed sump lid at $450. Add an extended sealing scope because the perimeter joint is open all the way round, at $600 rather than $300. Add a chase to hide the pipe through a finished stairwell at $700. The same house, quoted honestly, is now near $5,050 rather than $1,850, and every single line is real work.
That is the answer to the question homeowners ask most often, which is why a neighbour paid so much less. Almost always the neighbour’s house had one uninterrupted slab over good gravel, an attic circuit already present, and a utility closet running straight up. The price difference was never about the contractor. It was about the building. Build your own version of that stack in the job cost estimator and the spread stops looking arbitrary.
Radon at the point of sale
Property transactions are where most people first encounter this subject, and the timeline is what makes it expensive. A short term test is run during the inspection period, the result arrives with days to spare, and a decision has to be made under pressure. That is the worst environment in which to buy a system and it is where the most padded quotes get accepted.
The options are the same as with any inspection finding. The seller mitigates before closing, the seller credits the buyer and the buyer arranges the work afterwards, the price is adjusted, or the buyer proceeds as is. A credit is often the calmer path because it removes schedule risk from the closing and lets the buyer choose the contractor and see the follow up measurement themselves.
Two things are worth knowing in advance. Disclosure obligations for known results vary by state, so a test you commission on a house you own may create a duty you did not have before, which is a question for your agent or attorney rather than for a cost file. And a documented, tested, working system is a neutral to mildly positive feature at resale rather than a stigma, in the same way a sump pump is.
DIY, and where the line honestly sits
Some of this work is squarely within homeowner reach. Testing is designed to be done by the occupant and the kits are inexpensive. Sealing visible cracks and the floor to wall joint, fitting a gasketed sump lid, and sealing a crawl space hatch are ordinary sealing tasks. Monitoring the manometer and keeping the discharge clear are trivial.
Other parts are not, and the reason is not difficulty but verification. Coring a slab without knowing what is beneath it risks post tension cables, plumbing, and radiant tubing. Sizing a fan without a diagnostic measurement is guessing. Routing and terminating the discharge involves clearances that exist for a reason and that an inspector may check. Wiring the circuit is permitted electrical work in most jurisdictions.
The decisive argument is the one about outcomes. A homeowner installed system that runs but does not reduce the measured level has cost money and delivered nothing, and the only way to discover that is the follow up test. If you do take on part of the work, take on the sealing, then hand a well sealed basement to a certified mitigator and let them price a smaller job. Our do it yourself versus hiring walkthrough sets out how to make that split on any project.
Red flags in a radon proposal
Five patterns should slow you down. The first is a quote given over the phone without a site visit, because suction point count is a site question and nobody can answer it from a postcode. The second is a result presented without a device, a date or a protocol, since a number with no provenance is not a measurement.
The third is fear framing, meaning a sales conversation built on alarm rather than on the reading and the design. The fourth is a lump sum with no components: no point count, no fan named, no routing, no sealing list, no test. That proposal is unquotable against and unverifiable afterwards.
The fifth is a refusal to commit to a post mitigation result. A contractor who will not put a target level and a remedy in writing is asking to be paid for equipment rather than for an outcome, and the outcome is the only thing you are actually buying. Our contractor scam walkthrough covers the general versions of all five, and every one of them shows up in this trade.
Living with the system after it is installed
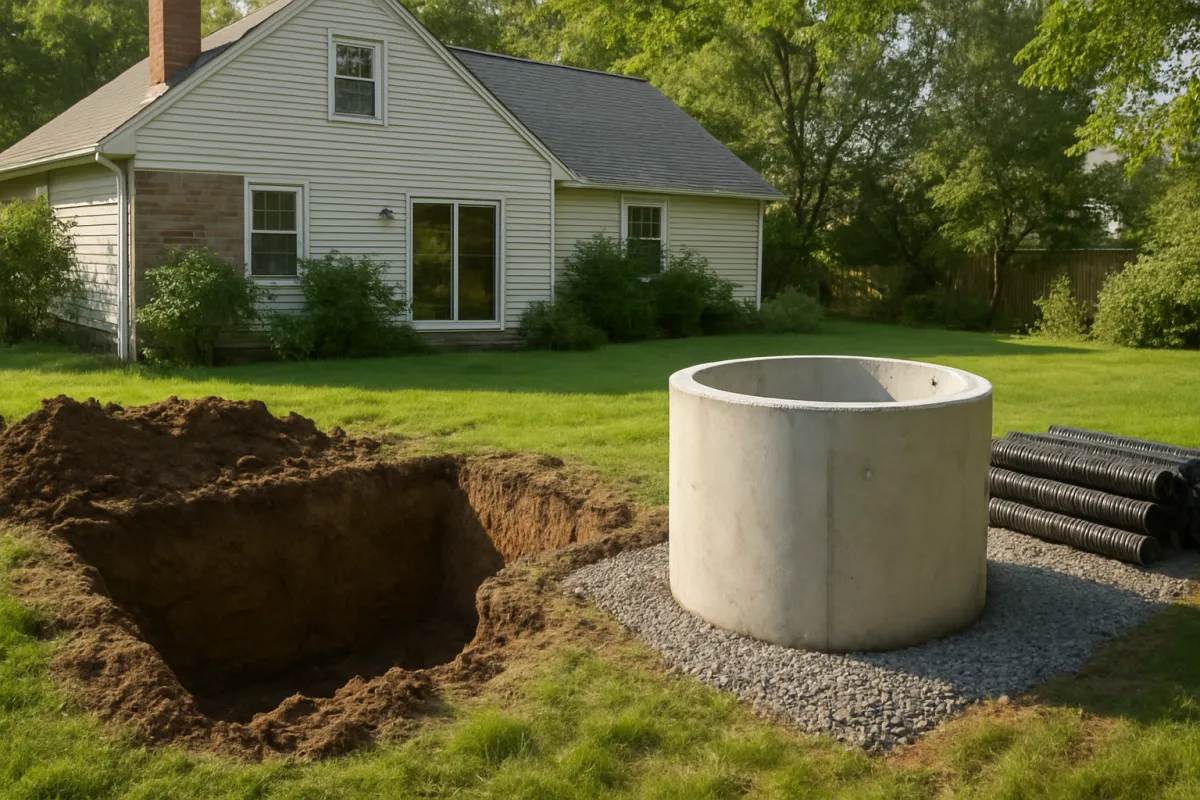
A finished system asks very little of you and it asks it forever. The manometer on the pipe shows a difference in liquid levels while the fan is running and equal levels when it is not, which makes checking it a two second job. Look at it monthly for the first year and a few times a year afterwards, and put a note somewhere that explains what it means, because the next owner will not know.
Keep the fan powered. The most common failure in the field is not a broken fan but a switched off circuit, a tripped breaker after a storm, or an unplugged connection during unrelated work. If the house has an electrician in for anything else, mention which circuit must stay live.
And retest periodically. Public health authorities generally recommend measuring again every few years and after any significant change to the building, meaning renovations that open the slab, a new heating system, foundation work, or a finished basement. A system that worked in year one is not proof of a system working in year eight, and a kit costs less than a single month of the fan’s electricity.
What radon work does and does not do for resale
A working, documented system is best understood the way waterproofing is: it protects the value the house already has rather than adding a premium. Buyers do not pay extra for a mitigation system. Buyers do walk away from an elevated result with no plan attached to it, or discount heavily for the unknown.
Two things carry value at sale. Documentation is the first: the original measurement, the proposal, the invoice, the fan specification, the follow up result and any later retests, kept together. An inspector who finds a pipe and a fan will ask what it is for, and a folder answers better than a memory. A functioning system with a recent measurement is the second, because it converts an open question into a closed one.
What does not help is a system installed without a follow up test, or a stack on the outside wall with no paperwork anywhere in the house. That reads as something dealt with rather than something solved, and it invites a harder look at everything else. Disclose what you know, keep the record, and let the measurement speak.
The bottom line
Radon mitigation cost is set by floor construction and by suction point count far more than by house size, and the bands are narrow enough to plan against. Illustratively, activating an existing passive stack sits near $500 to $1,500, a single point sub slab system near $1,200 to $2,500, a drain tile or sump system near $1,500 to $3,500, a crawl space sub membrane system near $2,000 to $5,000, and block wall depressurisation near $2,500 to $6,000, with each additional suction point adding an illustrative $300 to $800 and the electrical, sealing and sump lid lines adding several hundred more.
Then buy the work like a professional. Measure first and confirm the current action level and testing protocol with your state radon program rather than from any article. Ask how the suction point count was determined and expect a diagnostic answer. Insist that the fan, the routing, the sealing scope, the electrical and the follow up test appear as separate lines. Verify certification with the issuing program rather than with the company. Get the retest in writing along with what happens if it comes back high. And budget the fan’s electricity and its eventual replacement into the number from the start, because the system does not stop after the invoice is paid. Owners who do those things end up with a system that measurably works, which is the only version worth paying for.
ProsNook publishes this cost file to explain how radon mitigation systems are designed, scoped and priced in general terms, and it is educational material rather than health, environmental, engineering, legal or real estate advice. Nothing here assesses your house or your exposure, and nothing here should be read as a health claim: radon action levels, recommended actions, testing protocols and the risk evidence behind them are published by public health authorities and by state radon programs, are revised over time, and must be obtained from those sources directly rather than from this article. Every dollar figure, per square foot rate, wattage, share and scenario total above is illustration only, and your real cost will move with floor construction, suction point count, slab and soil conditions, routing, electrical work, sealing extent, finished space repair and local labor rates. Certification and licensing requirements for radon measurement and mitigation are set at state level and differ substantially, so confirm what applies at your address and verify any credential with the program that issued it. Obtain several detailed written proposals against one measured result and one defined scope, require a post mitigation measurement with a stated remedy if the target is not met, and treat urgency, alarm and phone quotes given without a site visit as reasons to pause rather than reasons to sign.
Frequently asked questions
How much does radon mitigation cost?
There is no single radon mitigation price, because the phrase covers everything from wiring a fan onto a pipe a builder already installed to sealing an entire crawl space under a membrane. As an illustrative framework, activating an existing passive stack commonly lands near $500 to $1,500, a straightforward sub slab depressurisation system near $1,200 to $2,500, a drain tile or sump integrated system near $1,500 to $3,500, a crawl space sub membrane system near $2,000 to $5,000, and block wall depressurisation near $2,500 to $6,000. Those bands are illustration rather than quotes, and the figure for your house is set mostly by how many suction points the slab needs and how hard the pipe is to route. Get the house tested before any of those numbers matter, because a system is only worth buying against a measured result.
What is sub slab depressurisation and why is it the standard system?
Sub slab depressurisation puts a sealed pipe through the concrete floor into the gravel or soil underneath, then runs a continuous fan on that pipe so the space below the slab sits at slightly lower pressure than the room above it. Soil gas that would otherwise seep up through cracks and joints is pulled into the pipe instead and discharged above the roofline. It is the standard approach because it treats the source rather than the room, it works continuously without the occupant doing anything, and it can be verified afterwards with a follow up measurement. Almost every other system named in this cost file is a variation on the same idea applied to a different floor construction, which is why the vocabulary in a quote is usually about where the suction is taken rather than about what the machine is.
Does a bigger house need a more expensive radon system?
Square footage matters far less than most homeowners expect, and slab behaviour matters far more. A large house on a single well drained gravel bed under an intact slab can often be treated from one suction point, while a small house on tight clay fill, or one with an addition poured against the original slab, may need two or three points to reach the whole area. Each additional point commonly adds an illustrative $300 to $800 for the coring, the pit, the extra pipe run and the tie in. Ask the person quoting how they decided on the number of points, because a diagnostic measurement of pressure field extension is a real test with a real answer, and a guess is not.
How much does a radon test cost?
Testing is the cheapest part of this entire subject and it is the only step that tells you whether the rest applies. As an illustrative framework, a short term do it yourself kit including the laboratory fee commonly runs near $15 to $50, a long term kit near $25 to $80, a consumer continuous monitor near $150 to $300 as a one off purchase, and a professional short term measurement with a calibrated continuous monitor near $150 to $300 per test. Testing done as a condition of a property sale sits at the higher end because of the chain of custody and reporting involved. Test protocols, including closed house conditions and placement, are set out by public health authorities and by state radon programs, so follow the current instructions that come with your device rather than an article.
Can I install a radon mitigation system myself?
Parts of it are within reach of a capable homeowner and parts of it are genuinely not. Sealing visible slab cracks, sealing a sump lid, fitting a gasketed cover on a crawl space access and extending a passive stack are all ordinary work. Coring a slab, sizing a fan against a measured pressure field, routing a sealed discharge above the roofline with correct clearances, and wiring a dedicated circuit are where the outcome depends on measurement and on code compliance rather than on effort. Several states also require that anyone performing mitigation for hire hold a specific certification, and some restrict who may perform the work at all, so check your state radon program's current requirements before deciding. A system that runs but does not reduce the measured level is the expensive failure mode here, and only a follow up measurement reveals it.
How much does a radon fan cost to run?
A mitigation fan runs continuously, so its electricity cost is small per hour and steady per year. As an illustrative calculation, a fan drawing 50 watts around the clock uses roughly 438 kilowatt hours a year, which at an illustrative 15 cents per kilowatt hour is about $66 a year. Across the range of fans used on residential systems, roughly 30 to 90 watts, that becomes an illustrative $40 to $120 a year at the same rate. There is a second and less visible cost, which is the conditioned air the system pulls out of the house through leaks in the slab, and it is one more reason that sealing the obvious openings during installation pays for itself.
Do radon systems need maintenance or replacement?
The system itself is mostly pipe and it does not wear out, but the fan is a motor running every hour of every year and it is a consumable. Plan on replacing it at some point in the system's life, at an illustrative $300 to $700 installed depending on the fan and on how awkward its location is. The other maintenance items are trivial and worth doing: check the manometer, the small U shaped gauge on the pipe, a few times a year so that a stopped fan does not go unnoticed, and keep the discharge point clear. Public health authorities generally recommend retesting periodically and after significant changes to the house, so treat a measurement every few years as part of owning the system.
Who pays for radon mitigation in a home sale?
Who pays is a negotiation rather than a rule, and it is decided the same way as any other inspection finding. A buyer may ask the seller to mitigate before closing, may ask for a credit and handle it afterwards, or may accept the house as it is. Sellers frequently prefer a credit because it removes the schedule risk of arranging work inside a closing window, and buyers frequently prefer the work done because they then control who does it and can see the follow up measurement. Disclosure obligations for known test results vary by state and are worth checking with your agent or attorney, since an existing result changes what has to be told to a buyer.